How to Use ChatGPT for Knowledge Base in WordPress

If you are a website owner who wants to manage information efficiently, consider looking for ways to use ChatGPT as a knowledge base. With the help of AI, a knowledge base can provide automated answers. ChatGPT allows your website to provide quick solutions for visitors to answer common questions and provide more interactive documentation.
In this article, you will learn how ChatGPT can help in knowledge base management, its benefits, and the steps to train it using third-party plugins. In addition, we will also discuss some of the best WordPress plugins that can be used.
- Integrating ChatGPT into your WordPress knowledge base enhances user engagement by providing instant, accurate, and context-aware answers—improving user satisfaction and reducing support wait times.
- AI-powered automation streamlines support and content management, allowing ChatGPT to handle repetitive FAQs, update documentation dynamically, and assist with generating educational or help content.
- With 24/7 availability and easy plugin-based integration, ChatGPT transforms your website into an intelligent self-service platform that reduces costs, improves SEO visibility, and keeps your knowledge base up to date.
Table of content
- Why Use ChatGPT for Knowledge Base Management?
- Benefits of using ChatGPT for Knowledge Base in your Website
- Steps to Train ChatGPT for Knowledge Base Using a 3rd Party Plugin
Why Use ChatGPT for Knowledge Base Management?
Integrating and adding ChatGPT into WordPress enhances the user experience while improving operational efficiency. With interactive real-time support, ChatGPT can answer users' questions quickly, ensuring they get relevant information without waiting for support. This automated response increases user engagement and reduces the burden on the support team.
With this feature, your WordPress site's knowledge base is always up-to-date without requiring much time and effort. ChatGPT is a cost-effective solution that can improve your site's overall performance.
Benefits of using ChatGPT for Knowledge Base in your Website

Using ChatGPT to build a knowledge base on a WordPress site provides many advantages. Here are some key benefits of integrating ChatGPT into your site's knowledge base.
- Improves user experience - ChatGPT provides instant, accurate answers, allowing visitors to get information without waiting for the support team. These quick and relevant responses increase user satisfaction and make browsing your site more comfortable.
- Reduces support team - ChatGPT can handle frequently asked questions automatically, reducing the number of incoming support tickets. This allows the support team to focus on more complex issues that require human intervention.
- Works 24/7 without stopping - Unlike a human team, ChatGPT can operate around the clock, providing support whenever visitors need it. This ensures that your site remains responsive even outside of business hours.
- Cost-effective solution for live support - With ChatGPT, you can deliver live chat features without hiring multiple agents. This provides a more affordable customer support solution without compromising on service quality.
Steps to Train ChatGPT for Knowledge Base Using a 3rd Party Plugin
Now that you know what benefits you'll get, it's time to train ChatGPT using third-party plugins to optimize responses according to your knowledge base.
With these plugins, you can input data from various sources, set the context of the answer, and ensure ChatGPT provides relevant and accurate information. Here are the steps.
Step 1: Create an OpenAI account & get the API key
To begin, sign up for an OpenAI account. Then, visit the website and log in. Once logged in, navigate to the account menu and select "View API key."
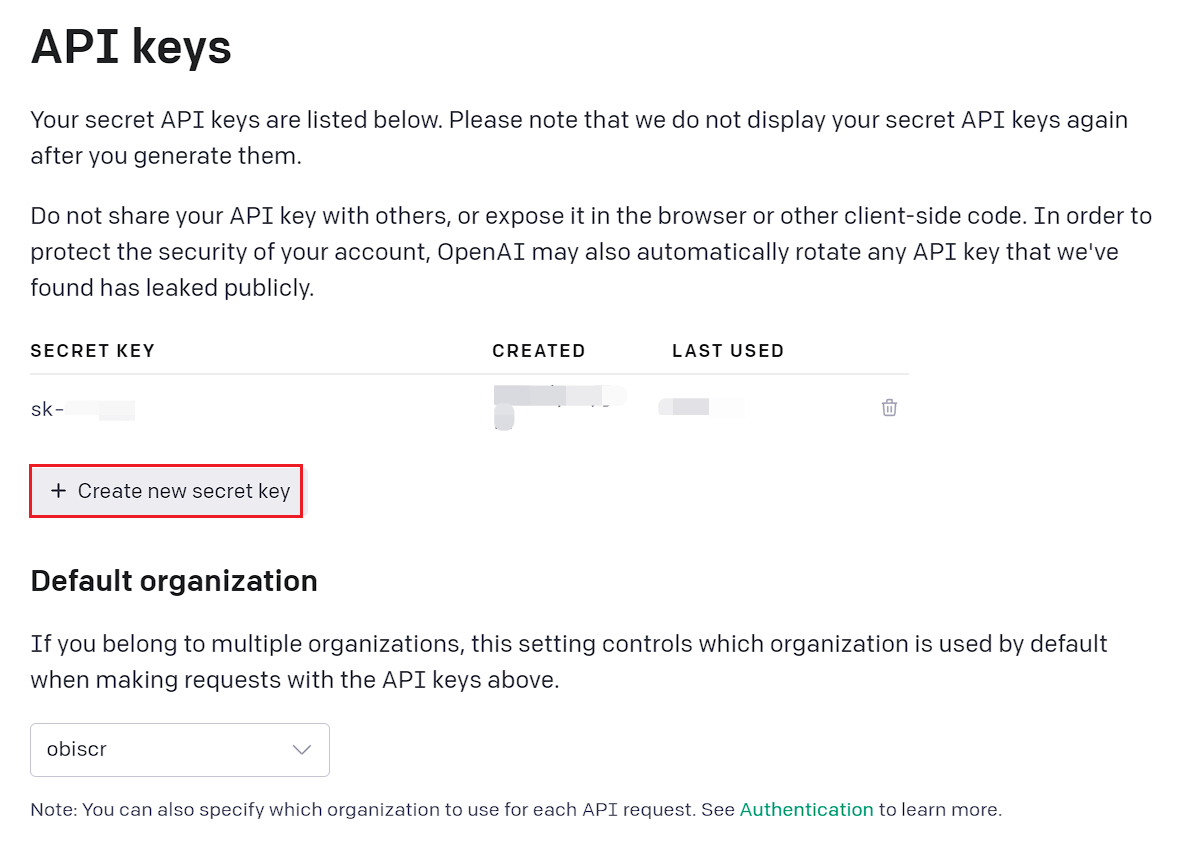
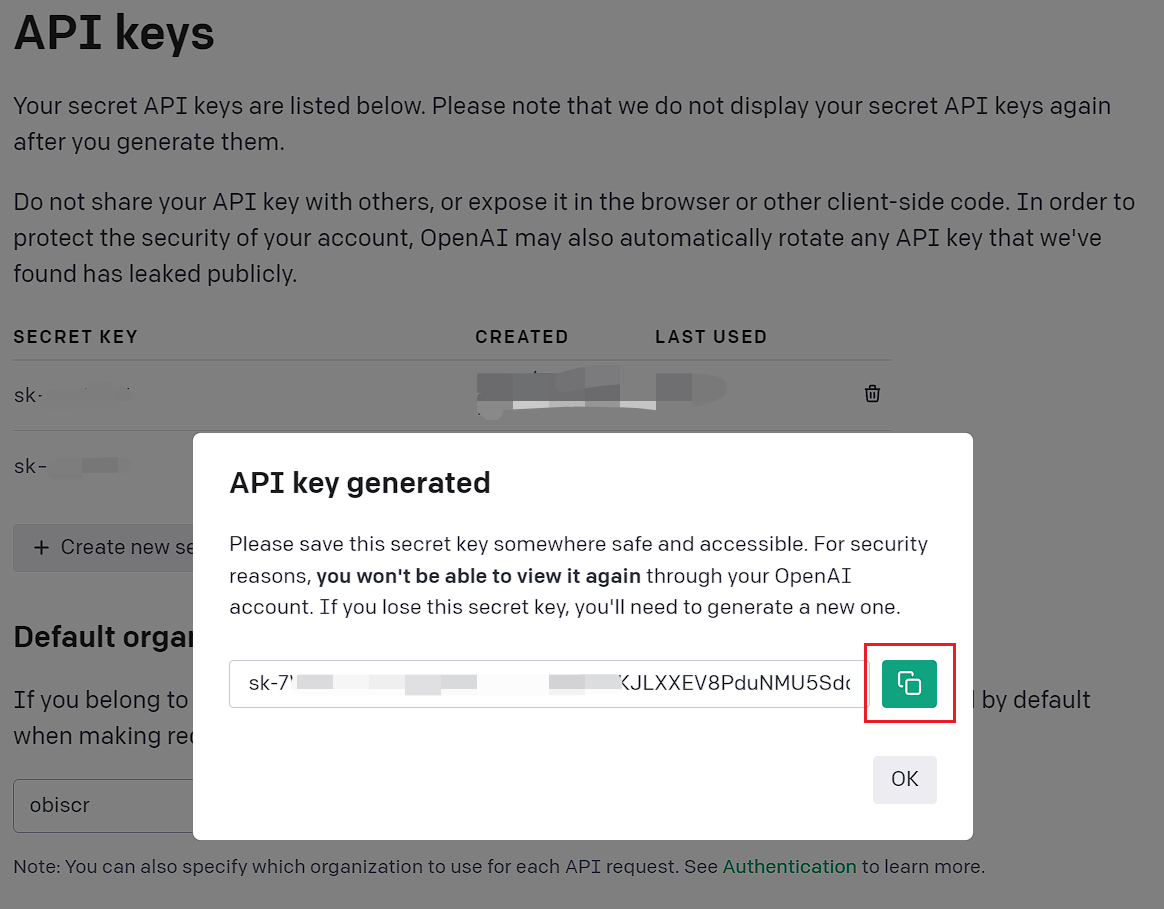
Next, click "Create new secret key" as shown in the image below. The key will be generated automatically. Then, click the copy button on the right to save it.
Step 2: Install and configure 3rd plugin
After obtaining the API key, you'll need a third-party AI plugin to integrate it with WordPress. One such plugin is WP AI Assistant.
This plugin enables you to create a chatbot that automatically responds to incoming inquiries on your website or business. Before diving into the steps for connecting OpenAI with WP AI Assistant, here are some key features:
- Seamless OpenAI integration
- AI training using WordPress data
- Support for documents and files
- Automatic data updates
- Compatibility with various GPT models
- Customizable AI roles
- Fully customizable chatbot design
- Easy integration without coding
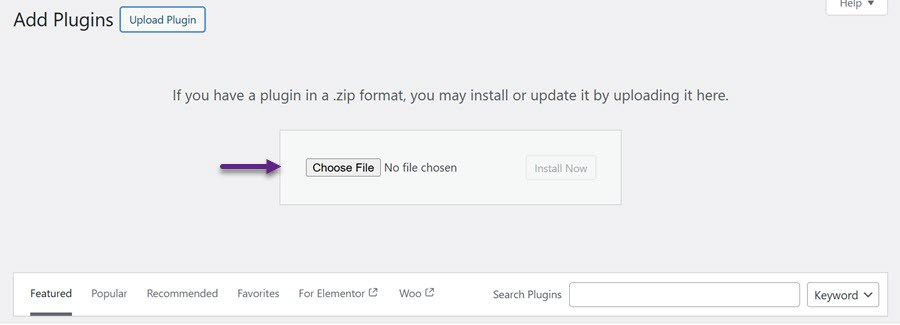
To integrate the plugin, start by installing it through the WordPress dashboard. Upload the plugin's ZIP file by navigating to Plugins > Add New Plugin > Upload Plugin.
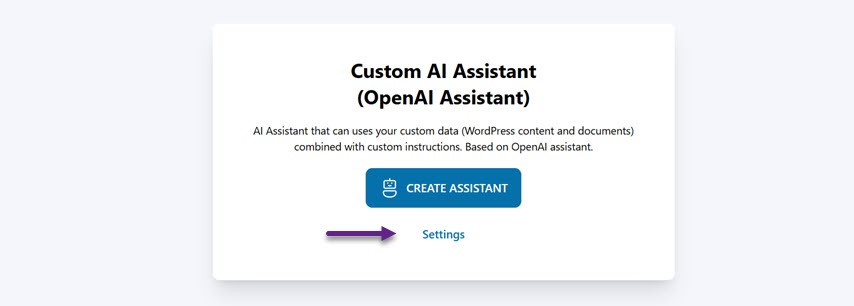
Once the plugin is uploaded, click Activate to enable it. After activation, the WP AI Assistant menu will appear in the left sidebar. Open this menu, and a new interface will be displayed. Click Settings and paste the API key you obtained from OpenAI.
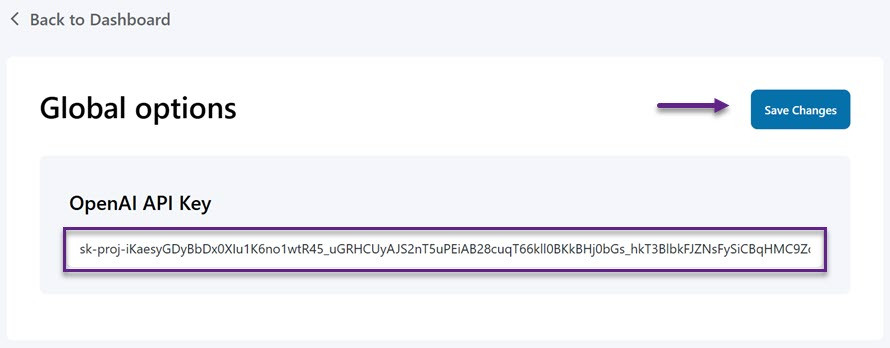
Next, paste your API key in the designated field and click Save Changes to apply the settings.
Step 3: Create an AI assistant for the knowledge base
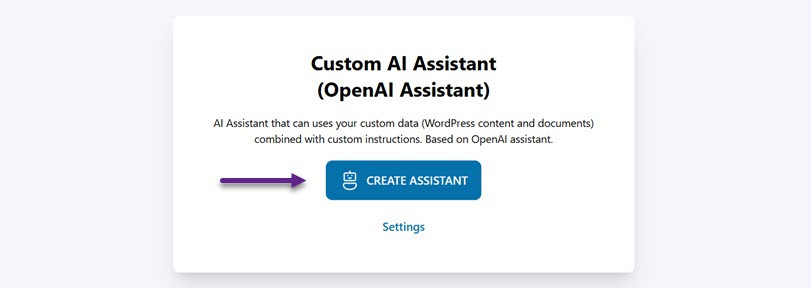
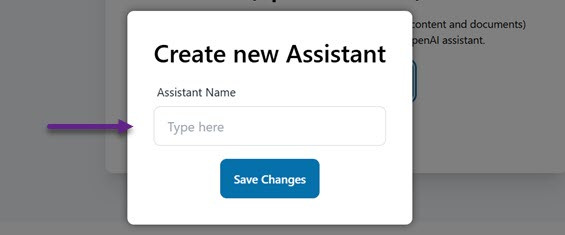
If the integration between OpenAI and WP AI Assistant is successful, the next step is to create an AI Assistant to handle customer inquiries. Navigate to the WP AI Assistant menu and select Create Assistant.
Enter your preferred assistant name and click Save Changes. Don't worry—you can edit the assistant's name later.
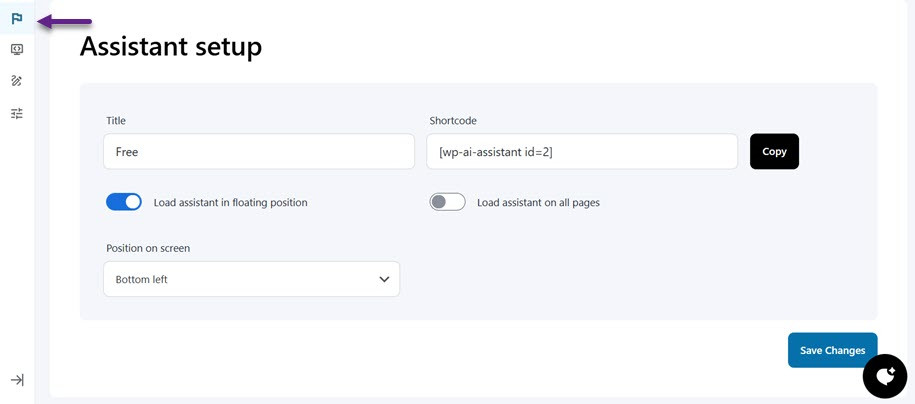
Step 4: Setup your assistant
First, you can click the menu with the Flag icon to set the assistant/chatbot starting from the name, then the position on the screen (bottom right or left), set the chatbot assistant load in a floating position, or set it to appear on all pages. Finally, there are also shortcodes that you can use.
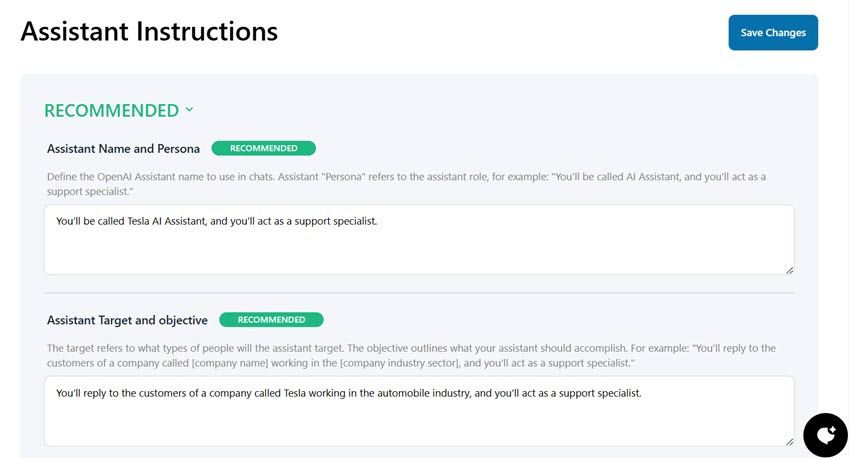
Step 5: Give instructions to your assistant
After that, scroll down to find the recommended instruction settings to personalize your assistant. In this section, you can set several things, each of which you must enter as a prompt that the assistant will use.
- Assistant name and persona: Here, you can choose the name of the OpenAI Assistant who will be used in the conversation. The Assistant's "persona" refers to its role.
- Assistant target and objective: In this section, the target refers to who the Assistant will target and what it should accomplish.
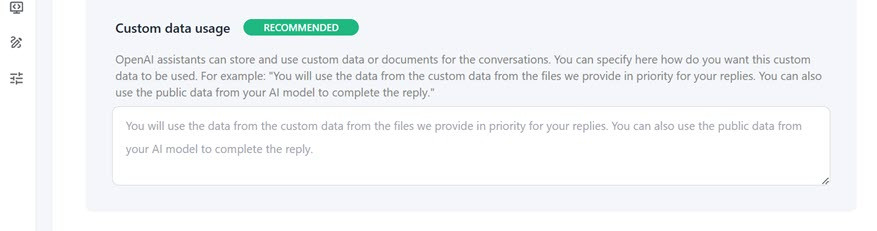
- Custom data usage: Here, you can tell the assistant to save and access certain data or documents for conversations. You can specify how the data will be used. For example: "You will prioritize the data from the documents we provide in each reply. In addition, you can also use public information from the AI model to supplement the answer."
In addition to the recommended settings, there are also optional settings, such as
- First message: This is the initial message the assistant will send the user when starting a chat. It only applies to new conversations.
- Types of content: This is the content that the assistant will generate, such as documentation, code, or others, and where it will be displayed.
- Content length and tone: You can set the length and style of the language in the assistant's reply. For example: "Your reply should be as complete as possible, with a maximum of 500 words per message, and use formal language that users can easily understand."
- Example of reply: This is used if you have a specific way to answer a question or give an example to the AI. For example: "If a user asks about [this product], you will always include [text] in your answer."


Step 6: Train assistant with data for the knowledge base
This plugin also comes with data training for your assistant. Data here can be from WordPress, Documents (PDF, text files, etc.), or External URLs, thus providing users with highly relevant and up-to-date information.
Train using WordPress data for knowledge base
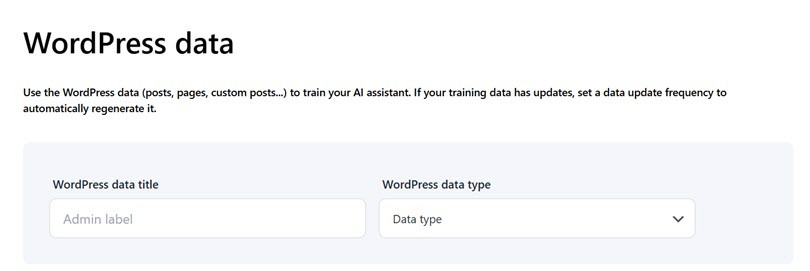
First, we will train the assistant for the knowledge base using existing data from WordPress. You can use WordPress data, such as posts, pages, or custom content types, to train your AI assistant. If the training data is updated, set the update frequency so the system can update it automatically.
Here, you need to enter the title of the WordPress data and the data type, such as Posts, Pages, Products, etc.
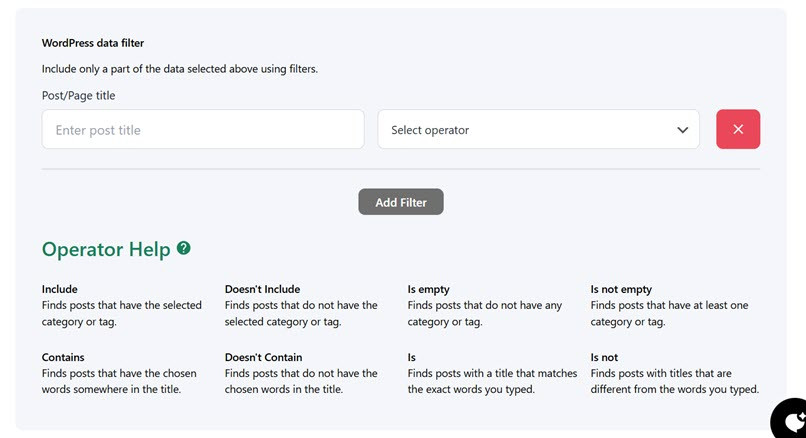
Furthermore, if there is anything you want to exclude from the data in data, you can set it here. First, enter the post/page title and then select the operator. Several operators can be selected, including:
- Include - Displays posts that have the selected category or tag.
For example, only posts with that category will appear if you select the "Technology" category. - Doesn't Include - Displays posts that do not have the selected category or tag.
If you select the "Technology" category, posts with that category will be hidden from the search results. - Is empty - Displays posts that do not have any category or tag.
Useful for finding uncategorized posts so they can be updated or assigned a category. - Is not empty - Displays posts with at least one category or tag.
Used to find all posts that have already been categorized. - Contains - Displays posts with specific words in the title.
For example, searching for "AI" will show all posts with "AI" in the title, such as "The Development of AI in Technology." - Doesn't Contain - Displays posts that do not have specific words in the title.
If you search for "AI," posts with "AI" in the title will be excluded from the results. - Is - Displays posts with a title that matches your typed words.
If you search for "WordPress Guide," only posts with that exact title will appear. - Is not - Displays posts with titles different from the words you typed.
If you search for "WordPress Guide," all posts except the one with that exact title will appear.
You can exclude operators and add or remove them from the assistant, including their permalink, ID, title, content, date, or slug.
Finally, you can set the update frequency for the generated data files so your assistant will have the most current data. The data can be updated every few months, days, hours, or minutes, with a frequency you can set yourself. You can select Save Changes to save the train assistant with WordPress data when you're done.
Train using documents data for knowledge base
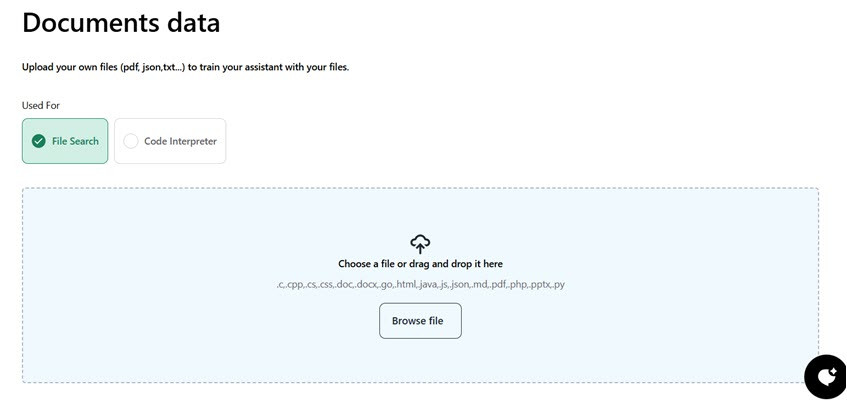
Another option to train your assistant for a knowledge base is to use documents personally uploaded to WordPress. Here, you can choose whether the document will be used as a search file or code interpreter. If it's a search file, the uploaded format is as follows. If the code interpreter is supported, more formats are supported, for example, .jpg, .jpeg, .xlsx, .xml, and many more.
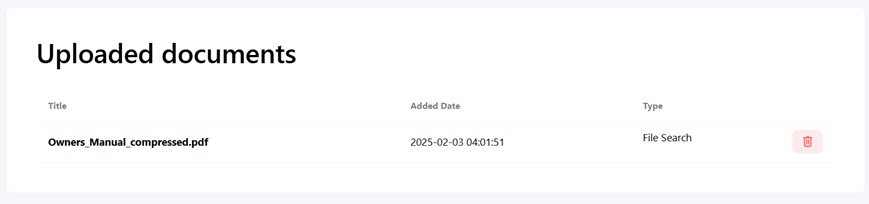
Select the "Browse file" button. If the file is successfully uploaded, it will appear at the bottom.
Here, we have uploaded a PDF document whose content can be used for the knowledge base. If uploaded successfully, the document will appear here.
Train using external URLs for knowledge base
Furthermore, you can also train for a knowledge base using data from external URLs. You can use URLs from any domain, take the page's content, and convert it into structured data (JSON) to train your assistant. For example, it could be a product documentation page.
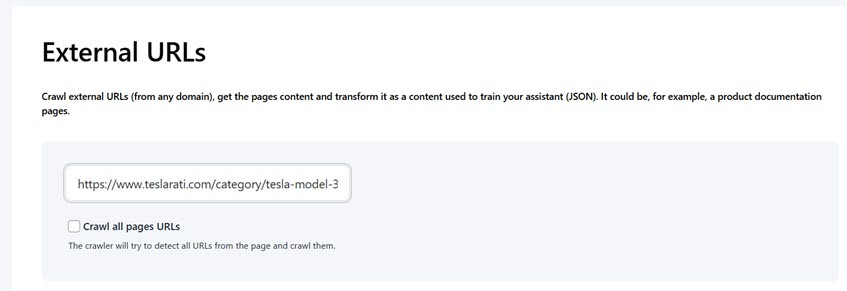
Then, you can enter the URL in the following field and check the "Crawl all page URLs" section. Here, you can set the maximum number of URLs.

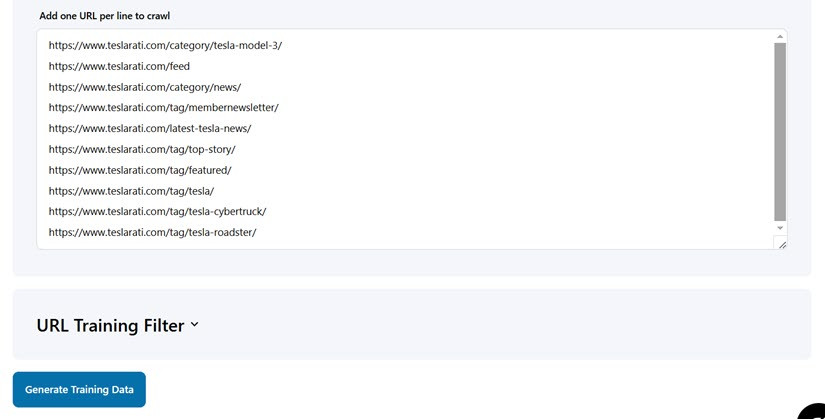
After that, click "Get URL list", and several URL lists from the web will appear. In addition, you can also set special data that the assistant can use for the knowledge base by adding special HTML or CSS tags to exclude relevant data. If so, you can select "Generate Training Data".
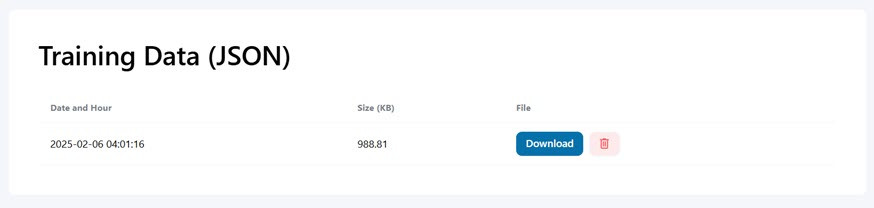
If the data is successfully generated, it will become a JSON training data format and appear in the following list, complete with the creation date and size. You can also download or delete the data if you no longer need it.
If you have finished training data on the assistant either through WordPress data, uploaded data, or through an external URL, you can click the Publish button in the top right corner to make it available on your website.
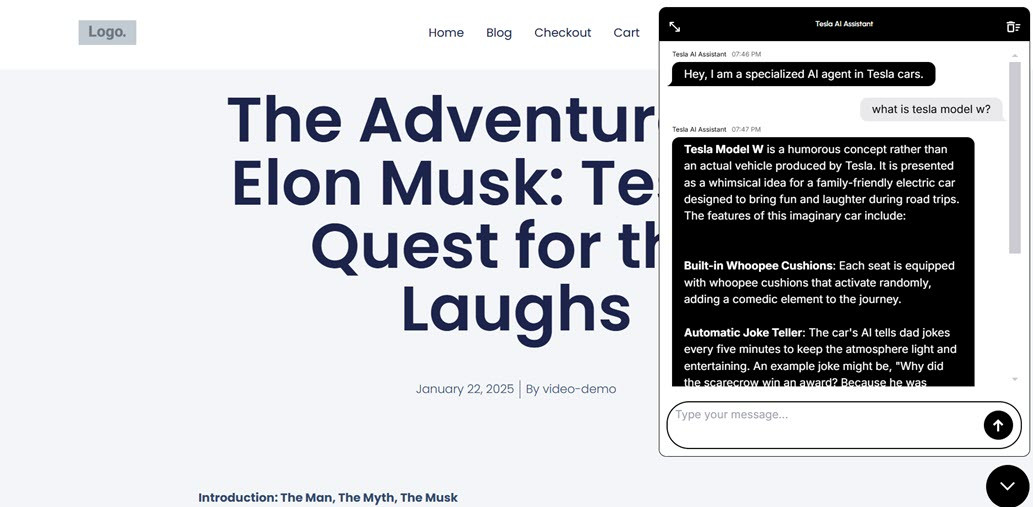
After that, we will try it directly on the website. Here is the initial display when the new knowledge base assistant is opened.

After that, we will try to ask questions related to one of the Tesla car models. Shortly after that, the assistant will answer the questions inputted, the answers generated by the assistant are derived from the training data that has been done above either through WordPress data, PDF document uploads etc. or external URLs.
At this point, you've successfully used ChatGPT in conjunction with a third-party AI plugin, in this case WP AI Assistant, to create a chatbot-based WordPress knowledge base.
Best WordPress Plugins for Knowledge Base
Here is a list of the best plugins for building an AI-powered knowledge base in WordPress. With these plugins, you can provide easily accessible information to users, automatically answer questions, and enhance interaction on your website.
WP AI Assistant
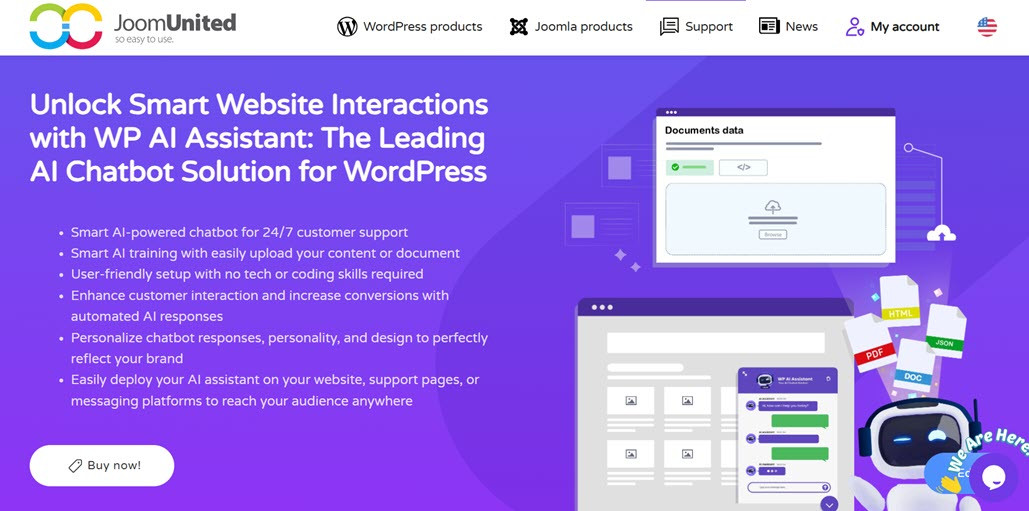
Key Features:
- OpenAI ChatGPT Integration – Utilize the latest GPT model for fast and accurate responses.
- Training with WordPress Data – The chatbot can learn from your site's posts, pages, or custom post types.
- Document Support – Add PDFs and other files to expand the chatbot's knowledge.
- External Data Search – Fetch information from external URLs to enrich the knowledge base.
- Chatbot Personalization – Customize the chatbot's appearance, responses, and personality to match your website's branding.
Turn Your Website Into a Smart AI Powered Assistant!
Engage visitors 24/7 with an intelligent chatbot that understands your business, deliver instant answers, and boosts conversions—no technical skills required!
AI Knowledge Base Assistant
This plugin is an AI-powered chatbot that answers visitor inquiries based on a predefined knowledge base. AI Knowledge Base Assistant can be connected to product documentation, FAQs, or help articles, enabling visitors to get answers without waiting for a support team.
Key Features:
- Automated FAQs – Instantly respond to common questions based on the knowledge base.
- Multi-Language Support – Helps a global audience with multilingual capabilities.
- OpenAI Integration – Uses AI to improve answer accuracy.
- Customizable Responses – Adjust the chatbot's tone and personality to match your brand.
BetterDocs
BetterDocs is a WordPress knowledge base plugin designed to organize and make documentation more accessible. With advanced search features and chatbot integration, visitors can instantly find answers without manually browsing through pages.
Key Features:
- Quick Search – Helps users find information within the documentation easily.
- Live AI Chatbot – Uses AI to answer questions based on the knowledge base.
- Responsive Templates – Attractive and mobile-friendly design.
- User Analytics – Track how visitors interact with the knowledge base.
WPBot (AI Chatbot)
WPBot is an AI-powered chatbot that can be directly integrated into WordPress sites to provide automated support. This plugin leverages GPT technology to deliver more natural and contextual responses to user queries.
Key Features:
- GPT-Based Chatbot – Provides smarter, context-aware responses.
- Automated Customer Support – Answers customer questions without human agents.
- Knowledge Base Integration – This can be used for document and FAQ searches.
- Customizable Appearance – Adjust the chatbot's design to match your website branding.
DocsGPT
DocsGPT is an AI-powered knowledge base plugin designed to help users quickly find information through an AI chatbot. Using GPT technology, DocsGPT allows visitors to ask questions and receive immediate answers from existing documentation.
Key Features:
- AI Knowledge Base Search – Helps visitors find information faster.
- Instant Responses – AI delivers answers instantly without delays.
- OpenAI Integration – Uses the GPT model for better contextual understanding.
- Easy Customization – Configure the chatbot to meet your site's branding needs.
Smarter Conversations, Happier Visitors!
Provide instant answers, assist users 24/7, and automate support effortlessly. WP AI Assistant is your key to a more interactive and intelligent website.
Conclusion
Using ChatGPT for the knowledge base in WordPress is an effective solution to reduce the burden on the support team. With automation features and real-time updates, ChatGPT can provide quick and accurate answers to visitors, ensuring they always get relevant information. Integration with third-party plugins also allows site owners to train the AI with specific data, making the responses more tailored to user needs. In addition, the integration process, which includes configuring the OpenAI API and training the assistant with WordPress data, ensures ChatGPT can serve as a constantly updated information center.
WP AI Assistant is the best choice for a more integrated and easy-to-use solution. This plugin is specifically designed to optimize the knowledge base in WordPress with AI intelligence, allowing your site to provide 24/7 support efficiently. Start using WP AI Assistant now and improve your site's user experience and operational efficiency!
When you subscribe to the blog, we will send you an e-mail when there are new updates on the site so you wouldn't miss them.

Comments