Import and use your NextGen images in the WordPress media library
So, you want to move from NextGen to WP Media Folder but don't want to because it could be too tedious to import all the galleries from NextGen to WP Media Folder well, or maybe you want to use both plugins as you need to create media folders… It won't be an issue anymore as WP Media Folder plugin covers you ;)
WP Media Folder has a dedicated tool for easily importing galleries from NextGen to WP Media Folder. This tool converts your NextGen galleries into media folders, allowing you to create awesome galleries directly from these media folders.
This post will show how to import and sync NextGen galleries with media folders.
Say goodbye to messy media library.
WP Media Folder lets you categorize files, sync folders with
cloud storage, create amazing galleries and even
replace images without breaking links.
Optimize your media workflow today
Convert NextGen Gallery to a Folder
Let's see how easy it is to import these Galleries to your media library as media folders. Please note that in this tutorial, we are using the WP Media Folder, which is needed to run this import tool.
First, we should have a gallery in NextGen Gallery to import it, so we created one for this tutorial called the doggies gallery, as you can see here.
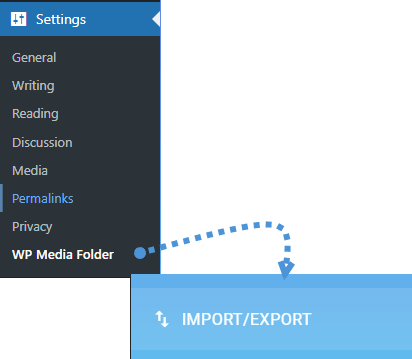
This gallery doesn't exist in the Media Library at the moment. Still, there are other things that we would like to do with the images there without having to upload them again so let's go to Settings > WP Media Folder > Import/Export.
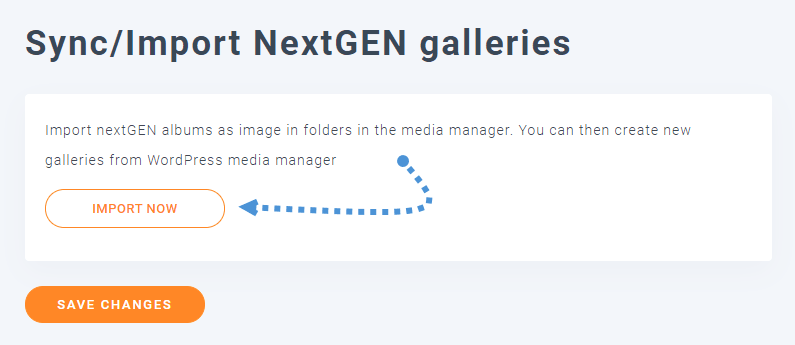
On this tab, scroll down to the Sync/Import NextGEN galleries. You'll see a button to Import now; click on it.
This will show you a loading animation in the Import Now button. Depending on the amount of media and galleries, it could take a few minutes. Still, after clicking on it and the animation disappearing, you'll have all the galleries that were on NextGen directly in your Media Library.
Let's go to the Media Library to confirm if the gallery was imported. If yes, you should be able to see the new folder with the media inside.
As you can see, it is as easy as clicking the import button and the magic is done :)
Now that you have your images in your Media Library, you can use all the features from WP Media Folder to organize and also create galleries directly from these folders using the WP Media Folder galleries.
You can, for example, create subfolders in this main folder that we just imported, to do this, select the folder and then click on + Add New Folder.
So now you can move your images or folders using the drag-and-drop system from this awesome plugin if you need to. You can also, of course, add more images or files, remove images, and use all the features that WP Media Folder offers to manage and improve your Media Library.
As we mentioned before, another useful feature is the option to create galleries based on the folders. Let's see how to use it.
We will use the Gutenberg Editor for this post, but this is already compatible with all major Page Builders with dedicated blocks.
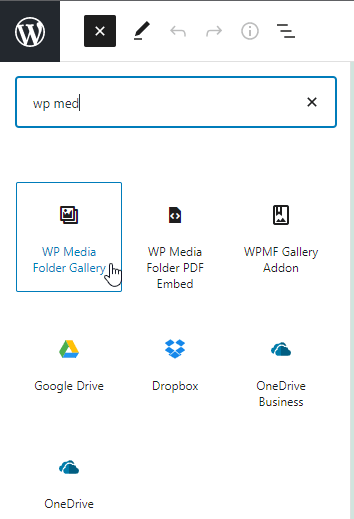
So, we are going to create a gallery based on DOGGIES GALLERY. To do this, go to your post/page and, in Gutenberg Editor, click on + > WP Media Folder Gallery.
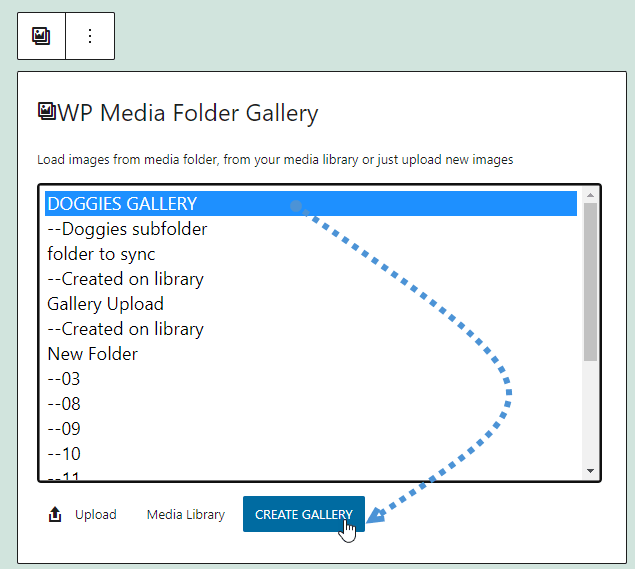
This will show you a section in the Gutenberg Editor with all the folders available. You can select one to create the gallery. For this tutorial, we'll select DOGGIES GALLERY, and then click on Create Gallery.
Now you'll see a preview of the gallery. You can edit the theme and adjust the layout directly from this section by checking the right panel.
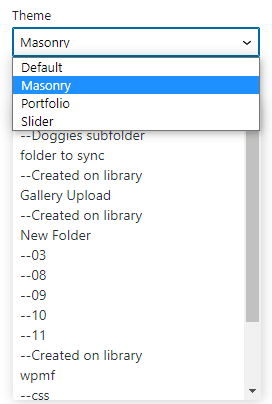
On this right panel, you can choose between the four themes offered by the WP Media Folder(more are included in the Gallery Addon) and set the order, number of columns, image sizes, action on click, and many other settings.
On the first section you'll see the option to select a theme and also, to change the folder for the gallery.
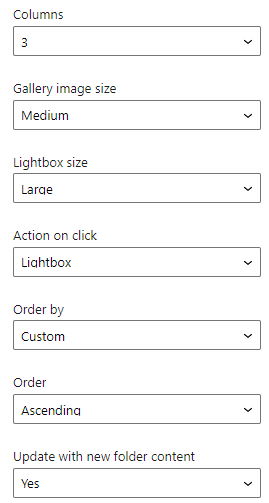
In the second part, scrolling down will reveal other settings to make your gallery fit the content of your site. These options are columns, Gallery image size, Lightbox Size, Action on Click, Order by, order(ascending or descending), and the option to select whether you want to update the gallery when the folder is updated with new images.
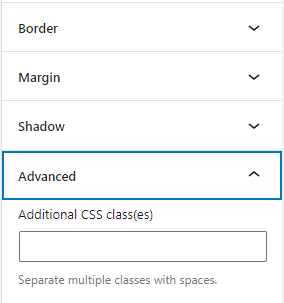
In the last section you'll have more advanced layout options, these are the border, shadow, and margins, as well as add a CSS class in the advanced tab.
So you can set your category as you want, make it fit your content with the advanced options, and preview the changes directly in the editor before publishing. Finally, click on publish, and that's all! You'll have your gallery created directly from a folder! It can't be easier.
Now, all you need to do is publish your gallery; voila, the magic is done.
Calling all webmasters!
Save time and boost productivity with WP Media Folder. Effortlessly organize client media
files, create custom
galleries, and provide a seamless user experience.
Upgrade your website projects now!
Manage your Galleries like a Professional
As you can see, managing your galleries like a professional is really easy with WP Media Folder. You don't need to go to multiple tabs to set a gallery, and then go to the editor and notice that something is missing as you have all the options directly in the editor. The best part is that these are not the only things that you can do with WP Media Folder, there are many other features that you can use with the pro add like connect your Media Library to a cloud service like Google Drive, OneDrive, and Dropbox or offload your entire Media Library to AWS to save some server storage.
So what are you waiting for? Go here and obtain your membership now!
When you subscribe to the blog, we will send you an e-mail when there are new updates on the site so you wouldn't miss them.






Comments