How to Properly Add Images in WordPress (Step by Step)

Adding images to your WordPress website might seem simple, but doing it the right way helps your content look more professional and perform better in search engines. Read more to discover how easy it is to upload, edit, align, and resize images even if you're not a tech expert.
In this guide, we'll walk you through step-by-step how to use the WordPress block editor to manage your images. You'll also get beginner friendly tips to align and resize images so your site looks polished. Plus, we'll highlight how WP Media Folder can help streamline everything even for non-technical users.
Say goodbye to messy media library.
WP Media Folder lets you categorize files, sync folders with
cloud storage, create amazing galleries and even
replace images without breaking links.
Optimize your media workflow today
Table of content
Why Image Handling Matters in WordPress
Images are more than visual flair, they affect speed, layout, and user experience. When images are properly added and styled, your content becomes clearer, more accessible, and more engaging. And when search engines can understand how your images are displayed, it supports better SEO.
1. Uploading Images via the Block Editor
The WordPress block editor (Gutenberg) makes image insertion intuitive:
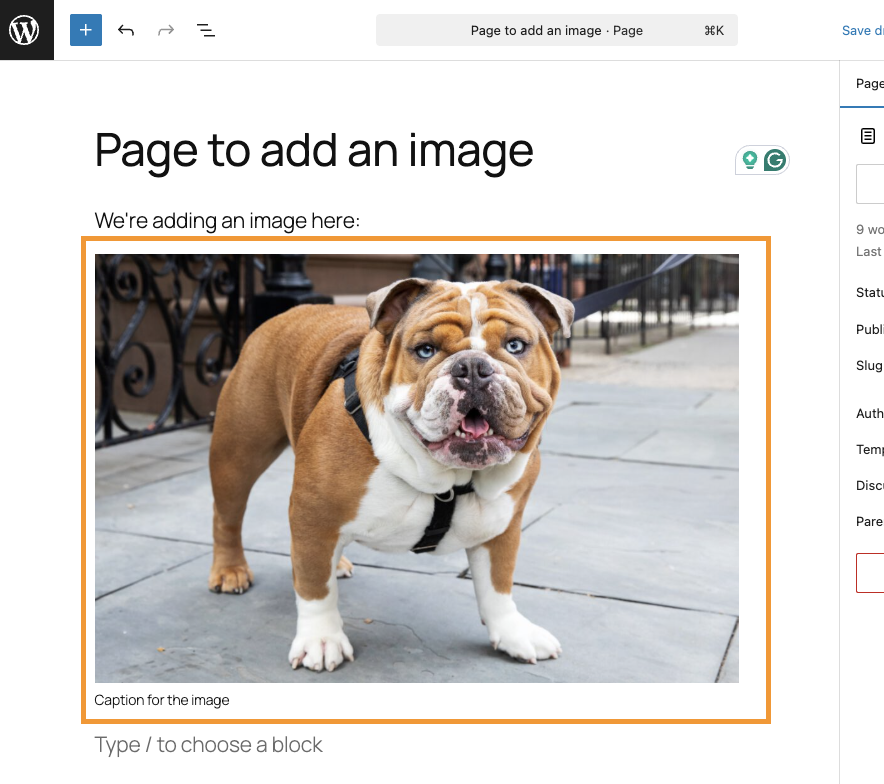
1. Open your page or post where you want the image.
2.Click the Add Block (+) button—usually at the top left of the editor.
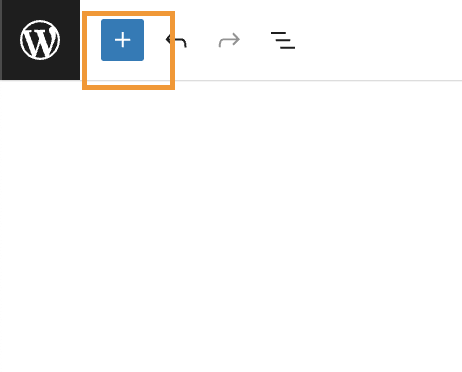
3. Select the Image block from the menu.

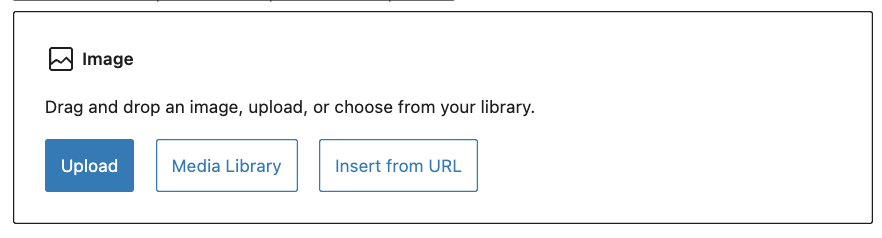
4. Choose Upload to add a new image from your computer or click on Media Library to use one of the images already uploaded, you will also get your folders and filters if you have installed WP Media Folder.
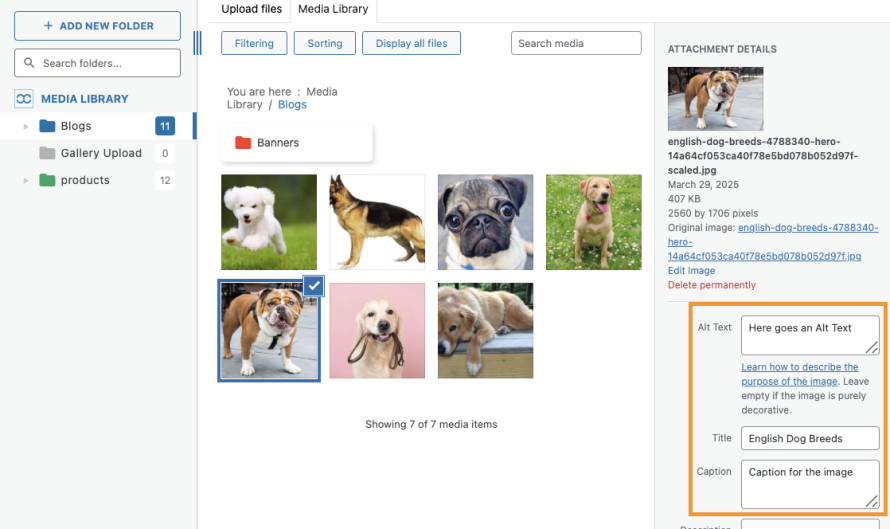
5. Once chosen, add key details in the Attachment Details panel on the right:
- Alt Text: A brief description to support accessibility and SEO.
- Title: Displayed when a user hovers over the image.
- Caption: Visible text beneath the image, helpful for context.
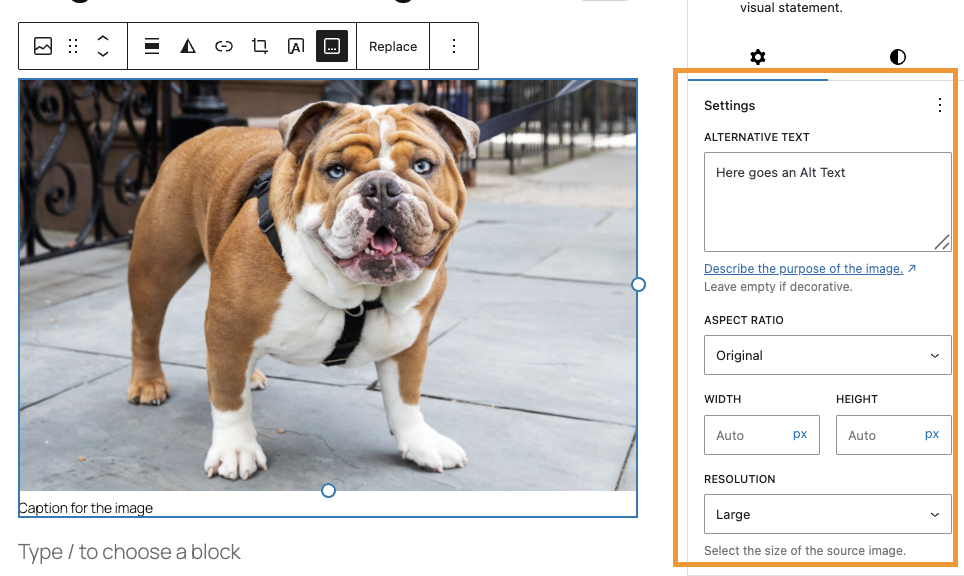
6. Click Select, and the image appears in your content.
7. Use the right sidebar block settings to further tweak size, style, border, or dimensions.
2. Editing and Embedding Images
To edit or update an image after inserting it:
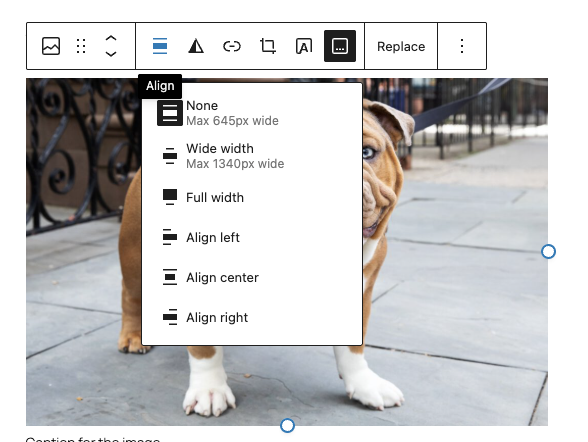
Click the image in the editor, then use the toolbar to align or edit (e.g., inline, wide, or full width).
- For deeper edits, click the Edit Image button—this opens up tools to crop, rotate, flip, or scale the image right within WordPress
- Make your changes, then click Save and Update to reflect them.
3. Aligning and Resizing Images Effectively
Alignment and resizing help your images blend seamlessly with text:
Alignment: After adding your image, use the block's alignment controls (left, center, right) to wrap text neatly.
Wide and Full Width Options: These block-level styles stretch the image across the content area for a bolder layout.
Resizing: Drag the image corners to resize visually, or enter precise dimensions in the block settings.
These simple controls let you craft polished layouts without needing code.
4. Enhancing Workflow with WP Media Folder
WP Media Folder is a powerful plugin that streamlines media management in WordPress—especially helpful when handling lots of images.
Key features include:
- One-click AI metadata: On image upload, the plugin can automatically generate SEO-friendly file names, titles, alt text, descriptions, and captions, saving you manual effort.
- Folder organization: Create folders and sub-folders directly in the media library. You can drag and drop files or assign multiple folders to a single image for better organization.
- Advanced filtering and searching: Easily filter and sort images by name, date, size, or type, especially useful for content-rich sites.
- Integration with Gutenberg: WP Media Folder works seamlessly with the block editor—letting you insert images stored in folders with no extra hassle.
This plugin helps keep your content organized and speeds up image handling, without requiring technical skills.
5. Tips for Non-Tech Users
- Always add alt text for accessibility and search clarity—keep it simple and descriptive.
- Use WP Media Folder's AI features to automate metadata for efficiency.
- Rely on the block editor's visual tools, alignment, and resizing, which are both user-friendly.
- Organizing your images from the start with folders makes later editing or reuse much easier.
Calling all webmasters!
Save time and boost productivity with WP Media Folder. Effortlessly organize client media
files, create custom
galleries, and provide a seamless user experience.
Upgrade your website projects now!
Your Image Workflow, Simplified
Working with images in WordPress doesn't require code or technical know-how. With the block editor's visual tools—image blocks, alignment options, resizing handles, and the organizational power of WP Media Folder, you can confidently manage your media and craft visually appealing, well-organized content.
Start by placing an image, add simple yet meaningful metadata, organize it with folders, and style it visually. Over time, this workflow becomes second nature, making your site look professional, load smoothly, and remain easy to manage.
When you subscribe to the blog, we will send you an e-mail when there are new updates on the site so you wouldn't miss them.

Comments