How to Add Magnifying Zoom for Images in WordPress

Adding magnifying zoom for images in WordPress is one effective way to enhance the user experience on your website. This feature lets visitors see image details more clearly without opening separate files. The zoom effect helps your audience understand the quality of the products or visual details displayed on your site.
The zoom feature is important in building visitor trust for online store owners and creative portfolio owners. Customers can check fabric textures, material quality, and design details directly from the screen, while photographers or designers can showcase the details of their work. This makes the website look more professional while providing greater convenience for users.
- Enhance user experience by allowing visitors to zoom in and inspect detailed images, boosting trust for e-commerce and portfolio sites.
- Choose from multiple methods—plugin-based or custom code—to implement a magnifying zoom, suitable for any WordPress website.
- Increase conversions and reduce product returns by showcasing quality, texture, and details directly on your site.
Table of content
Why Add a Magnifying Zoom for Images?
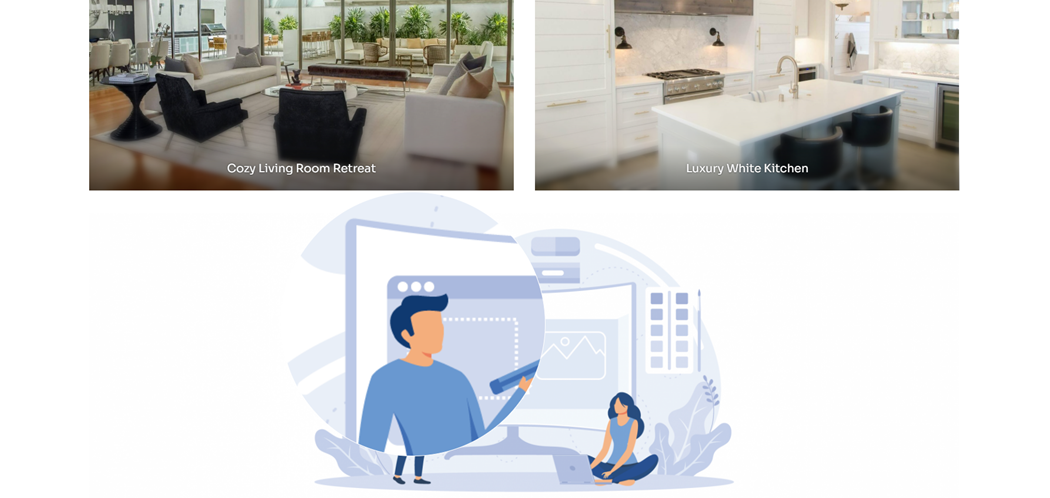
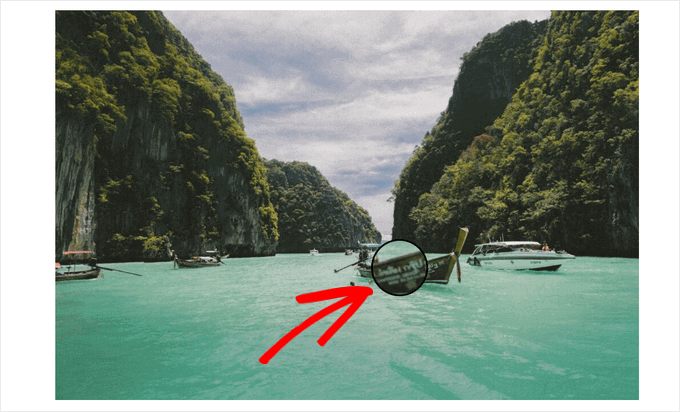
The magnifying zoom feature in WordPress allows visitors to see image details more clearly and sharply. This is especially useful when images display small elements not visible to the naked eye.
For photography or portfolio websites, zoom helps audiences enjoy the fine details of the work on display. Meanwhile, for online stores, customers can examine products more closely, from fabric texture to material quality. It's no wonder that many large e-commerce sites already use it to provide a more convincing shopping experience.
To maximize the impact of zoom features, it's equally important to organize your images well. A plugin like WP Media Folder helps you manage and categorize visuals efficiently, so you can quickly use them in galleries or product pages.
With this feature, your website will look more professional and provide additional convenience for visitors. The following section will discuss practical ways to add a zoom effect in WordPress.
Say goodbye to messy media library.
WP Media Folder lets you categorize files, sync folders with
cloud storage, create amazing galleries and even
replace images without breaking links.
Optimize your media workflow today
Method 1: Using Envira Gallery Plugin (Recommended)
Envira Gallery is widely recognized as one of the top photo gallery plugins for WordPress, allowing you to build stunning image galleries easily. One of its premium features is the Zoom Addon, which lets you integrate a magnifying zoom effect into your gallery images.
Beyond zoom, Envira offers many powerful tools such as a drag-and-drop gallery builder, pre-designed themes, lightbox popups, image compression, and protection options. These features make it a flexible solution for creative portfolios and e-commerce websites.
To get started, simply install and activate the Envira Gallery plugin.
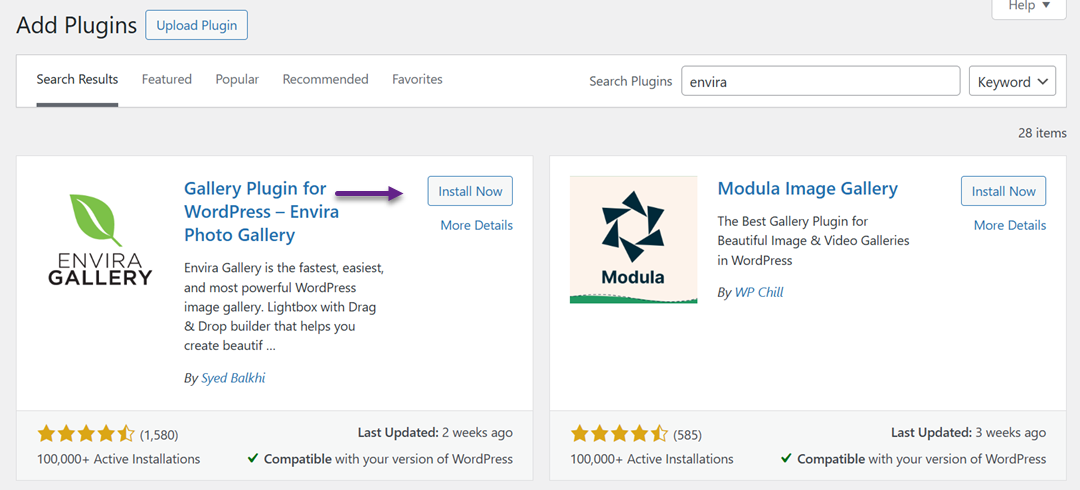
A free version is available, but you'll need the Plus plan or higher to unlock the Zoom Addon. After activation, go to Envira Gallery Settings, enter your license key, and verify it.

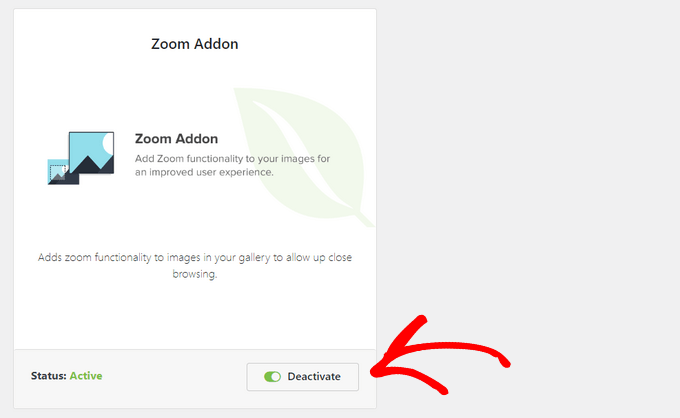
Once the license is verified, navigate to Envira Gallery > Addons, locate the Zoom Addon, and install it.
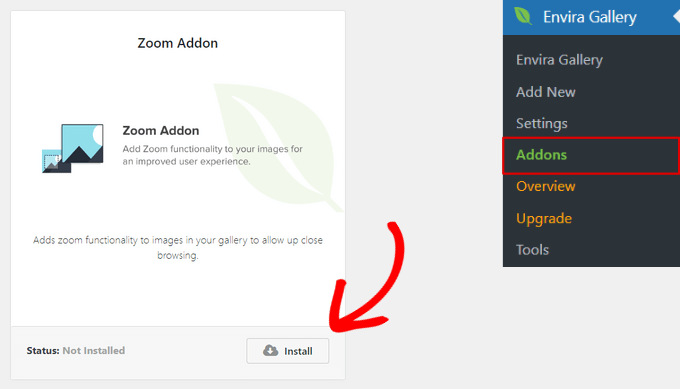
Don't forget to activate it afterward.
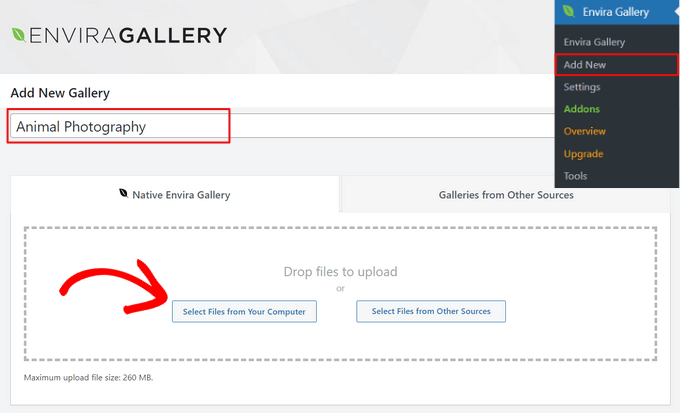
Then, you can create a new gallery by going to Envira Gallery > Add New, giving it a name, and uploading your images from either your computer or the WordPress media library.
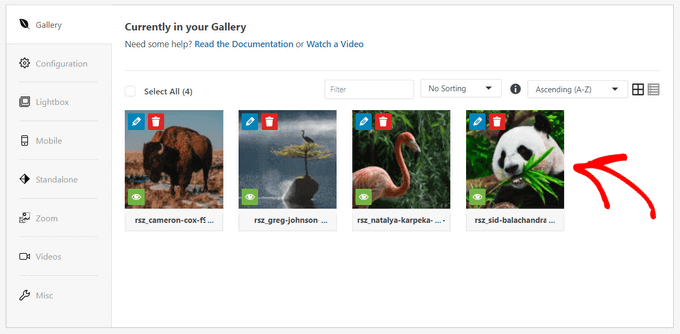
The gallery can be customized further with drag-and-drop ordering, layout adjustments, titles, alt text, captions, and more.
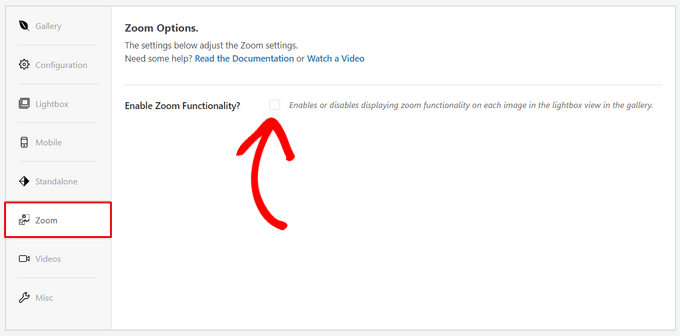
To enable magnifying zoom, open the Zoom tab in your gallery settings and check the option to turn it on. You'll then have access to various configurations such as hover or click zoom, zoom window size and position, lens type, tint color, and other visual adjustments. Once you're satisfied, publish your gallery to save the changes.
Finally, embedding the gallery is simple. In the WordPress block editor, add the Envira Gallery block.

Choose the gallery you want to display, preview it, and publish your page or post.
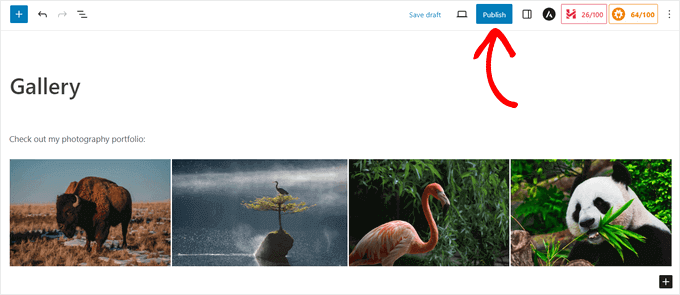
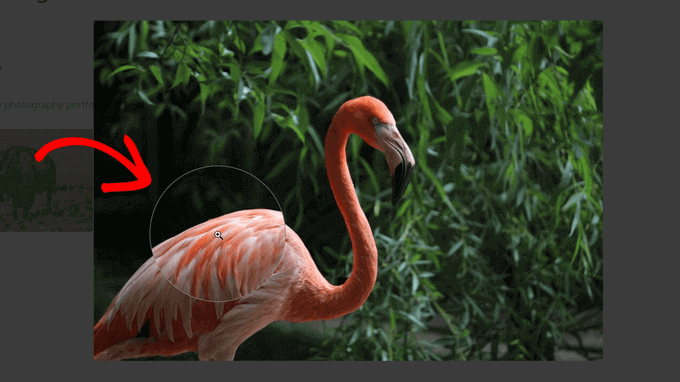
After publishing, visitors can use the zoom effect directly on your site.
Envira Gallery is an excellent choice for anyone looking to showcase detailed visuals, whether running a photography portfolio or an online shop where product details matter.
Method 2: Using WP Image Zoom Plugin
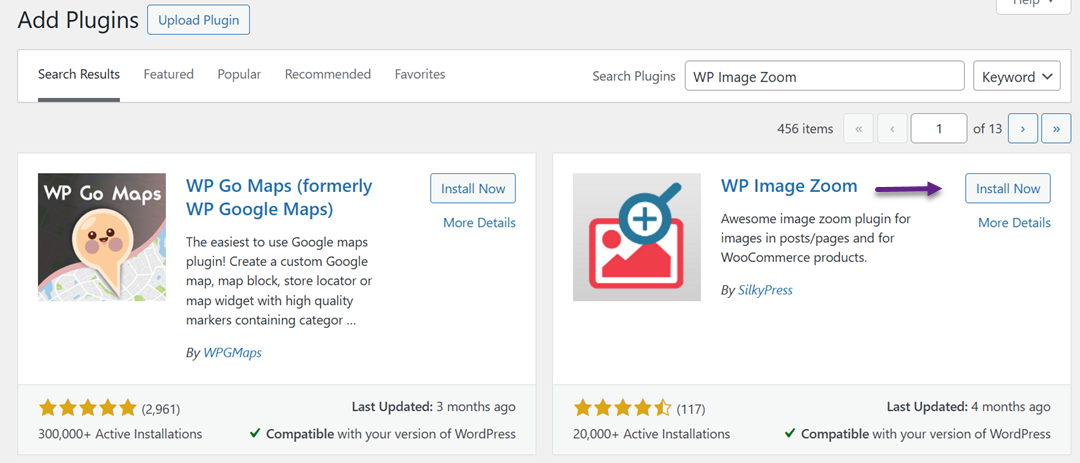
WP Image Zoom is a free WordPress plugin that allows you to easily add a magnifying glass effect to your images.
To begin, install and activate the WP Image Zoom plugin. In this guide, we'll focus on the free version, but for additional customization options, you may consider upgrading to WP Image Zoom Pro, which offers advanced features.
Once the plugin is activated, navigate to WP Image Zoom > Zoom Settings in your WordPress dashboard.
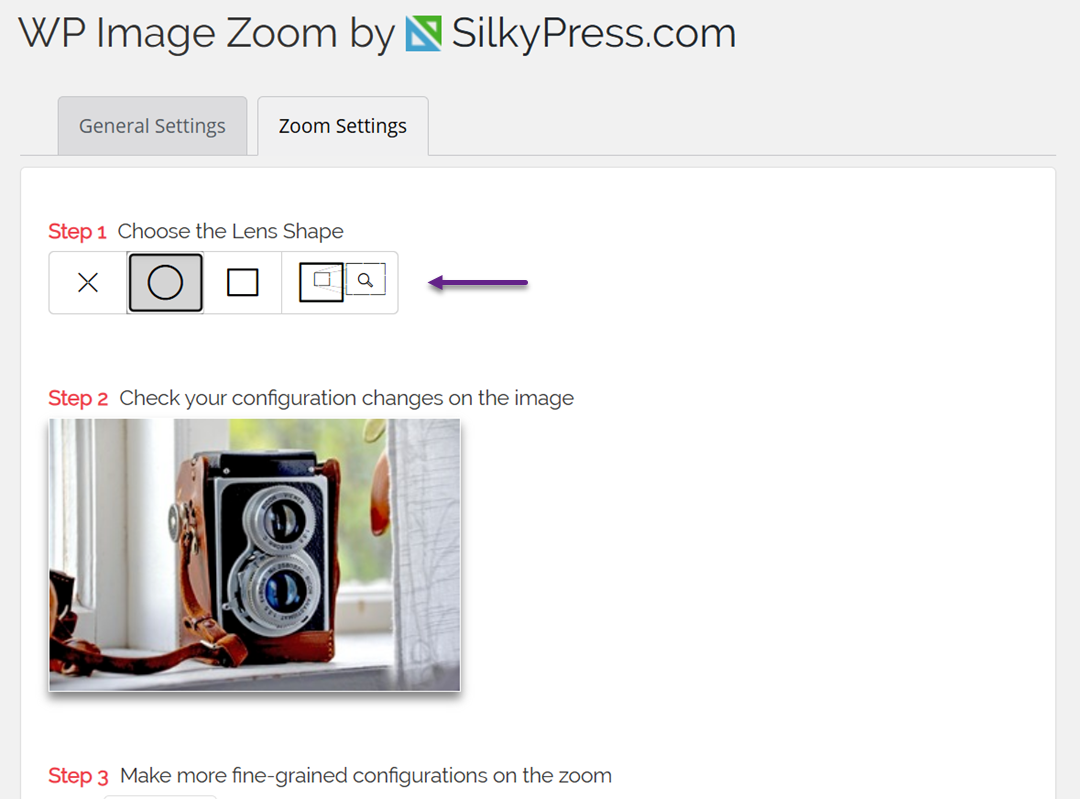
In the Zoom Settings tab, you can choose the lens style for your zoom effect. Options include a circular lens, a square lens, or a zoom window. You can even select "No Lens" for a more seamless magnification.
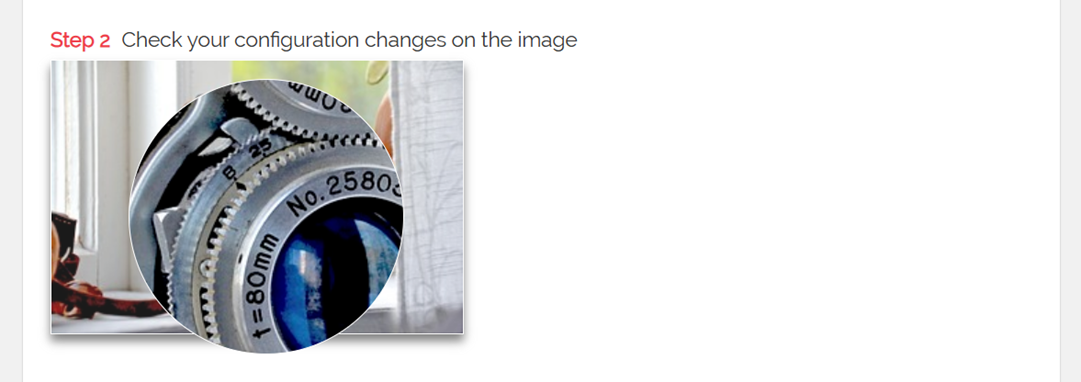
After choosing your lens style, scroll down to preview how it works using the plugin's built-in demo image. This allows you to test your settings before applying them to your site.
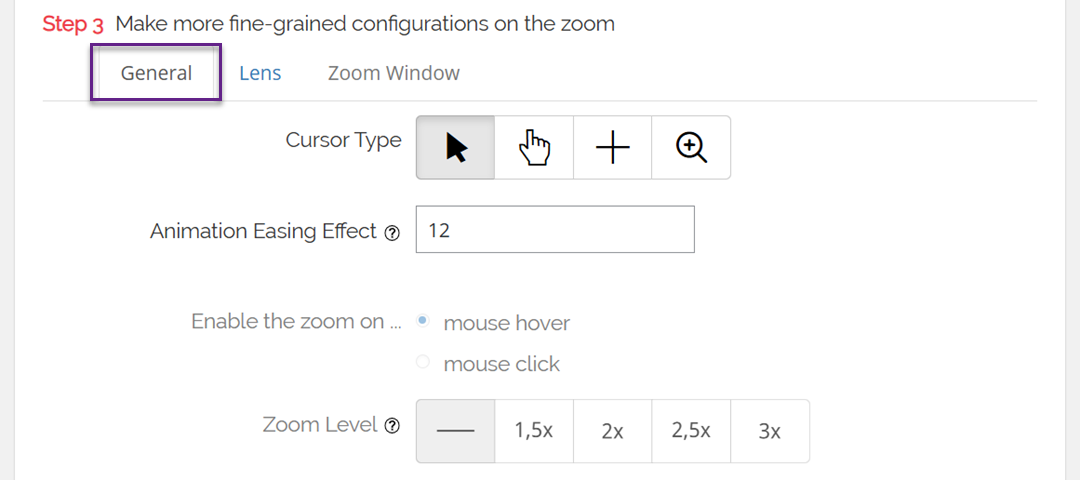
Next, switch to the General tab, where you can fine-tune the behavior, such as cursor type, animation style, zoom on hover or click, and the zoom level. Some of the more advanced adjustments are only available in the Pro version.
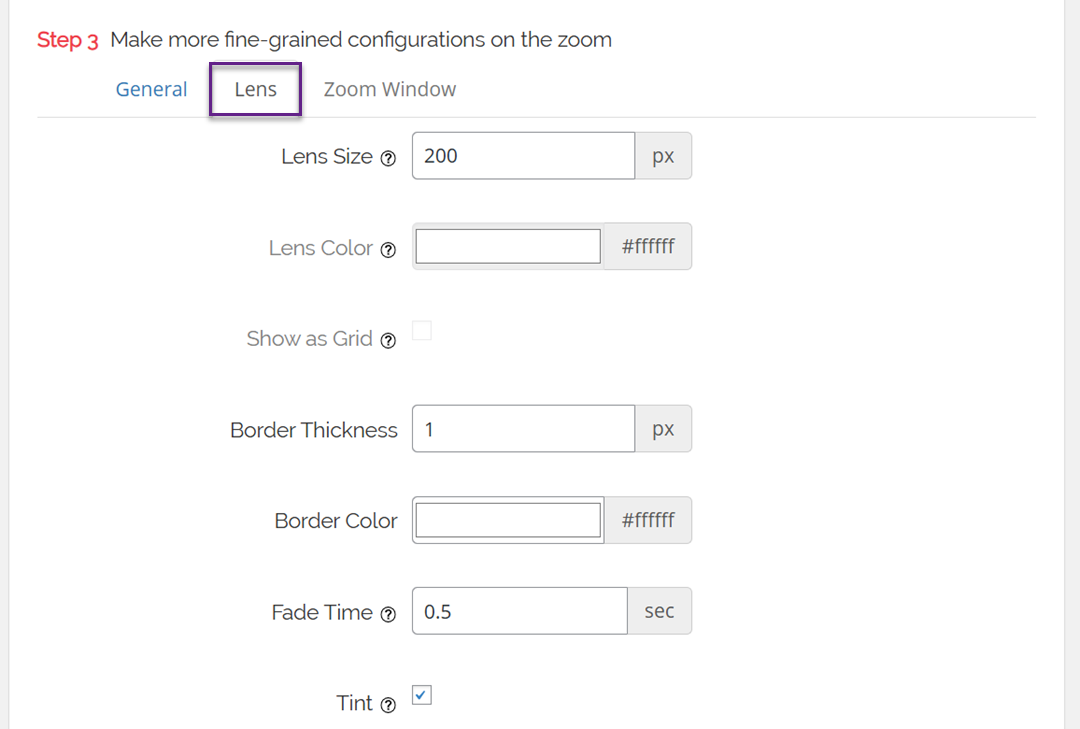
If you selected the circle or square lens, open the Lens tab to customize details like lens size, color, and borders.
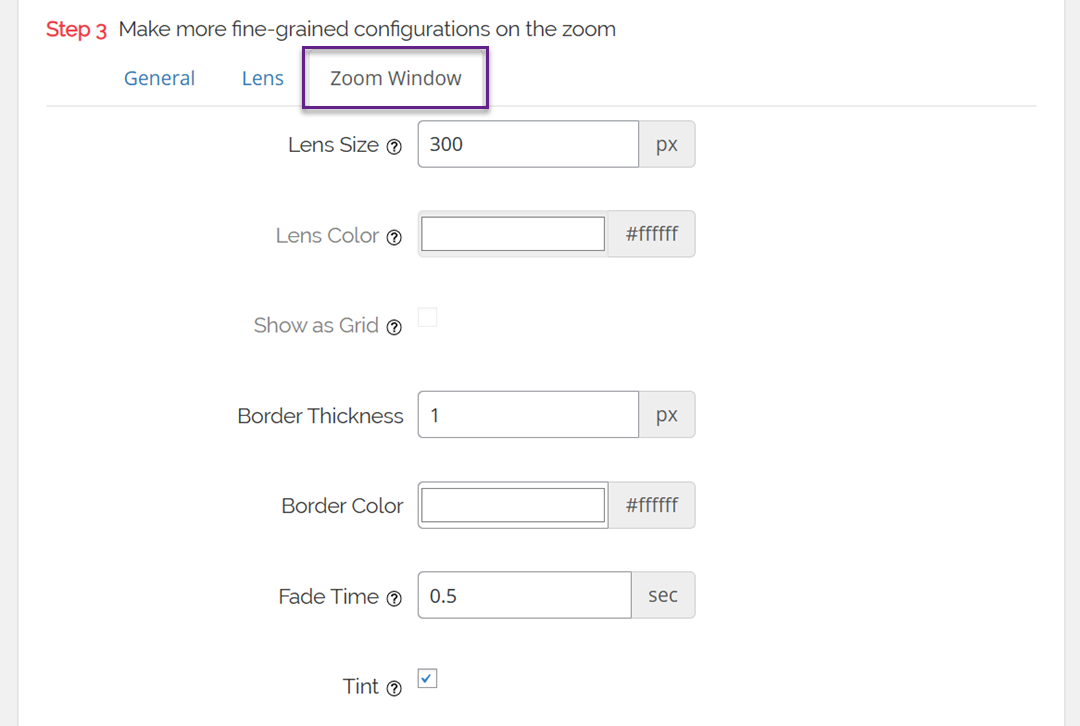
For those using the zoom window option, the Zoom Window tab lets you control its width, height, position, distance from the main image, border color, and more. Once you're satisfied, remember to click Save Changes to apply your settings.
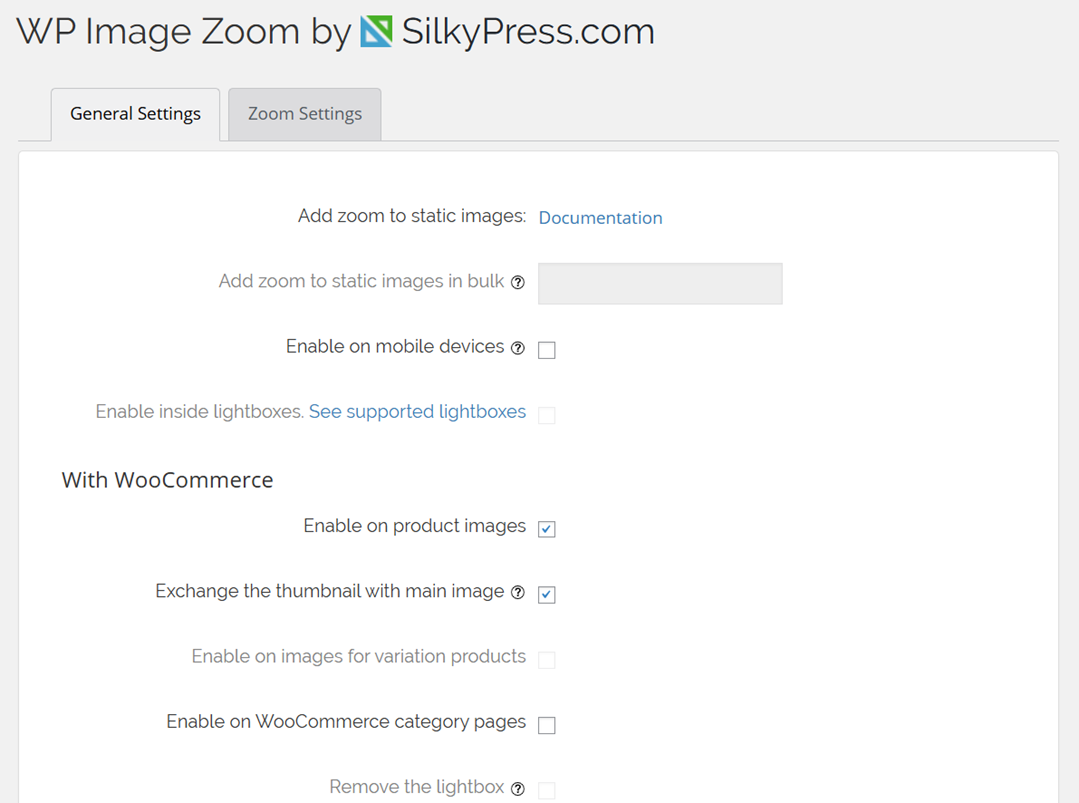
From the General Settings section, you can also enable zoom for WooCommerce product images, thumbnails, category pages, attachment pages, and even mobile devices by checking the relevant boxes. There's also an option to disable the lightbox effect for smoother zooming, although this requires the Pro version.
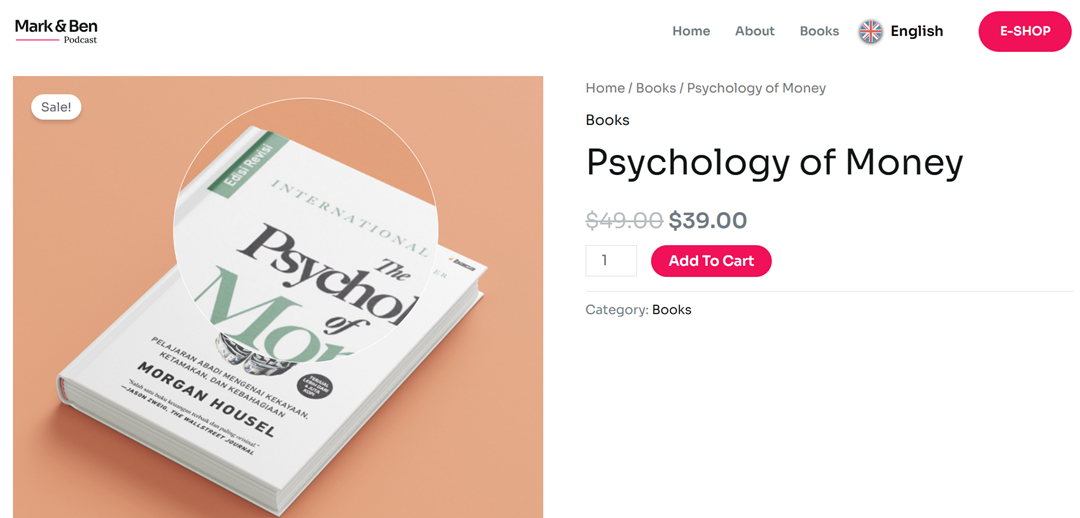
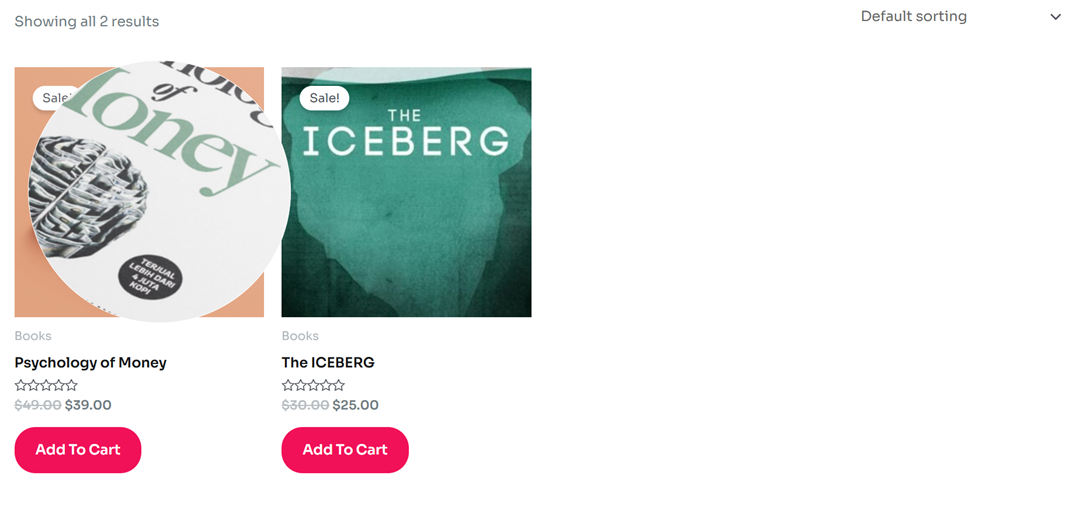
After saving your changes, the magnifying zoom feature will be active for your WooCommerce products. You can visit your online store to see it in action.
If you'd like to use zoom on standard WordPress posts and pages, you'll need to enable it manually for each image. To do this, open your post in the block editor, upload an image from your computer or media library, and click on it to reveal the Block Settings panel.
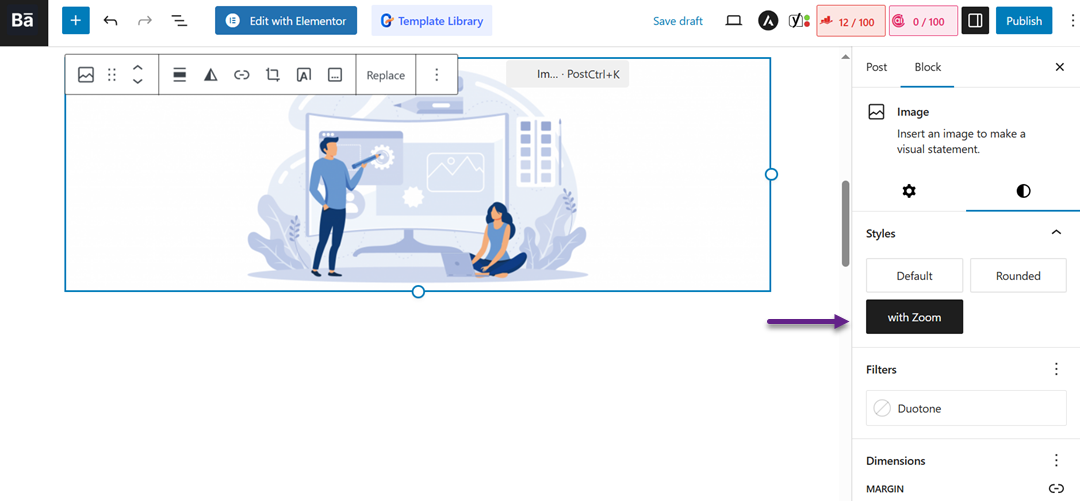
From there, go to the Styles tab and choose With Zoom. Finally, update or publish the post, and the zoom effect will be applied to your image.
Method 3: Using WPCode (Custom Code Snippets)
WPCode is one of the most popular code snippet managers, designed to let you safely insert custom code into your site without editing theme files directly. It includes a library of over 390 pre-built snippets, including a ready-to-use magnifying glass effect for images.
To begin, install and activate the WPCode plugin. Suppose you're unsure how. Refer to our tutorial on installing WordPress plugins. The free version is sufficient for adding snippets like the image zoom. However, upgrading to WPCode Pro unlocks advanced tools such as scheduled snippets, AI-powered snippet generation, eCommerce tracking, and more.
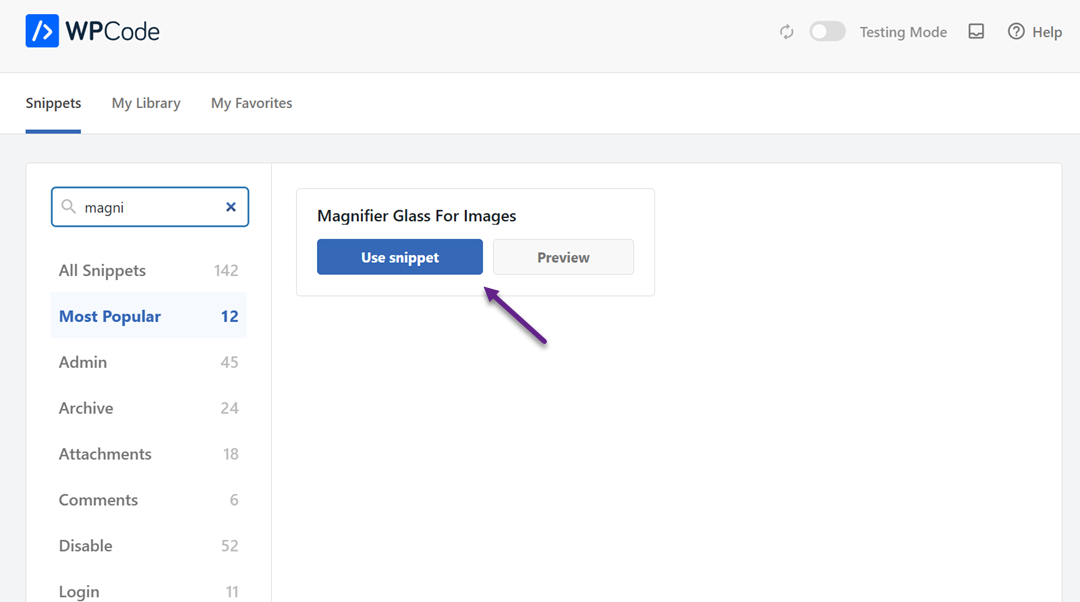
Once activated, navigate to Code Snippets > Library in your WordPress admin panel. In the library, search for the snippet titled "Magnifier Glass for Images." When it appears, hover over it and select Use snippet.
WPCode will automatically insert the correct code into your site and choose the appropriate insertion method. To finalize, switch the snippet from Inactive to Active and click Update.
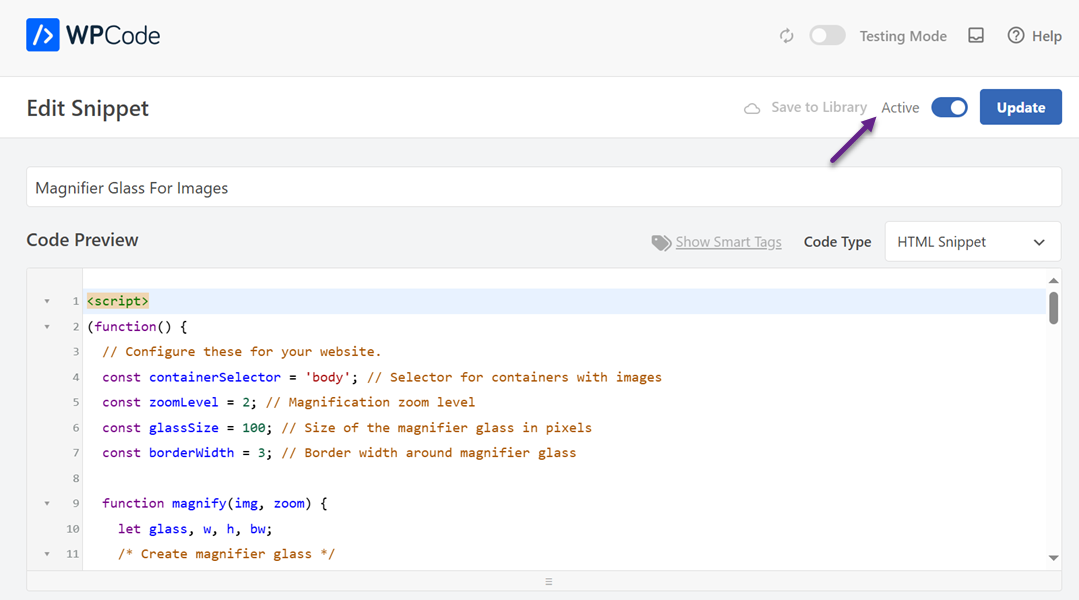
After saving, visit your WordPress site and hover over an image, and you'll now see the magnifying glass zoom effect in action.
Use Cases: E-commerce and Portfolios

Magnifying zoom plays a significant role in building trust and improving user interaction. The most common areas where this feature shines are e-commerce and creative portfolios.
E-commerce
In online shopping, customers cannot physically touch or examine products, so having a zoom option helps them feel more confident in purchasing. This small detail can significantly improve the shopping experience and reduce hesitation before checkout.
Moreover, zoom features also reduce the chances of product returns, since buyers are able to view items more accurately before making a purchase. By inspecting textures, patterns, and quality closely, customers develop realistic expectations, which leads to higher satisfaction and stronger trust in the store.
Portfolios
Showcasing work clearly is essential for photographers, designers, or artists. A magnifying zoom enables audiences to observe intricate details, from subtle brush strokes in digital art to fine textures in high-resolution photography. This feature helps creative professionals present their work in a more engaging and professional way, ensuring that every detail is fully appreciated.
By allowing viewers to zoom in on visual elements, creatives can highlight the craftsmanship and uniqueness of their work. This not only enhances audience appreciation but also strengthens the professional image of the artist, making portfolios more impactful and memorable.
Best Practices for Image Zoom
Adding a zoom feature is useful, but the results will be much better if you follow a few best practices. Here are some important tips to keep in mind:
Always use high-quality images
The quality of your images greatly affects the zoom result. If the image is blurry or low resolution, the zoom feature will only make it look worse. That's why it's essential to use high-resolution images so details appear sharp when enlarged.
High-quality images look professional and build user trust, especially in online stores. Visitors can examine your product or creative work in greater detail and with more confidence.
Optimize image size to prevent slow website loading
While high-quality images are important, their file sizes are often large and can slow down your website. The solution is to optimize images before uploading them to WordPress. You can use compression plugins or online tools to reduce file size without sacrificing visual quality.
This way, your site remains fast and responsive even with many images. A well-optimized website enhances the user experience and positively impacts SEO rankings.
Adjust the zoom effect as needed
Not every page requires the same zoom level. For example, products with fine details, like jewelry or fabrics, may need a stronger zoom effect than electronics. That's why adjusting the zoom settings according to your content needs is important.
At the same time, avoid going overboard with zoom. If the effect feels too aggressive, it can distract users rather than help them. Make sure the zoom feels natural, easy to use, and supports the main purpose of your website.
Calling all webmasters!
Save time and boost productivity with WP Media Folder. Effortlessly organize client media
files, create custom
galleries, and provide a seamless user experience.
Upgrade your website projects now!
Conclusion
Adding magnifying zoom for images in WordPress is a powerful way to enhance user experience and present visuals more professionally. Whether you manage an e-commerce store or a creative portfolio, the zoom effect allows visitors to explore textures, details, and quality more closely, building trust and improving engagement on your site. You can implement this feature without complex coding by using plugins like Envira Gallery, WP Image Zoom, or WPCode.
Always combine high-quality images with proper optimization and the right zoom settings to maximize this functionality. If you want to keep your media library organized while managing images for zoom effects or galleries, consider using WP Media Folder to simplify your workflow and improve website performance.
When you subscribe to the blog, we will send you an e-mail when there are new updates on the site so you wouldn't miss them.

Comments