Create and Manage Tables with Gutenberg Editor
Tables and charts are more important than we think when we have a website as this could make it really easier the way in how we show our prices, plans, company trajectory, and a lot of things more.l
It could be really tedious to find a table after creating it as we should copy/paste the shortcode but what about if there is a block dedicated to finding all your tables? WP Table Manager allows you to do that with the easy to use Gutenberg WordPress editor.
WP Table Manager adds blocks to the Gutenberg editor that will allow you to add these tables with a search box directly into the block.
Looking for a robust table management solution for client websites?
From pricing tables to product comparisons, this plugin offers powerful features to present data in a clear and user-friendly manner.
Get the competitive edge now!
Creating WordPress Tables with this Plugin for Gutenberg
For this post we will use WP Table Manager to create a price comparison table, first of all, we will see how to create tables.
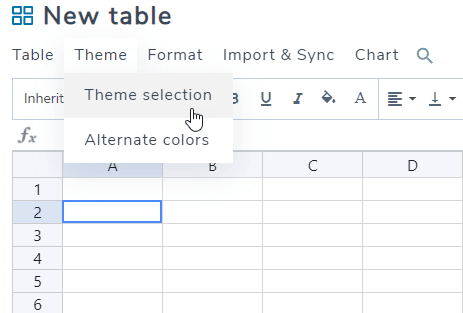
First of all, go to Tables Manager > All Tables, on this section, click on + Create New > Table, this will open the table editor, we could use a theme to make things really easier so let’s choose one, click on Theme > Theme Selection.
You will see all the options for themes, so we are going to select the one that will work for the price comparison table.
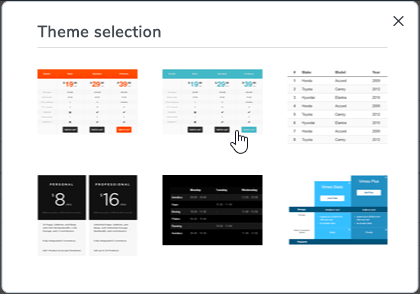
Now click in Ok(keep in mind that all the data in the table will be removed).
As we have added a theme, almost all the entire work is done.

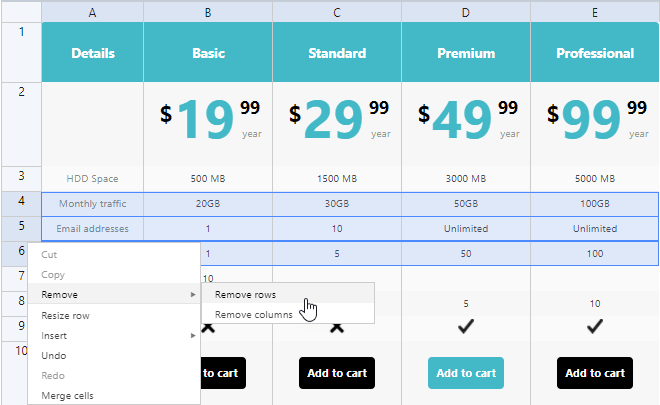
We just have to make simple adjustments and adapt the table to our needs, I will remove many rows and edit many of them, these can be edited just by clicking on it and start to type like if you were using Excel.
To remove, just click on the rows, right-click, and then, Remove.
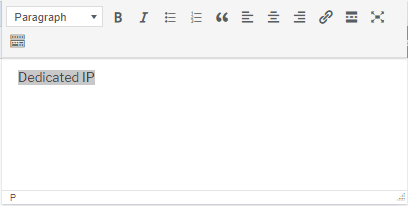
Now if you want to edit the cell, just click on it, it will open an advanced editor that you can use to customize the content as you want.
If we want to customize more the table, we can change the color, we just have to click on the cell and use the top tools to change the color of the cells we want.
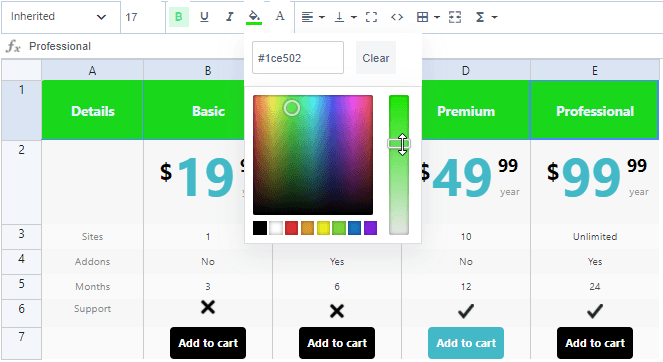
We don’t have to save the table as it is going to be automatically saved with every change.
Now that we have created the table, we can add it to the post using the Gutenberg Editor block.
Go to Posts > Add New, you will see the Gutenberg Editor, we will select the WP Table Manager block.
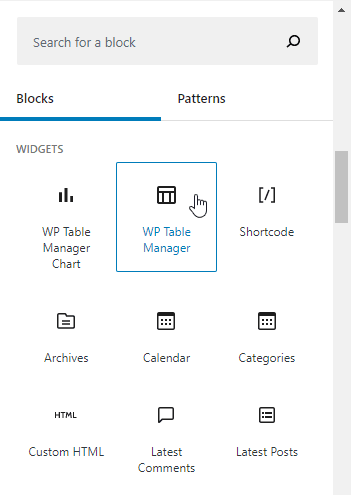
This will add a search field that will show you the categories and tables and you will be able to add a table just by clicking the table.
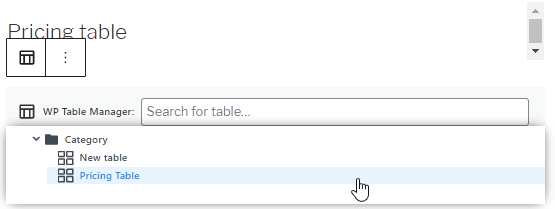
The table will be added, and now, you will only have to publish that post and the table will be there, as easy as click on the table and publish the post/page.
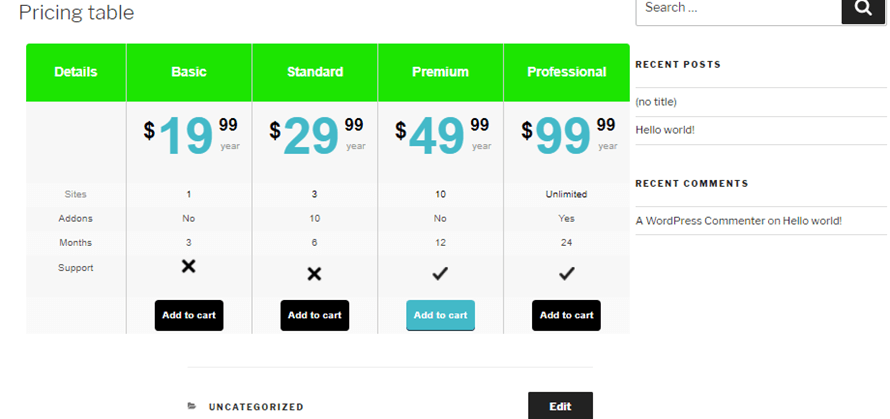
And that’s all, we have created and posted a pricing table in less than 10 minutes, really easy, isn’t it?
Using WP Table Manager in WordPress to Create Charts
Yes, we will also have the option to create charts from the tables, and the other good news is that the charts section has a dedicated Gutenberg Block so you will be able to easily find the chart when you’re creating your post.
Now, to create charts go to Table Manager > All Tables, we should have a table created with the data that we want to reflect in the chart, we have a table prepared with information to create this chart.
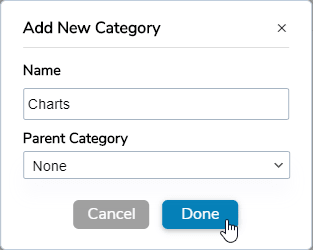
A good practice could be, create a category for each type of table that we want to create, for example, here we have created a category called: “Charts”.
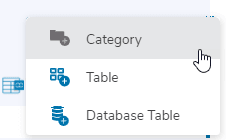
Categories are really easy to create, for this click on + Create New > Category.
Finally, type the category title, select the parent category(if this is a sub-category), and click on Done.
Now let’s go to the table where we want to create the chart, we have added a table based on the populations from 5 countries.
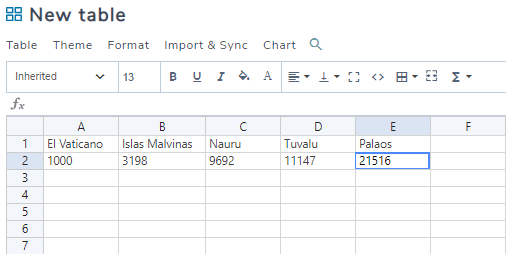
To create the chart, we will have to select the cells that we want to add to the chart and click on Chart > Create chart from data.

Now, we will see the chart created with the right menu where we are going to be able to see the tools to customize the chart.
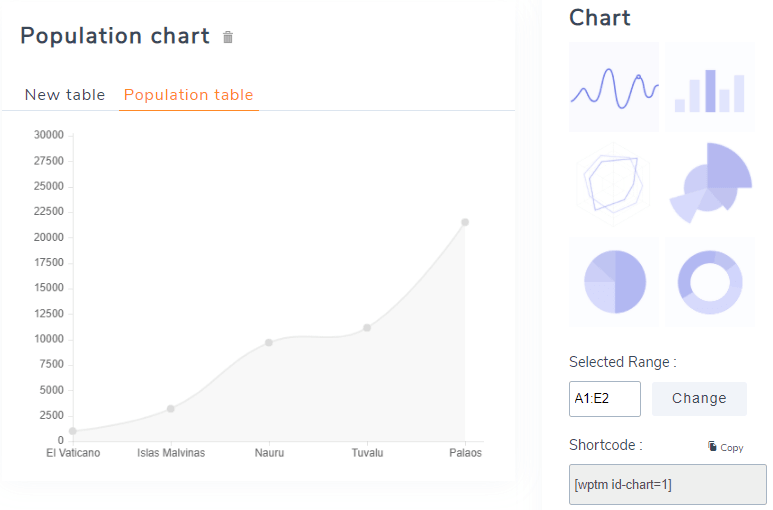
We will use the circle chart for this example.
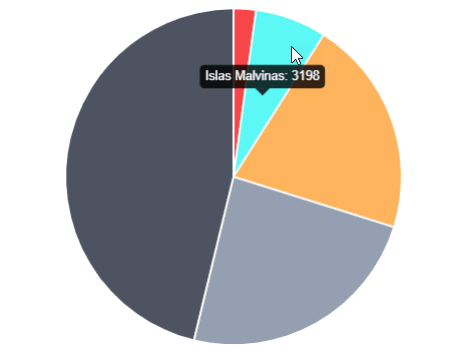
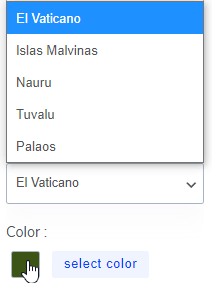
At the bottom of the right-side panel, we are going to be able to select the color for each field so we can make colors fit with the theme that we are using.
Now that we have created/customized the chart, let’s go to Post > Add New so we can create the post and add the new chart that we have created.
On the Gutenberg Editor, look for the “WP Table Manager Chart” block and add it to the post.
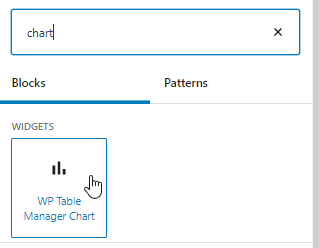
This will open a search field where you will be able to see all the charts available.
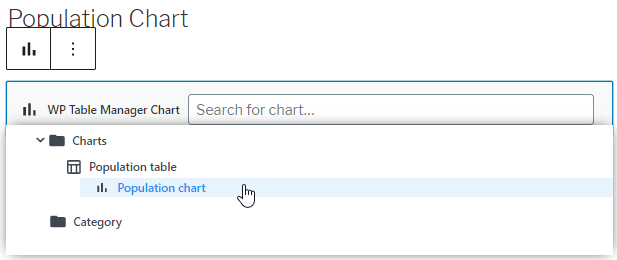
As you can see it will show all the categories, tables and charts available, that’s why we should have everything ordered in categories, now click on the chart that you want to add, in our case is the “Population chart”.

As you can see, the shortcode will be automatically added, so you will only have to publish it and everything will be done.
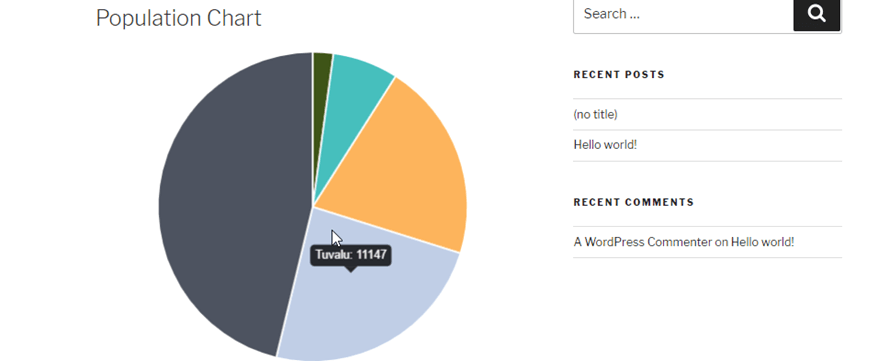
But now, what happens if we want to update the data in the chart? Should we create a new chart? Well, the answer is no! You can just edit the data inside the table and the chart will be automatically updated.
In this example, the Tuvalu population is 11147, as you can see in the image so let’s change the population to 20000, and check the chart again.
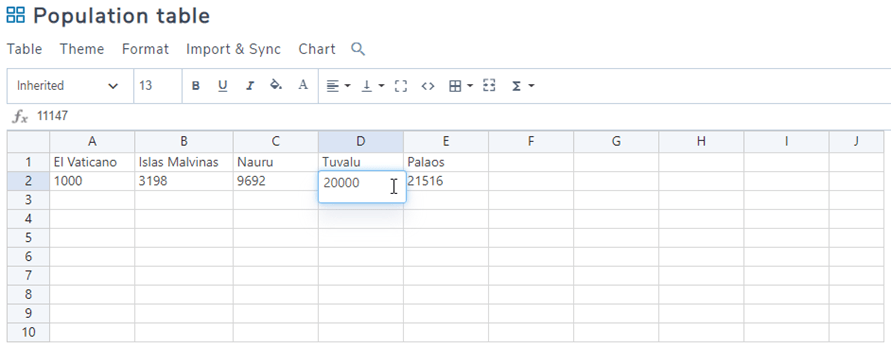
Now the chart should be updated, let’s check it.
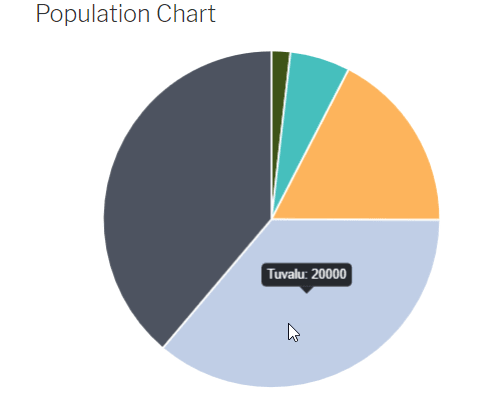
And yes, the magic is done, we have created a dynamic chart that can be easily changed just by changing the data inside the table.
Plus, Tables from Databases in WordPress
There is also an option to create tables from the Database and this table will be automatically updated when there are changes in your database so if you have info stored on your Database and you want to create a table/chart based on it, just click on + Create New > Database Table
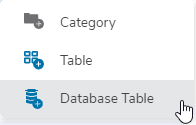
This will redirect you to a page with all the tables included on your Database so you can just select it with the columns that you want, and WP Table Manager will automatically create the table.
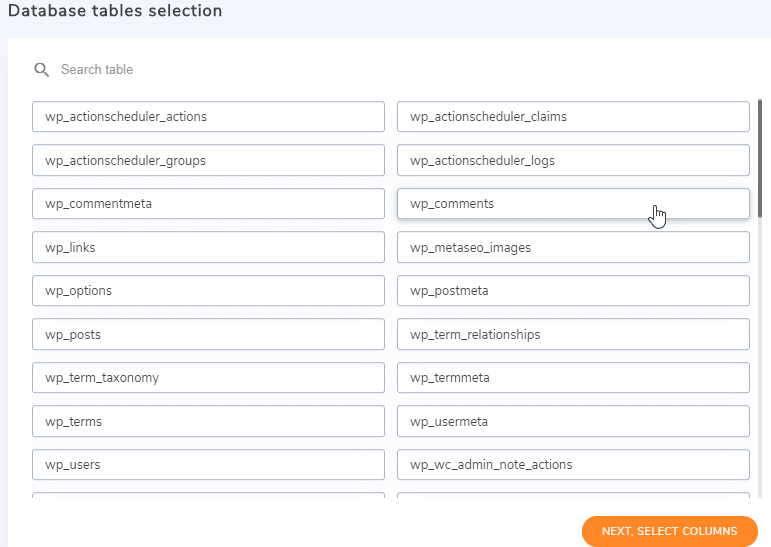
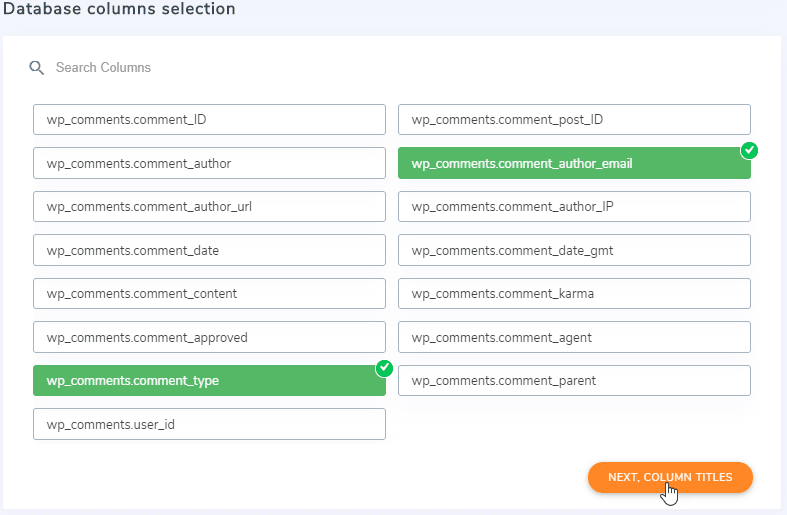
After that, you will be able to select the columns that you want to add to the table, for example, here we will select only the comment type and the email from the authors.
Finally, select the title for each column and add the rules to create the table.
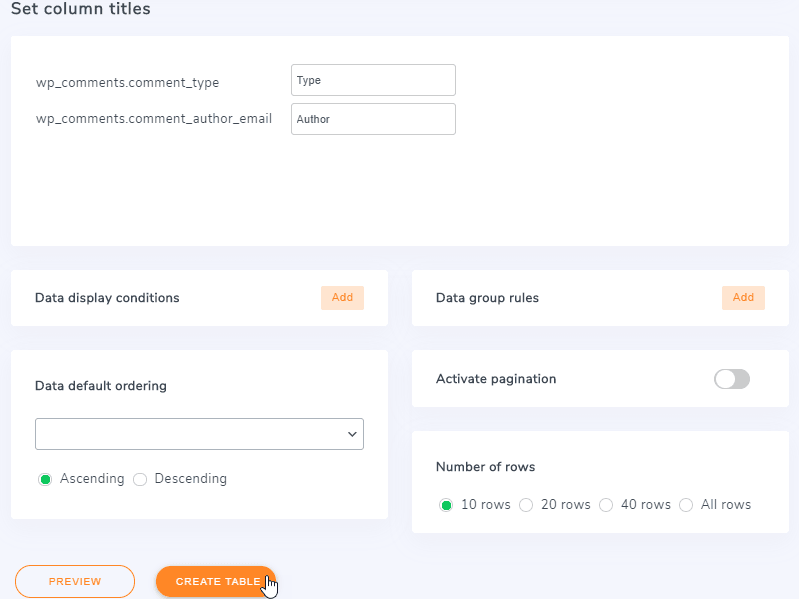
Now, click on Create Table and the table will be automatically created, keep in mind that there are Conditions that we can add, for example, show a variable only if the email of the author is “
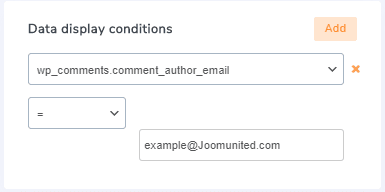
We can add as many rules as we want, we just have to click on “Add” and a new box will be added to set a new rule.
And now you can see how easy is to create tables from the database.
Our new design will make everything even easier!
Calling all webmasters!
Enhance your client websites with WP Table Manager. Easily manage and customize tables, charts, and spreadsheets, providing clients with dynamic and engaging data visualizations.
Upgrade your web design services today!
Start Creating Tables with WP Table Manager
Now that you know how easy is to create tables and manage them using WP Table Manager, what are you waiting for? Go here and purchase your membership to start serving all these tables in the most professional way.
When you subscribe to the blog, we will send you an e-mail when there are new updates on the site so you wouldn't miss them.


Comments 8
I cannot center my advanced table block. Please advise.
Hi, you can use the advanced column manager to center your table if the default tool does not work as expected. Use for example a 3 columns layout and put the table in the center part. Hope it helps.
Might you add an option to adjust font size in the advanced table block? This is a common request from clients, and is the only feature I miss from your otherwise wonderful advanced table block.
OK noted!
Would it be possible to have lists in the table cell?
Hi, that's not currently possible but I recommend to post a feature request on the plugin directory support forum.
Hello! I noticed that Advanced Tables looks way different on the back-end than the front-end. I'm not sure how to attach screenshots to this comment or where to email support. Any idea why this is happening?
Hi, it happens that themes apply automatic styling on tables. Cloud you please drop us a support request on the plugin directory support forum?