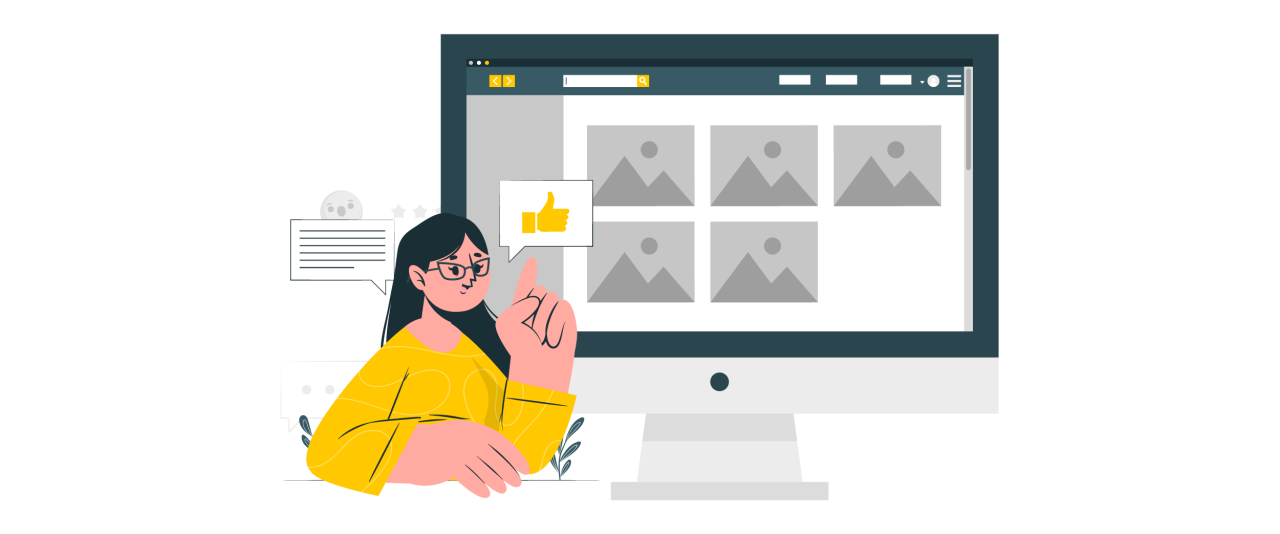
How to Create an Image Gallery in WordPress (Step by Step)

Creating an image gallery in WordPress is one of the most effective ways to showcase your visual content and make your website more engaging. Whether you're a photographer, blogger, or business owner, a well-arranged gallery lets you present multiple images in an organized and visually appealing layout. This helps save space with grid-based designs and makes it easier for visitors to browse your photos without endless scrolling.
- Use high-quality, optimized images to ensure your gallery looks professional while maintaining fast page load times for a smooth user experience.
- Organize your images with categories, tags, or folders to make browsing easy for visitors and simplify media management on your site.
- Enhance engagement by adding captions, descriptive alt text for SEO, and enabling lightbox or fullscreen view so users can interactively explore your images.
Table of content
In this guide, we'll walk you through creating an image gallery in WordPress, using the default block editor and powerful image gallery plugins for advanced customization. By the end, you'll have a functional and optimized gallery that enhances user experience and keeps visitors engaged longer.
Why You Should Create an Image Gallery in WordPress?
Adding an image gallery to your WordPress site is a strategic move to enhance design, improve navigation, and keep visitors engaged. With a gallery, you can organize multiple images in an attractive grid layout, making your content visually appealing and easy to explore. Here are the main reasons to consider using an image gallery:
- Improved visual appeal: A gallery arranges your images in a clean, grid-style layout, making your website look professional and well-structured. This layout is far more attractive than displaying images one after another, which can appear cluttered and unorganized.
- Better user experience: Thanks to thumbnail previews and easy navigation, visitors can browse multiple images in less time. This reduces excessive scrolling and helps users find what interests them more quickly.
- Higher engagement rates: A well-designed gallery encourages users to spend more time on your site. Users can click, enlarge, and interact with images, which increases the chances they'll explore other parts of your website.
- Space efficiency: By displaying multiple photos in rows and columns, you can showcase more images in less space without overwhelming the layout. This keeps your pages clean and easy to navigate.
- Professional presentation: For photographers, artists, or businesses, an image gallery provides a polished way to showcase work, products, or portfolios, helping to build credibility and trust with your audience.
Creating a Gallery Using the Block Editor
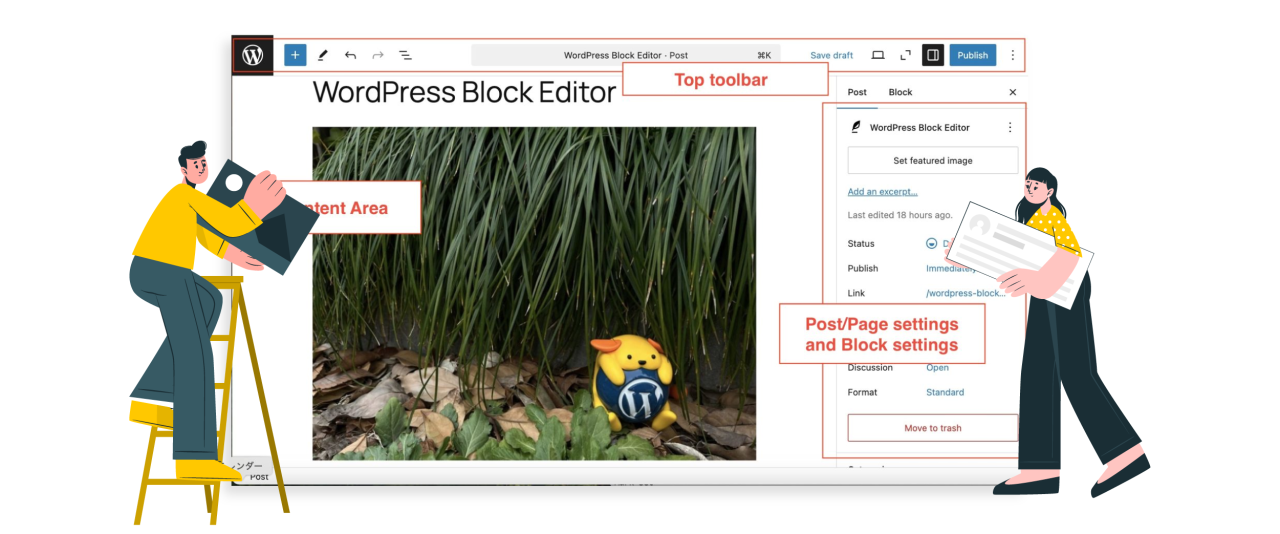
Creating a gallery using the Block Editor in WordPress is a quick and easy way to display multiple images in a neat and organized layout. With just a few clicks, you can upload photos, arrange them in a grid, and add captions, without needing additional plugins or coding skills. Therefore, we will discuss how to create a gallery using the Block Editor easily.
First, open the post where you want to add the gallery. Then, click the + icon to add a block and search for the keyword "Gallery."
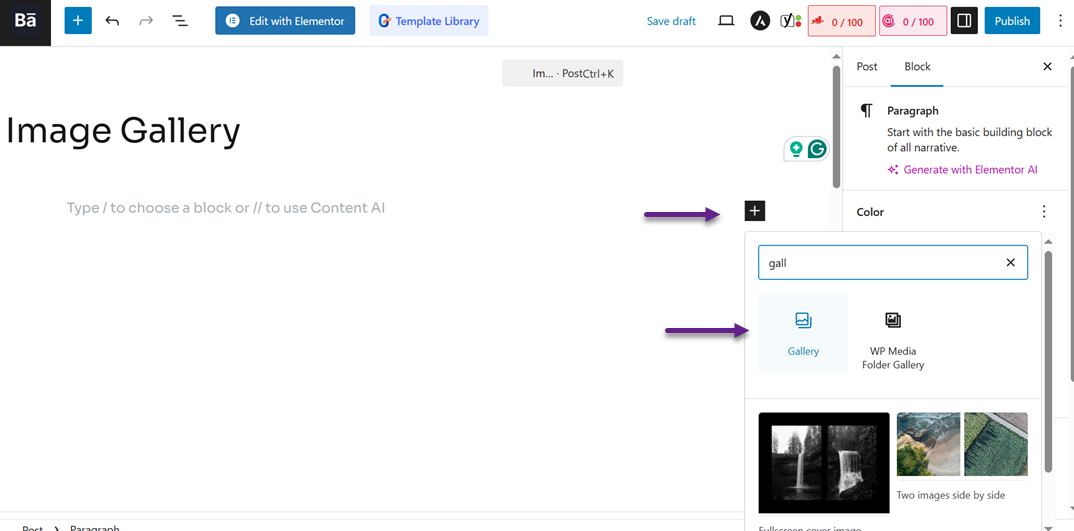
Then the following screen will appear. You can select Upload or Media Library to add the image
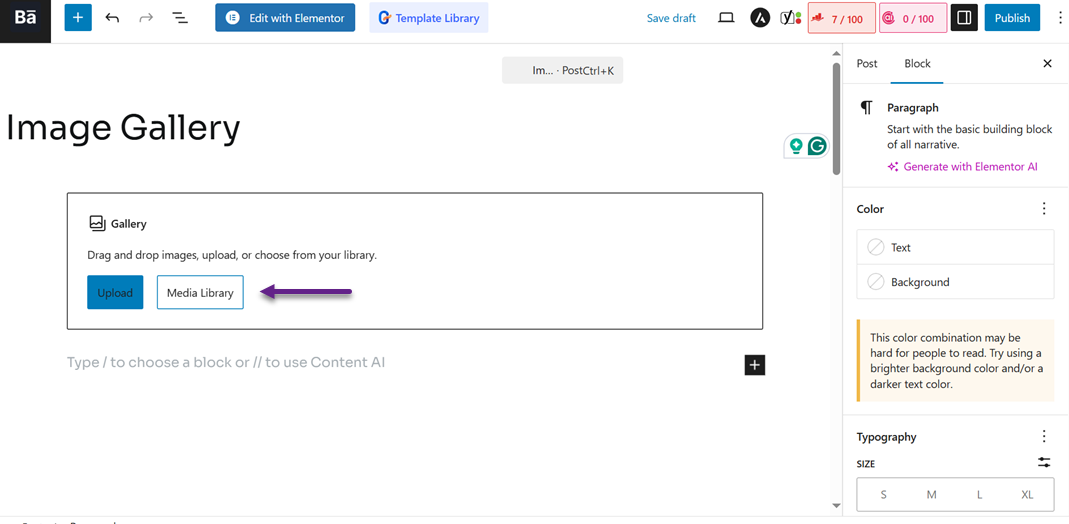
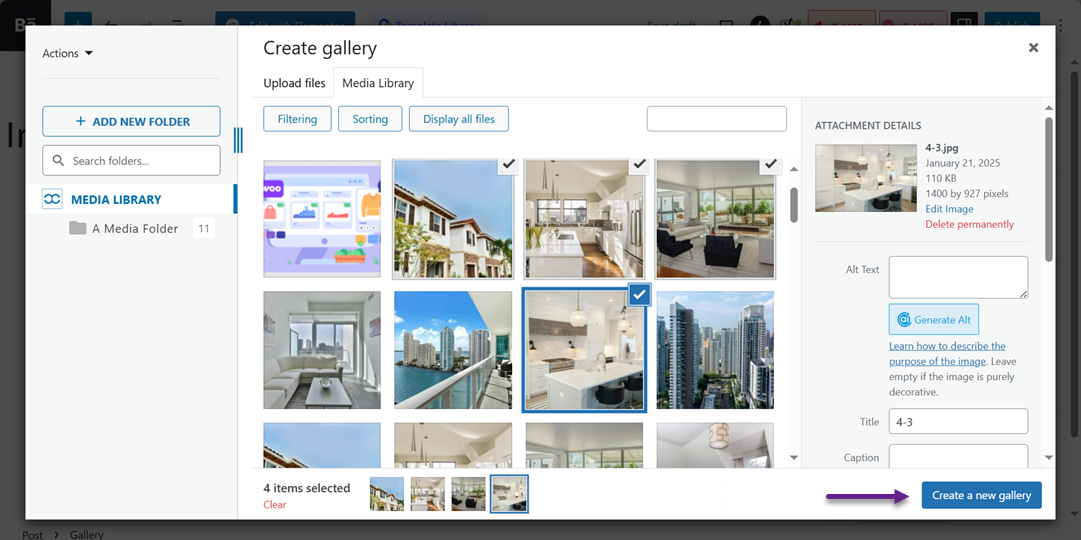
If you select Media Library, a screen will appear where you can select which images you want to include in the gallery. You can select several at once and then click Create a new gallery.
Next, you will be directed to the edit page, where you can add captions for each selected image. Then select Insert gallery.

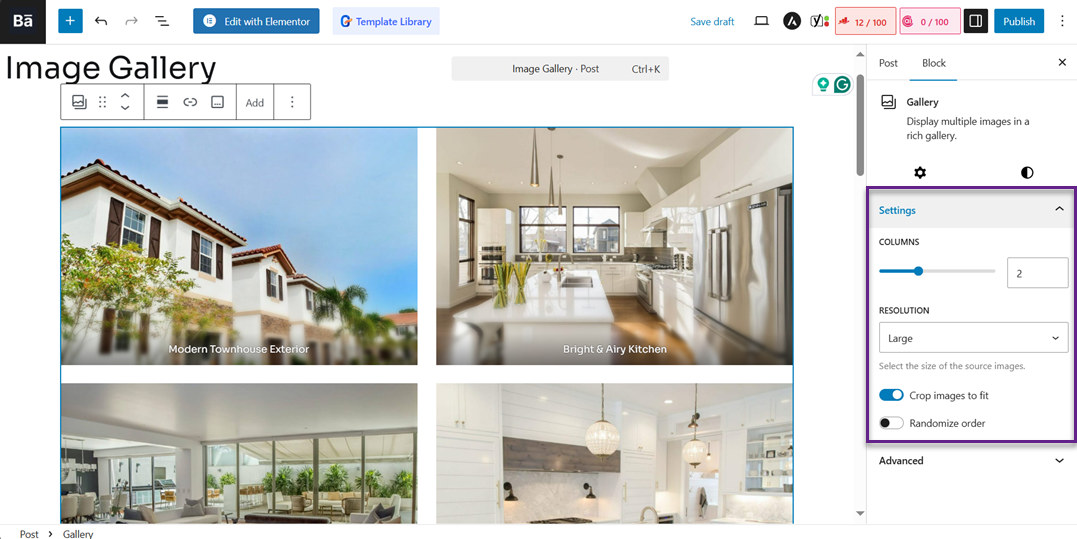
After that, the image will appear in the WordPress editor. Then, you can set the number of columns, resolution, and several other settings in the Settings menu on the right.
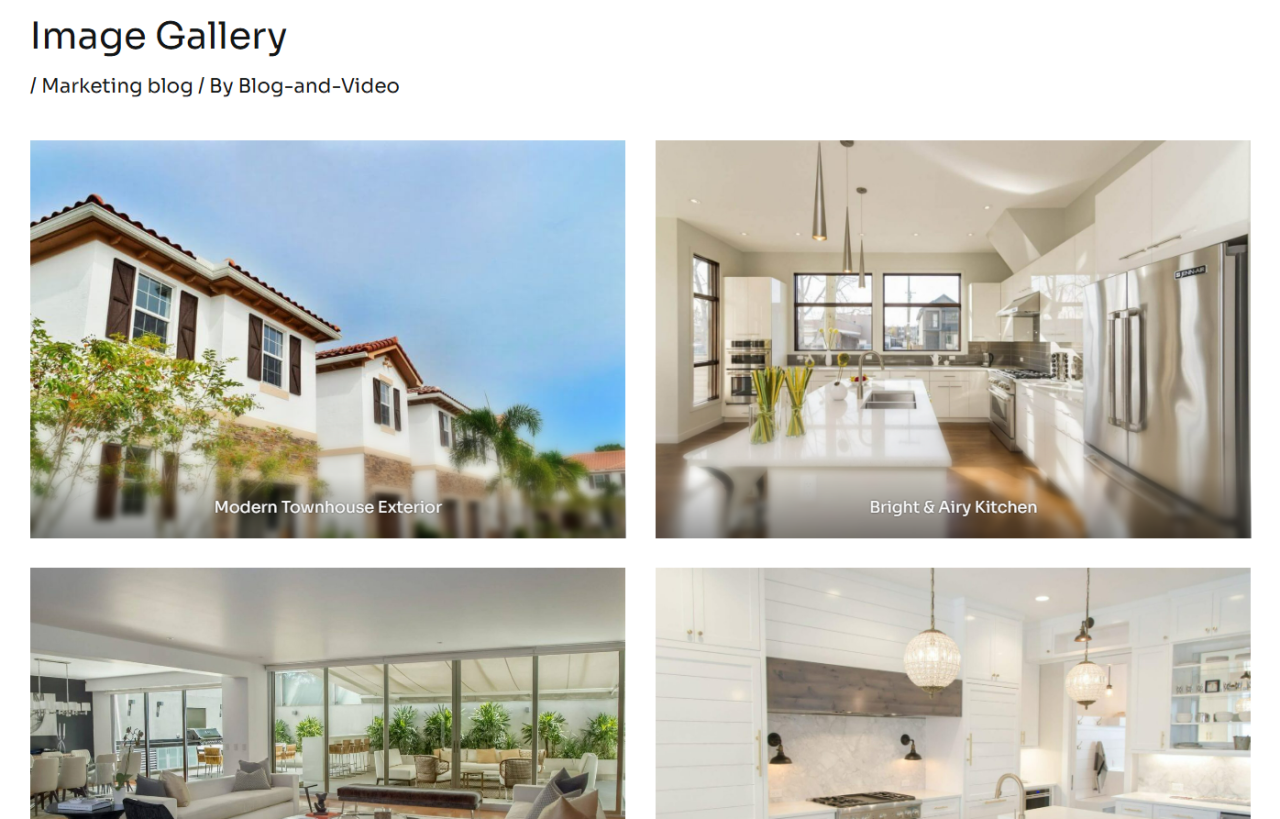
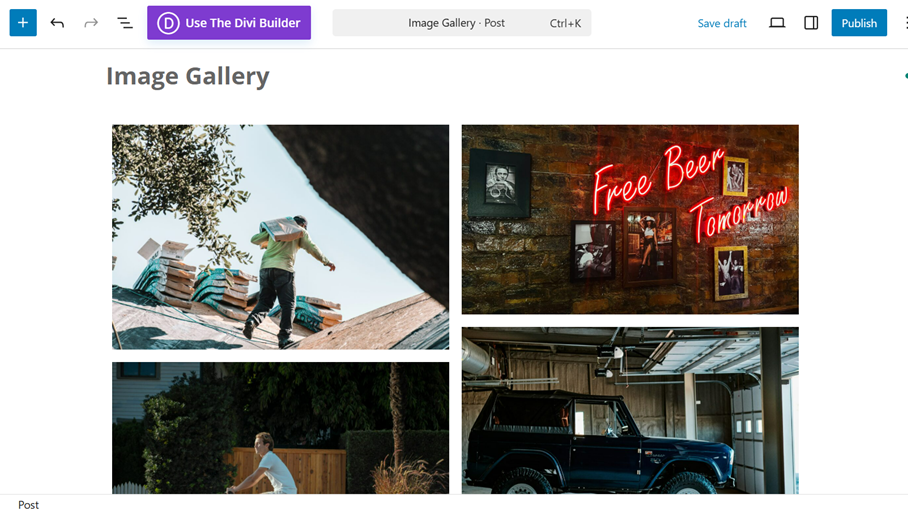
Once you have finished setting it up, you can see a preview of the gallery as follows.
At this point, you have successfully created a gallery easily using only the block editor without any additional plugins.
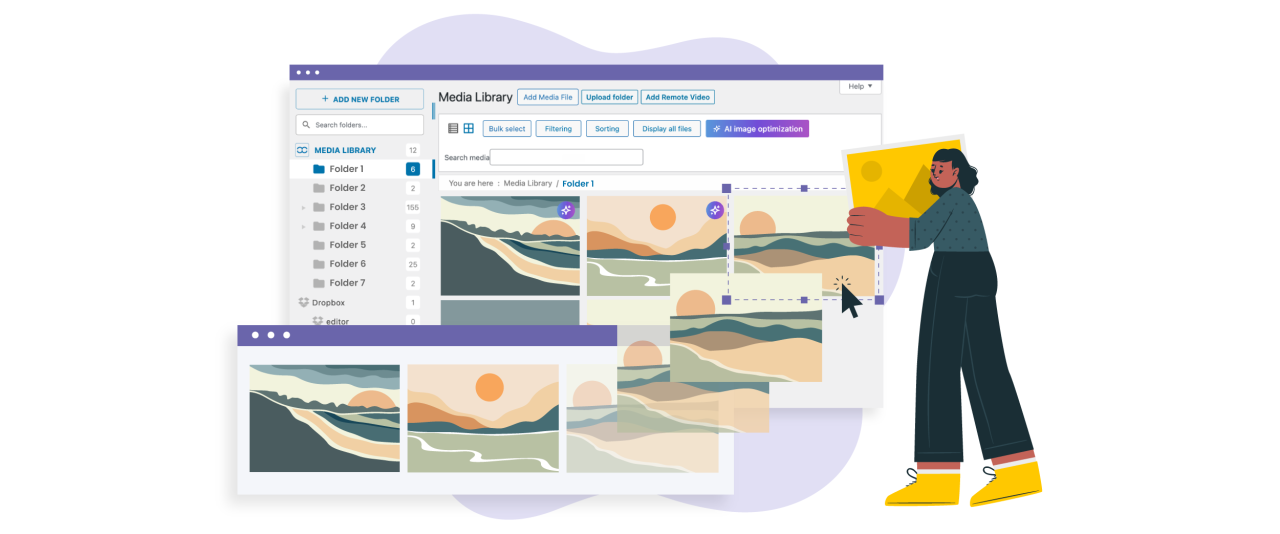
Say goodbye to messy media library.
WP Media Folder lets you categorize files, sync folders with
cloud storage, create amazing galleries and even
replace images without breaking links.
Optimize your media workflow today
Creating a Gallery Using WP Media Folder Plugin
The second method for creating a gallery is to use a third-party plugin. Although you can create one using the block editor, there are some limitations, such as customizing the gallery theme, layout, and more.
Therefore, you can use a plugin with comprehensive features, such as WP Media Folder. WP Media Folder is a WordPress plugin designed to organize and manage media files in the Media Library using a folder and subfolder system. Here are some of the features supported by WP Media Folder for creating galleries:
- Creating galleries from the Media Library or local files
- Setting the gallery title, choosing a theme, and configuring the hierarchy (parent/sub-gallery)
- Adjusting the Lightbox size
- Setting the number of columns in the gallery display
- Enabling or disabling transition effects
- Configuring pagination or page division in the gallery
- Setting the layout and spacing between images
- Adjusting the gallery background color
- Adding zoom icons or navigation in the Lightbox, and much more.
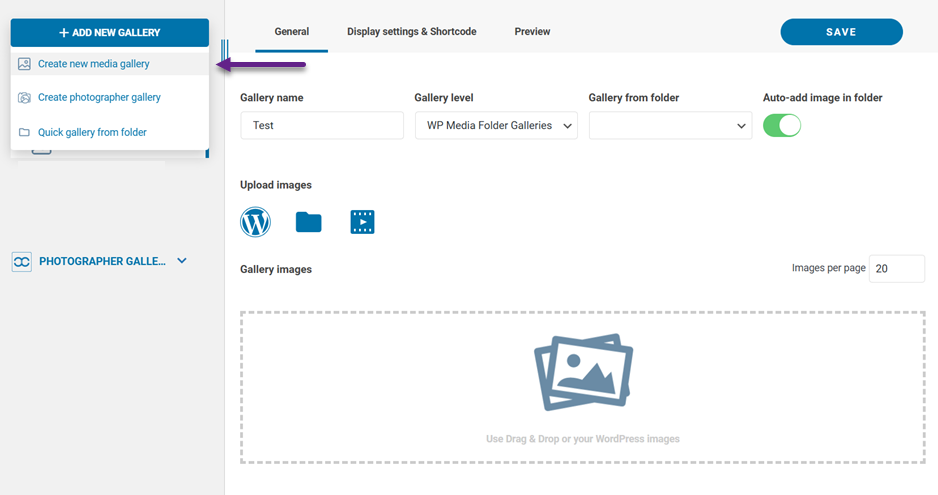
Step 1: Create New Media Gallery
Let's get started on creating a new gallery. Make sure you have installed the WP Media Folder plugin on your website. Then go to the Media > Media Folder Galleries > Create new media gallery menu.
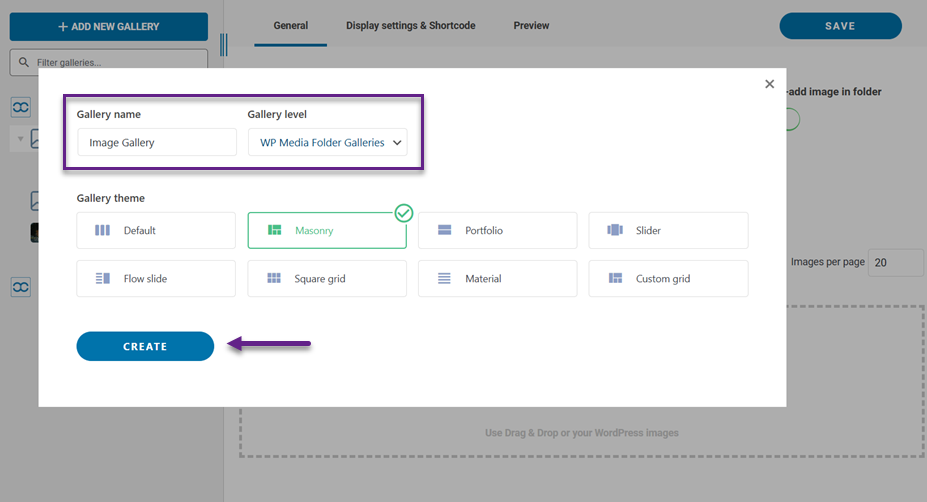
After that, enter the gallery name and level, select the gallery theme you want, then click Create.
Once you have done so, you can upload images via WordPress or your local computer.
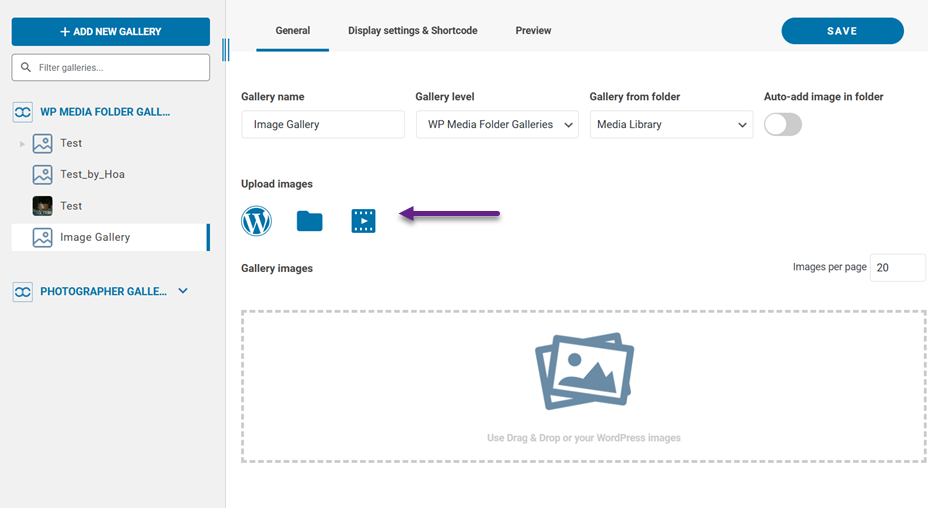
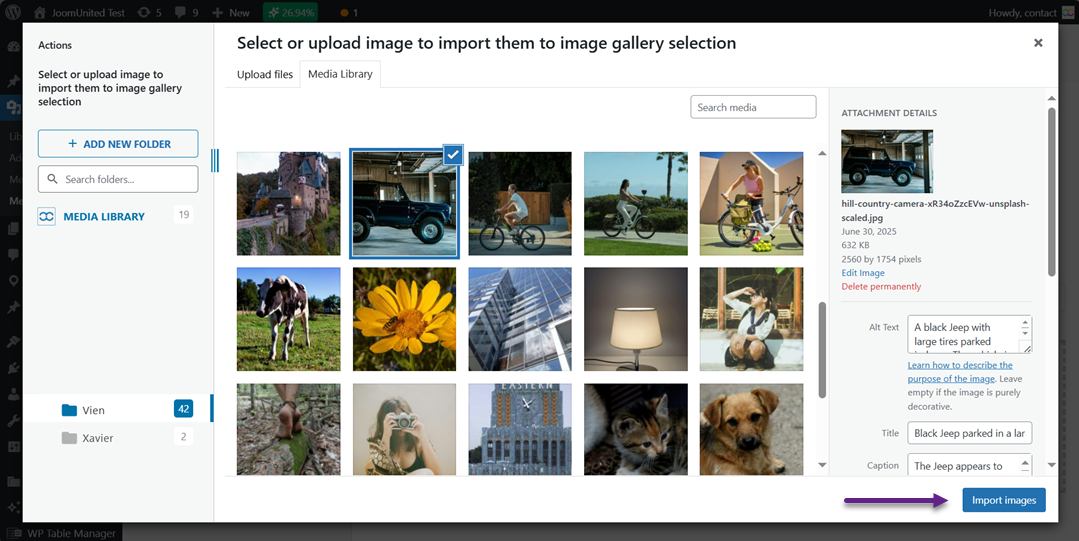
In this tutorial, we will try uploading directly from WordPress media. Once you have selected, click Import images.
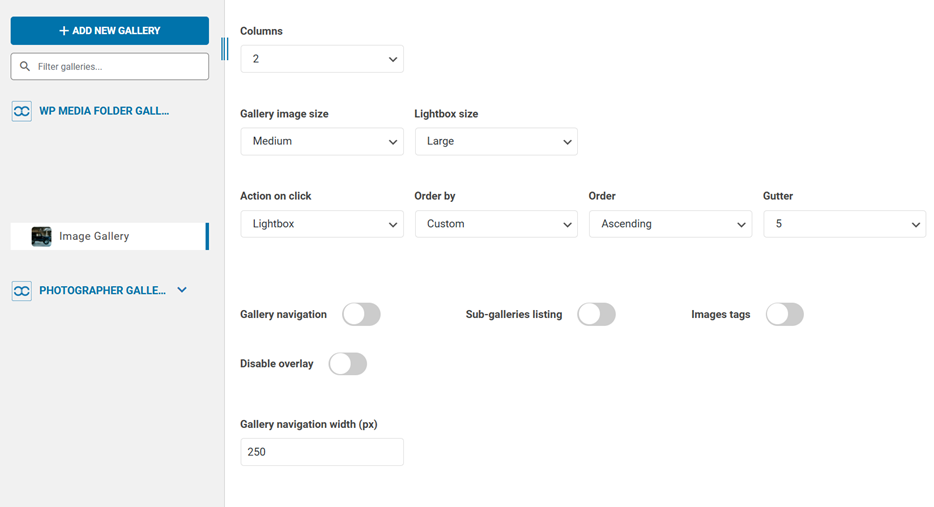
Next, in the Display settings & shortcode menu, you can configure several things, ranging from the number of columns, gallery image size, lightbox, gallery navigation, and much more.
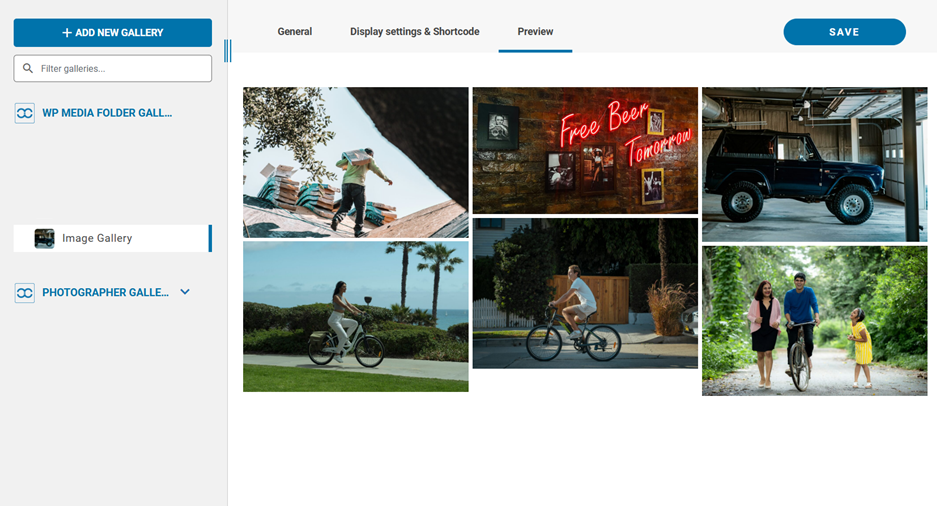
Meanwhile, on the Preview menu tab, you can see a preview of what your gallery will look like. If you are satisfied with it, select Save.
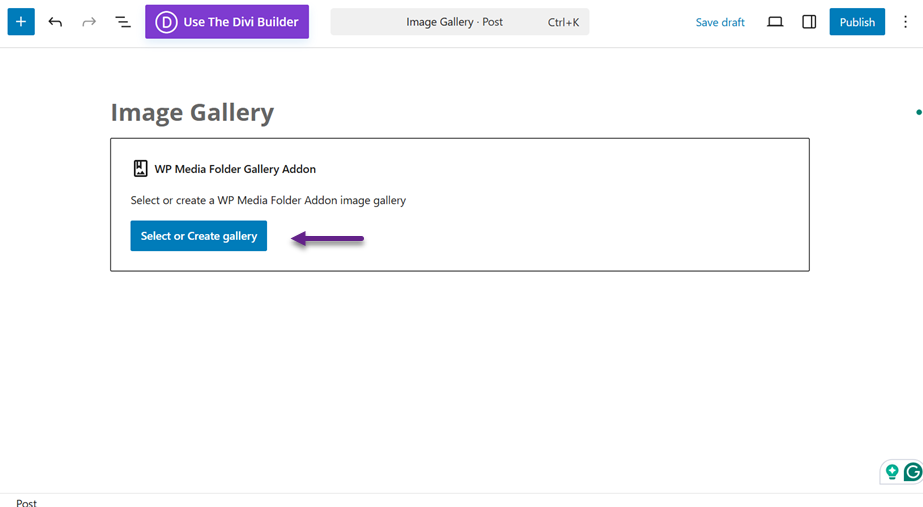
Step 2: Display Your Gallery on WordPress
Once the gallery is created, it's time to display it on your website. Here, you can add a block editor, select WP Media Folder Addon, and then select Select or Create Gallery.
Here you will be asked to select which gallery folder you want to insert. Once you have selected it, click Insert.
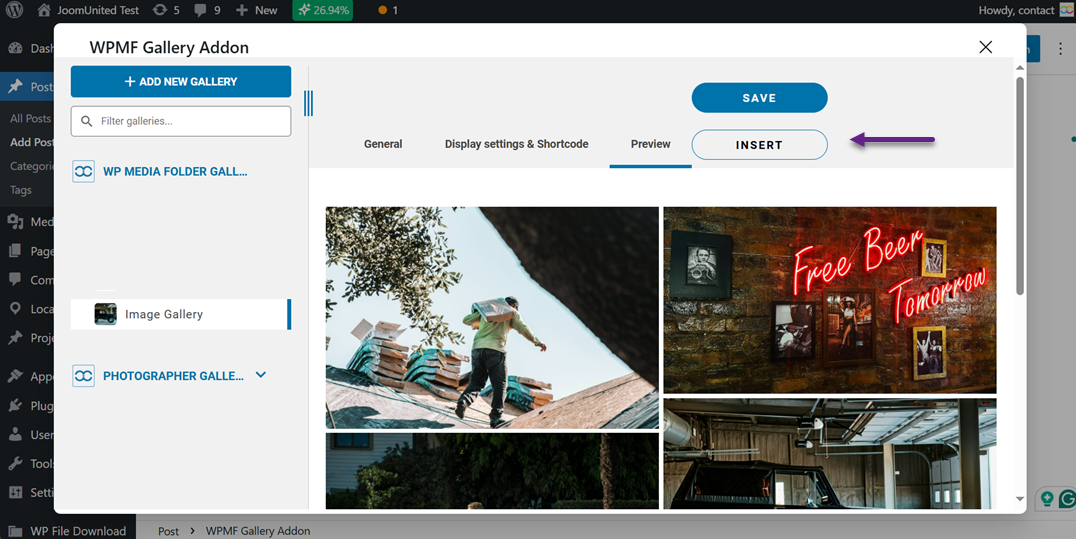
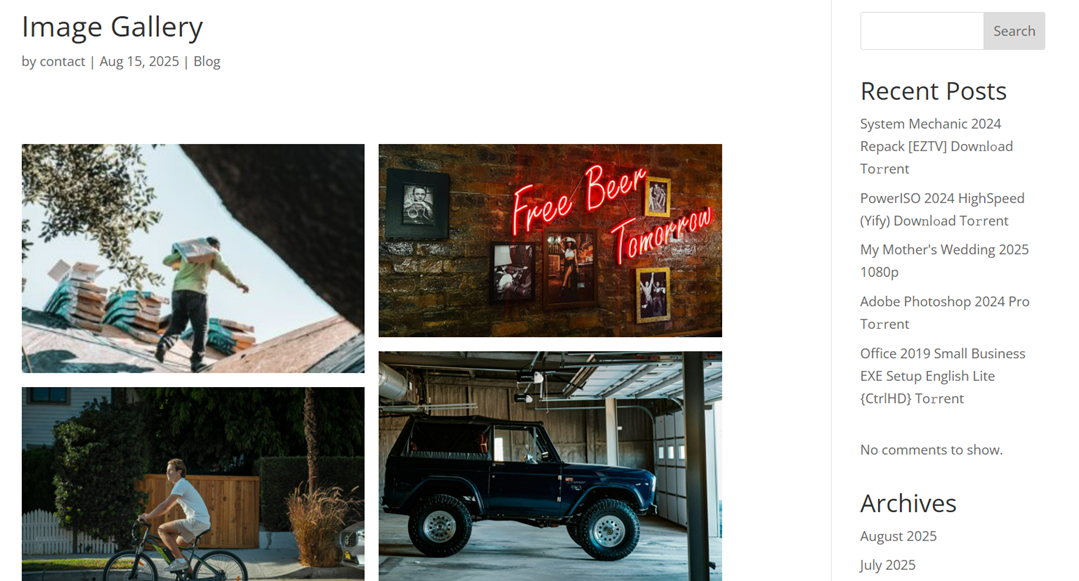
If successful, your gallery display will appear in the WordPress editor.
Now, here is the gallery that you have successfully inserted into your WordPress post.
Tips to Maximize Your Image Gallery

A well-optimized image gallery can do more than just display pictures, it can grab attention, tell a story, and improve the overall experience for your visitors. Whether you're running a personal blog, a portfolio, or an online store, making the most of your image gallery will help you stand out and keep visitors engaged.
Choose High-Quality, Optimized Images
Using high-quality images ensures your gallery looks professional and visually appealing. Blurry or pixelated pictures can make your site look unpolished and reduce trust in your brand. However, high quality doesn't mean heavy file sizes, you should always balance clarity with fast loading times.
Optimizing images means compressing them without losing visible quality. This way, your site stays fast and responsive while still showcasing sharp, vibrant visuals. Tools like TinyPNG or built-in WordPress optimization plugins can make this process quick and easy.
Organize Your Images for Easy Navigation
A beautiful gallery is pointless if visitors can't easily find what they want. Organizing your images into categories, tags, or folders helps users browse effortlessly. This structure also makes it easier for you to manage your media library in the long run.
Think of your gallery like a well-arranged shop display, group related items together so visitors can enjoy a smooth, intuitive experience. Plugins media library like WP Media Folder allow you to create folder hierarchies and sort your images without clutter.
Use Captions and Alt Text Wisely
Captions can give context to your images, making them more engaging and informative. They help visitors understand the story behind the picture or the product details. Keep captions short, clear, and relevant to the image.
Alt text, on the other hand, plays a big role in SEO and accessibility. It tells search engines and screen readers what your image is about. Writing descriptive and keyword-friendly alt text improves your site's discoverability while making it more inclusive for all users.
Enable Lightbox or Fullscreen View
Sometimes, visitors want a closer look at an image without leaving the page. Enabling a lightbox or full-screen view lets them enlarge pictures with a simple click, creating a more immersive experience. This is especially useful for showcasing art, photography, or product details.
A lightbox also keeps users engaged because they can browse through images without being redirected to new pages. Many gallery plugins offer this feature out of the box, making it easy to implement.
Calling all webmasters!
Save time and boost productivity with WP Media Folder. Effortlessly organize client media
files, create custom
galleries, and provide a seamless user experience.
Upgrade your website projects now!
Conclusion
Creating an image gallery in WordPress creates a visually appealing, organized, and engaging visitor experience. By using either the default Block Editor or a feature-rich plugin, you can present your images in a way that enhances your site's design, improves navigation, and keeps people exploring your content longer.
With the right tools, like WP Media Folder, you can go beyond the basics, adding folder organization, custom layouts, lightbox effects, and more to showcase your work truly. If you're ready to take your image gallery to the next level, try WP Media Folder and see how effortless managing and displaying media can be.
When you subscribe to the blog, we will send you an e-mail when there are new updates on the site so you wouldn't miss them.


Comments