How to Connect Amazon S3 Buckets to WP Media Folder for Optimized Cloud Storage

Managing large volumes of images, videos, and downloadable files can quickly put pressure on a WordPress server. This is why many developers and agencies look for ways to move media assets to cloud storage. One effective solution is learning how to connect Amazon S3 buckets for optimized cloud storage, allowing websites to offload media files while keeping the WordPress media library organized and easy to manage.
By integrating Amazon S3 with WordPress, you can reduce server load, improve website speed, and scale storage as your content grows. In this guide, you'll learn how media offloading works, the benefits of using Amazon S3 for WordPress media, and the step-by-step process to connect Amazon S3 buckets to WordPress.
- Offload heavy media files to Amazon S3 via WP Media Folder to cut load times and hosting costs.
- Manage S3 buckets like local folders with drag-and-drop syncing and automatic uploads.
- Safely transfer existing media to cloud storage without downtime or broken links.
Table of content
What is Media Offloading for WordPress?
Media offloading for WordPress is the process of storing your website's media files—such as images, videos, PDFs, and other uploads—in external cloud storage rather than on the main hosting server. Normally, when you upload files to the WordPress media library, they are saved directly on your website server. As the number of files grows, this can consume significant storage space and increase the server's workload.
With media offloading, those files are automatically moved or copied to cloud services such as Amazon S3. WordPress still displays media in your posts and pages, but the files are served from the cloud rather than your hosting server. This approach helps reduce server load, improves website performance, and allows websites with large media libraries to scale their storage more efficiently.
Benefits of Using Amazon S3 for WordPress Media
Using Amazon S3 for WordPress media offers several advantages, especially for websites that handle large numbers of images, videos, or downloadable files.
Reduced Server Load
One of the biggest benefits of using Amazon S3 is reducing the workload on your main WordPress server. When media files are stored locally, every image or file request must be handled by the hosting server, which can consume storage space and server resources. As the media library grows, this can slow down the website and increase the risk of performance issues.
By offloading media files to Amazon S3, the storage and delivery of those files are handled by the cloud infrastructure rather than the hosting server. This allows the WordPress server to focus on processing the website itself, which can help maintain stable performance even as the amount of media content increases.
Faster Speed and Scalability
Amazon S3 is designed to handle large volumes of data and traffic, making it ideal for websites that frequently upload or serve media files. Instead of relying on limited hosting storage, websites can easily scale their media storage as the site grows, without worrying about server limitations.
This also helps improve loading speed because media files can be delivered from an optimized cloud infrastructure. When combined with a CDN such as CloudFront, visitors can access images and other media from servers closer to their location, reducing latency and improving overall page load times.
Secure and Reliable Storage
Amazon S3 provides a highly secure and reliable storage environment for website media files. Data stored in S3 benefits from Amazon's cloud infrastructure, which includes built-in redundancy and multiple backup layers to ensure files remain accessible even if hardware issues occur.
In addition, S3 offers advanced permission settings and access control, allowing website owners to manage who can access or modify stored media files. This level of reliability and security makes Amazon S3 a trusted solution for managing WordPress media at scale while protecting important website assets.
Why Use WP Media Folder for Amazon S3 Integration?
WP Media Folder is a WordPress plugin designed to improve how media files are organized and managed inside the WordPress media library. Instead of handling hundreds or thousands of files in a single list, the plugin lets users manage media in folders, making it easier for developers, content teams, and agencies to organize large media libraries efficiently.
One of the key capabilities of WP Media Folder is its Amazon S3 integration, which allows websites to automatically offload WordPress media files to an S3 bucket. Once connected, existing media can be transferred to S3, and new uploads will be automatically stored in cloud storage while still appearing in the WordPress media library like regular files.
Some important features of the WP Media Folder Amazon S3 integration include:
- Automatically offload existing and new WordPress media to Amazon S3
- Option to remove media from the server after uploading to S3 to save hosting storage
- Manage S3 buckets directly from the WordPress dashboard
- Restore media from Amazon S3 back to the WordPress media library anytime
- Built-in Amazon CloudFront CDN integration for faster media delivery
With these capabilities, WP Media Folder helps websites take full advantage of Amazon S3 cloud storage while keeping media management simple inside WordPress. This makes it particularly useful for media-heavy websites that need scalable storage and optimized media delivery.
Say goodbye to messy media library.
WP Media Folder lets you categorize files, sync folders with
cloud storage, create amazing galleries and even
replace images without breaking links.
Optimize your media workflow today
Step-by-Step: Connecting Amazon S3 to WP Media Folder
After understanding the benefits of Amazon S3 for WordPress media, the next step is to connect your cloud storage to WordPress. WP Media Folder simplifies this process by allowing you to integrate Amazon S3 directly from the WordPress dashboard, enabling automatic media offloading and cloud-based storage management.
Below is a simplified step-by-step guide to help you integrate Amazon S3 with WP Media Folder.
Prepare Your AWS Environment
Before connecting WordPress to Amazon S3, you first need to prepare your AWS environment by creating an IAM user, generating access keys, and setting up an S3 bucket.
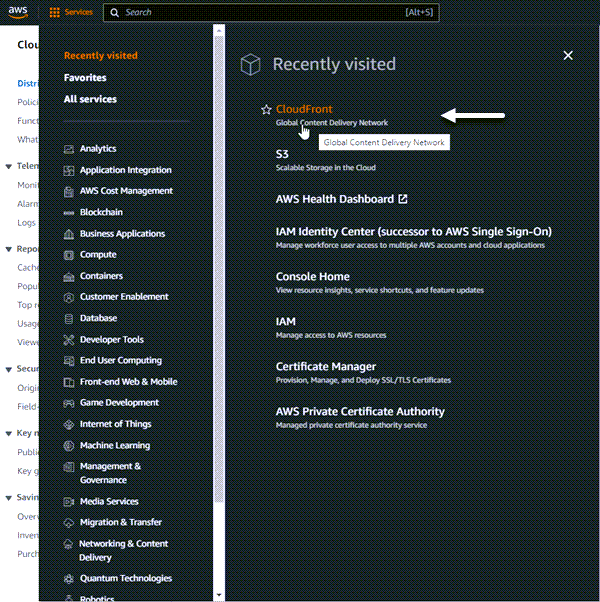
Start by logging in to the AWS Management Console, then navigate to IAM (Identity and Access Management) and create a new user. During the setup, assign permissions by attaching the AmazonS3FullAccess policy so the user can manage S3 buckets and objects.
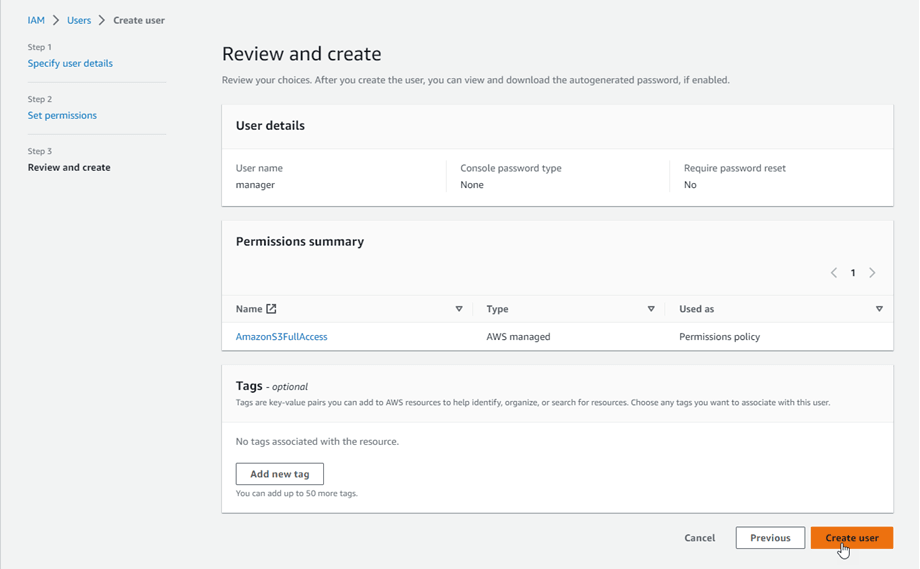
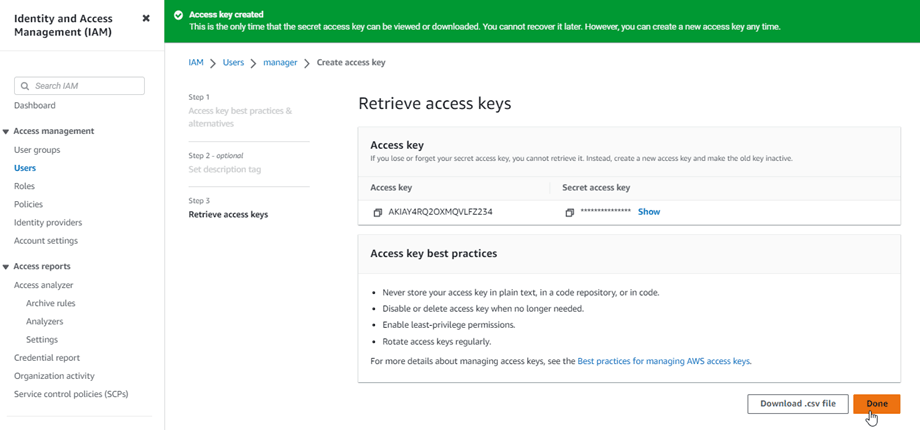
After the user is created, generate an Access Key ID and Secret Access Key from the Security credentials tab. Save these credentials because they will be required when connecting WordPress to Amazon S3.
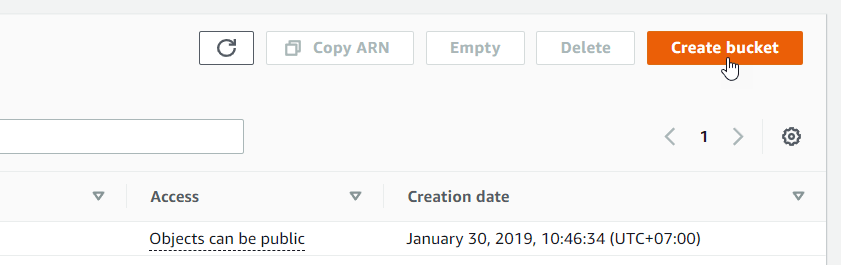
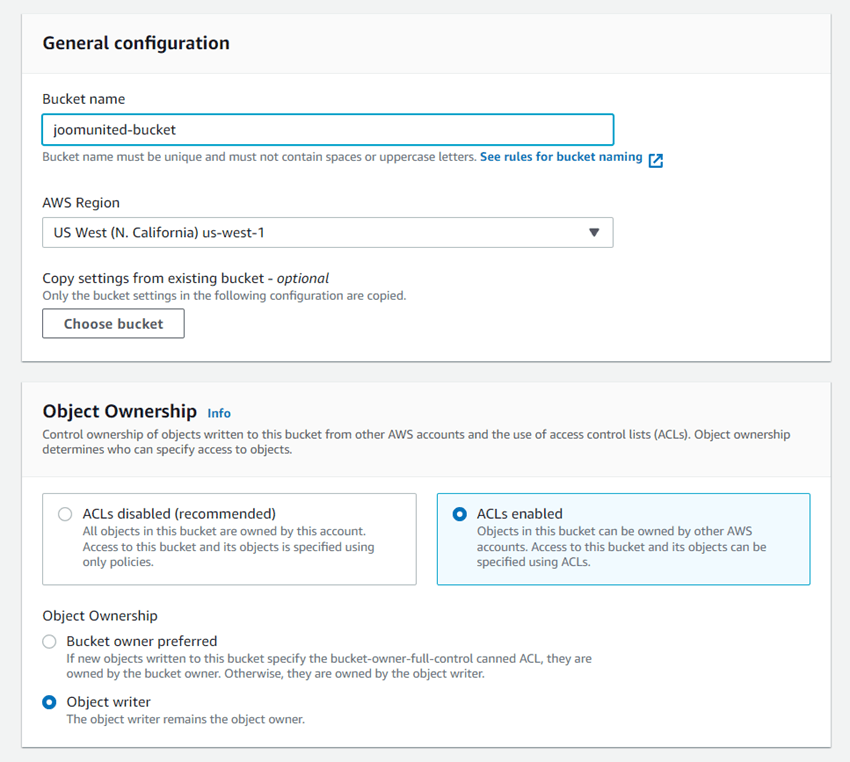
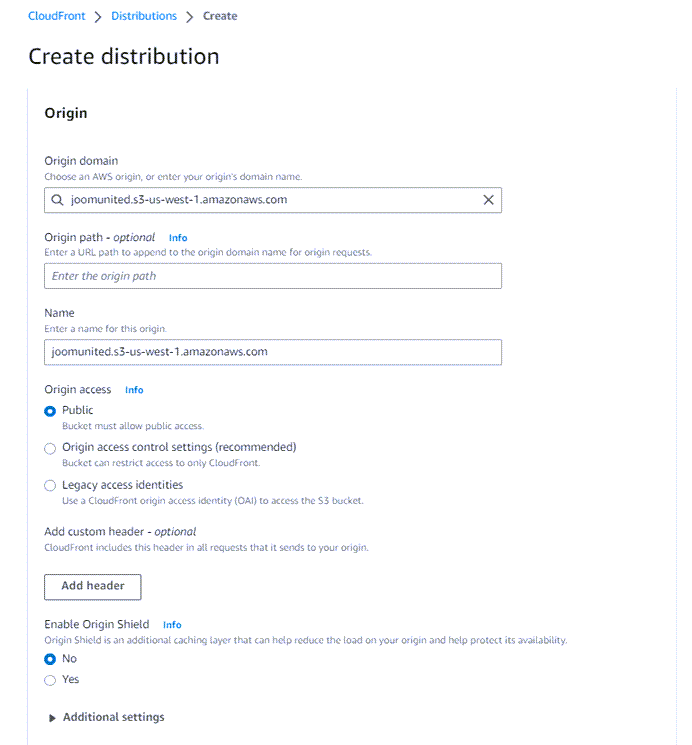
Next, create a new S3 bucket from the Amazon S3 dashboard. To start using Amazon S3, you need to create a new bucket. Go to the S3 bucket page in the AWS console and click the Create bucket button.
In the General configuration section, enter a bucket name and select the preferred AWS region. Then, in the Object Ownership settings, choose ACLs enabled and select Object writer.
Next, locate the Block Public Access settings for this bucket section. Uncheck the Block all public access option and confirm by selecting "I acknowledge that the current settings…" as shown in the example.
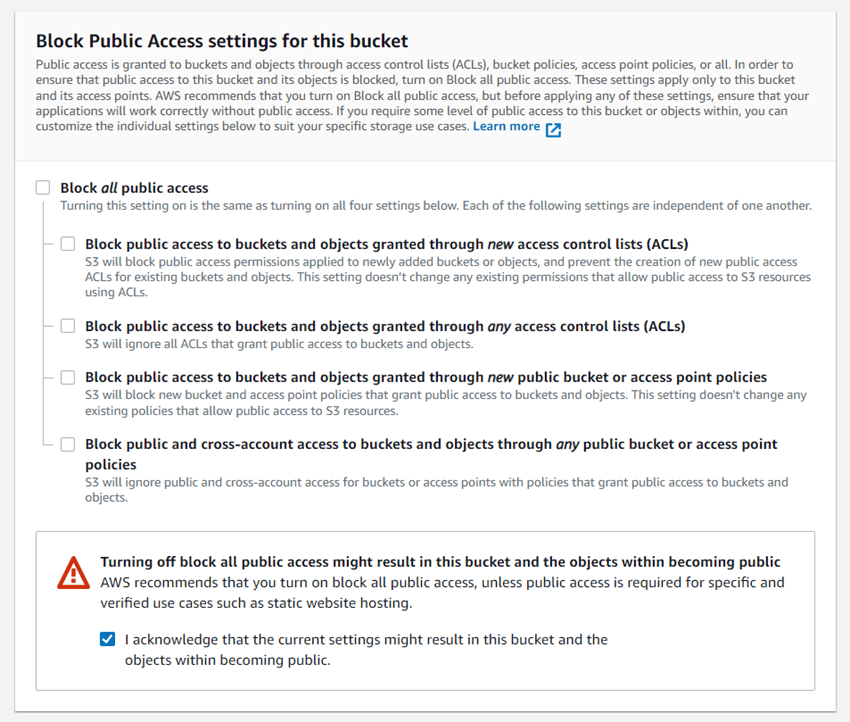
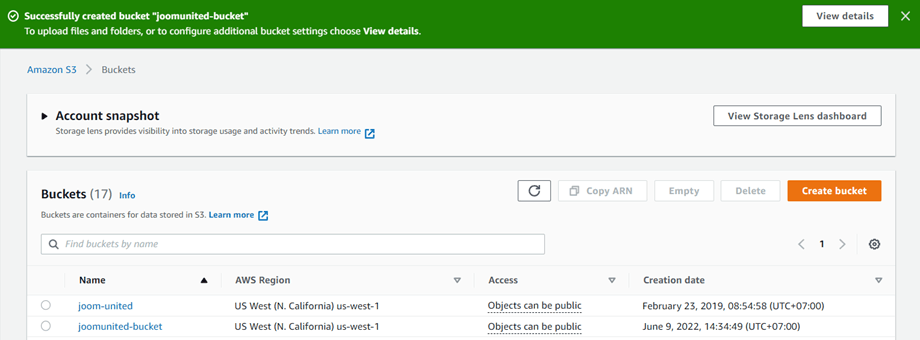
After that, keep the remaining settings at their defaults and click Create bucket. Once completed, the new bucket will be created successfully, and the Access column should indicate that objects can be public.
Connect WP Media Folder to Amazon S3
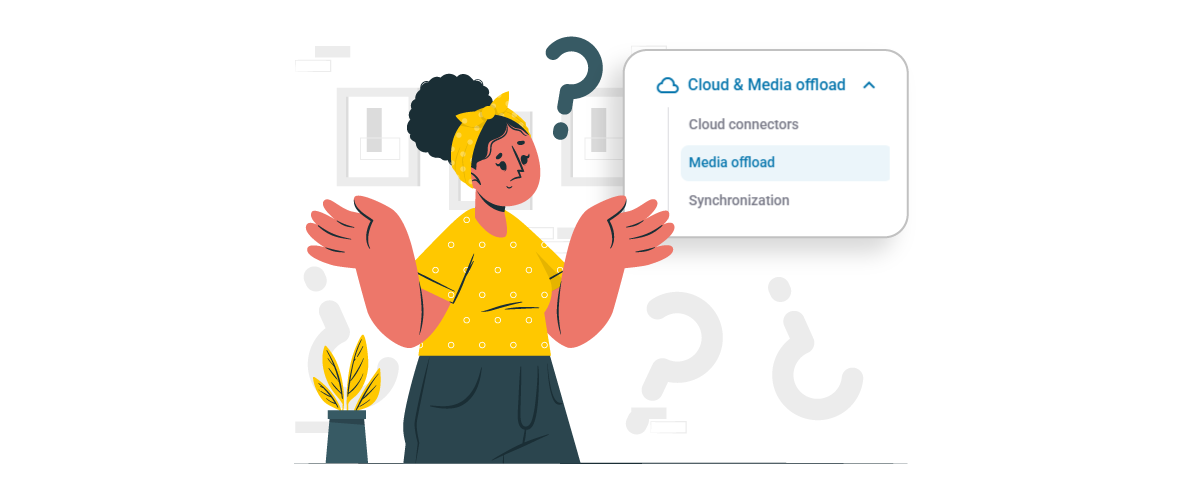
Once your AWS environment is ready, you can connect Amazon S3 to WordPress through WP Media Folder. In your WordPress dashboard, navigate to Settings → WP Media Folder → Cloud & Media Offload → click Amazon S3.
Then paste the Access Key ID and Secret Access Key generated from AWS into the plugin configuration fields and save the settings. If the credentials are correct, the plugin will successfully connect to your Amazon S3 account.
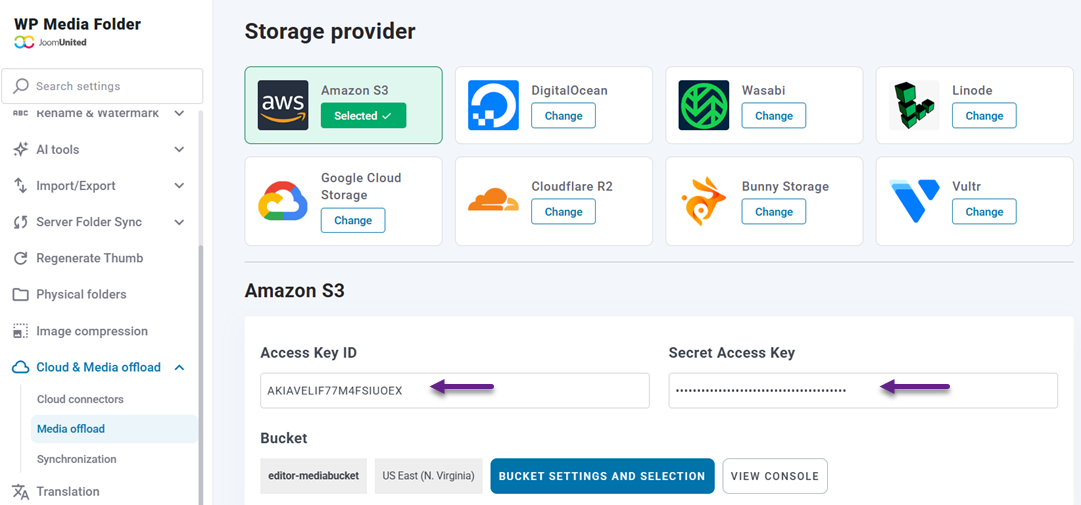
After the connection is established, you can choose an existing bucket or create a new bucket directly from the plugin settings. This bucket will serve as the main storage location for your WordPress media files.

Synchronize Your WordPress to Amazon S3
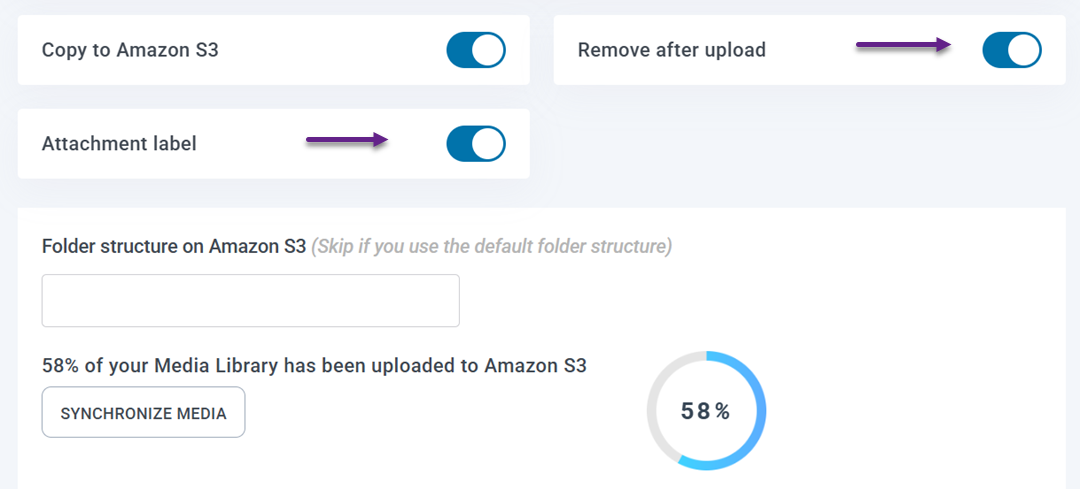
Once the connection is active, you can start transferring your existing WordPress media library to Amazon S3. From the same WP Media Folder settings page, select your bucket and enable the Copy to Amazon S3 option. This setting ensures that every new file uploaded to the WordPress media library will automatically be copied to your S3 bucket.
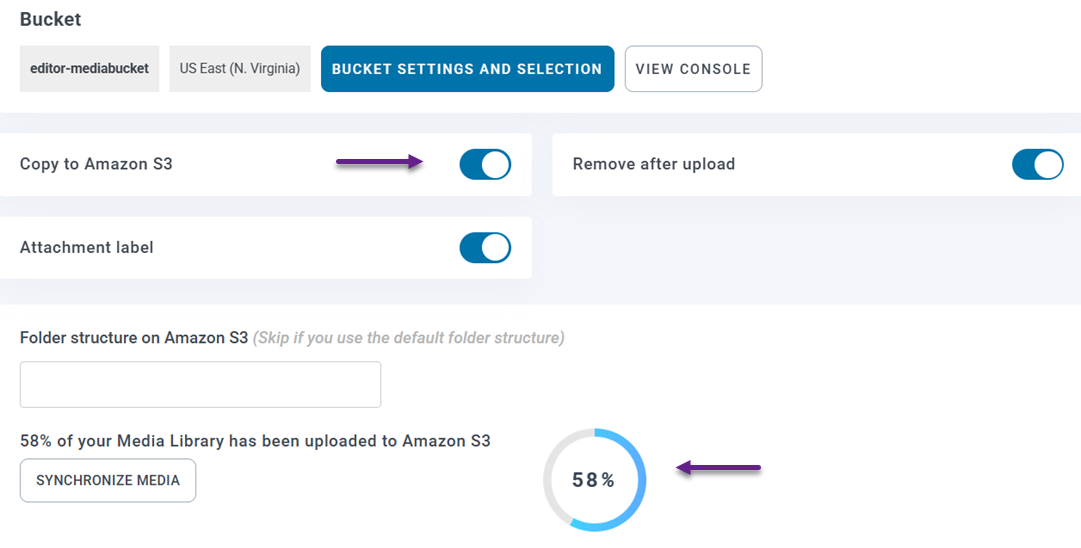
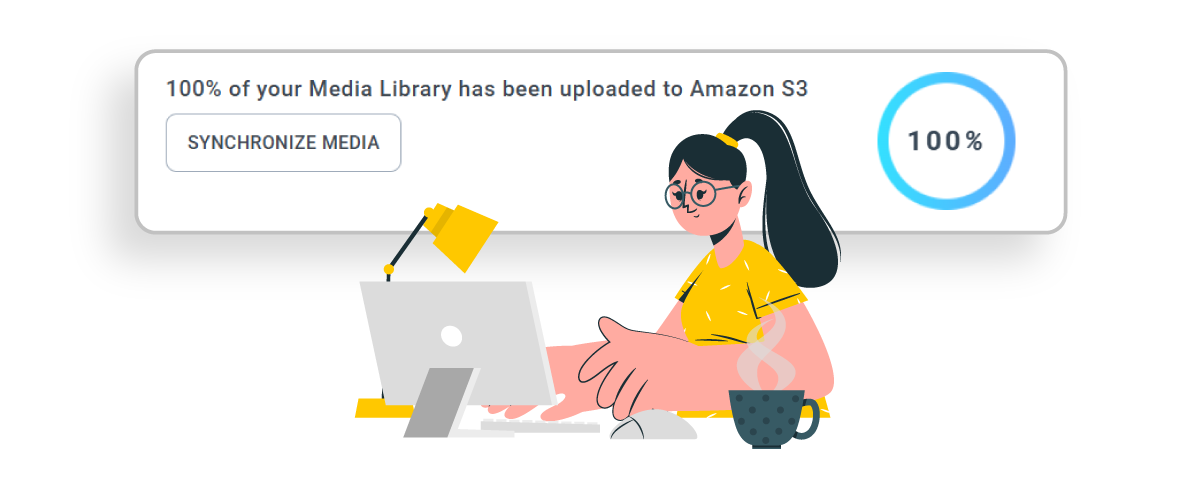
Synchronize Media - How to Connect Amazon S3 Buckets to WP Media Folder for Optimized Cloud Storage. If your site already contains media files, click the Synchronize Media button to upload all existing media files to the S3 bucket. After synchronization, the media URLs will be updated to use the Amazon S3 path instead of the local server path.
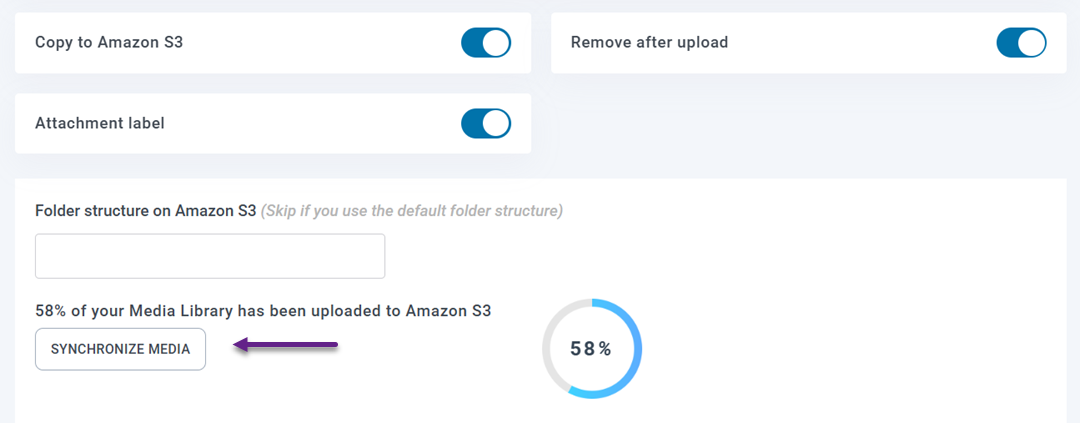
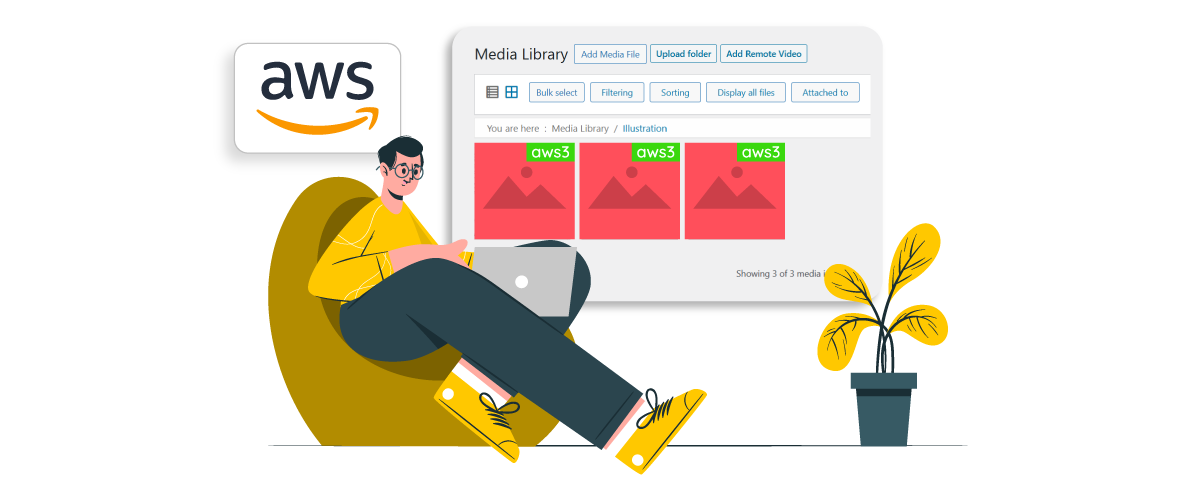
You can also enable the Remove after upload option to store media files only on Amazon S3 and free up space on your hosting server. If the Attachment label option is activated, each media file will display an AWS3 label in the media library, and hovering over it will show information about the file stored in Amazon S3.
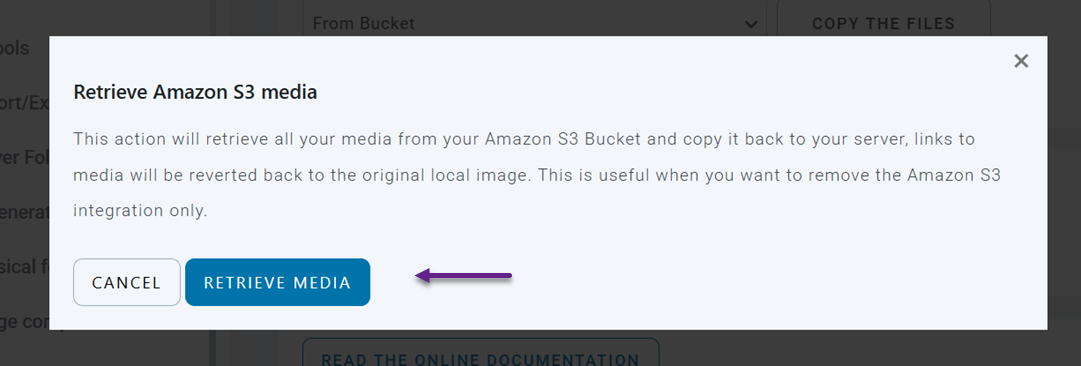
If you later need to move your files back to WordPress, you can use the Retrieve Amazon S3 Media feature. This will copy all media from Amazon S3 back to the WordPress media library while keeping existing links in your posts and pages unchanged.
Configure CloudFront CDN for Media Delivery
To further improve media delivery performance, you can connect your Amazon S3 bucket with Amazon CloudFront, which acts as a global Content Delivery Network (CDN).
Start by opening the CloudFront service in the AWS dashboard and clicking Create Distribution. On the configuration page, set your S3 bucket as the Origin domain, configure the cache behavior settings, and create the distribution.
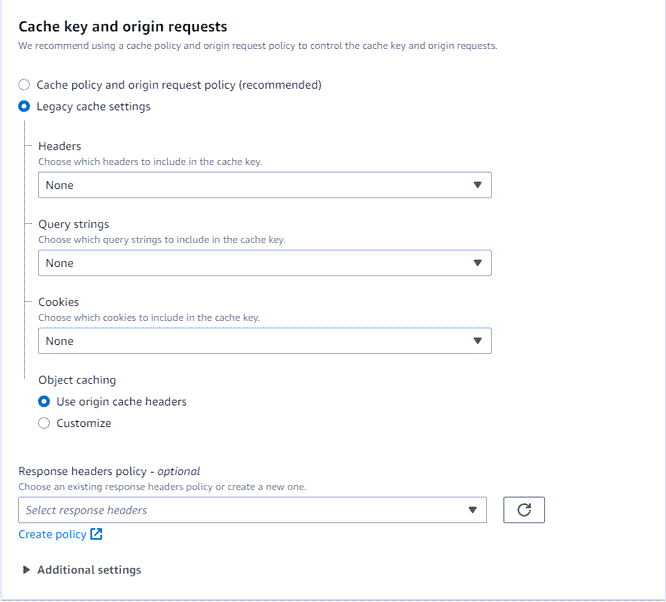
In the default cache behavior section, go to Cache key and origin requests and choose the Legacy cache settings option.
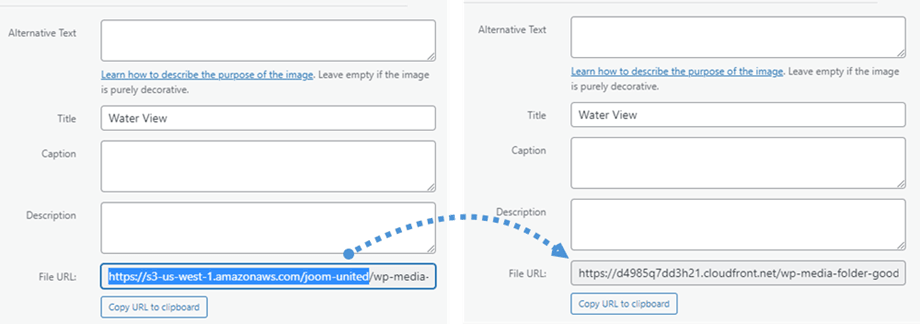
Once the distribution is created, copy the Distribution Domain Name generated by CloudFront. Return to the WP Media Folder Amazon S3 settings and paste this domain into the Custom Domain (CNAME) field.
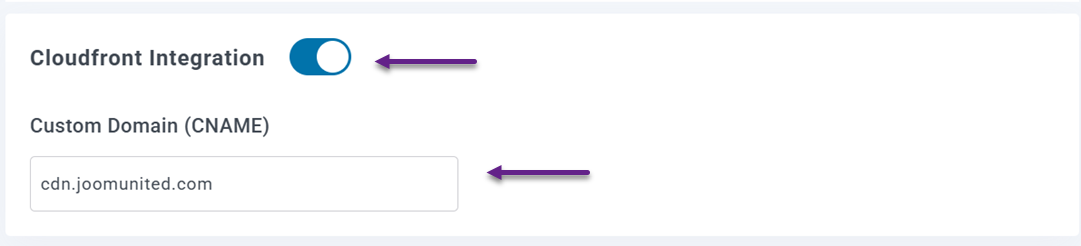
After the configuration is complete and the distribution status changes from Deploying to Active, your media files will start loading through the CDN. This setup ensures faster media delivery by serving cached files from locations closer to your website visitors worldwide.
Best Practices for Managing Media Files in Amazon S3
Using Amazon S3 for WordPress media storage can significantly improve performance and scalability, but properly managing those files is equally important. Applying a few simple practices can help keep your media library organized, maintain fast delivery, and ensure your cloud storage remains efficient as your website grows.
Organize Media with Clear Folders
Keeping your media files organized with a clear folder structure makes it easier to manage large numbers of files stored in Amazon S3. Without proper organization, media assets can quickly become difficult to locate, especially for websites that frequently upload images, videos, or documents.
Creating folders based on categories such as year, project, content type, or website sections can simplify file management. This structure helps developers, content teams, and agencies quickly find and manage media files while maintaining a clean and structured storage system.
Use CDN for Faster Delivery
While Amazon S3 provides reliable storage, combining it with a Content Delivery Network (CDN) can significantly improve the speed at which media files are delivered to visitors. A CDN distributes cached versions of files across multiple servers located in different regions around the world.
When someone visits your website, the CDN serves the media from the closest server location instead of retrieving it directly from the main storage. This reduces latency and improves loading times, especially for international audiences accessing your website from different geographic regions.
Optimize Images Before Uploading
Even with cloud storage, uploading large, unoptimized images can still affect website performance. Oversized images increase file sizes, which means browsers need more time to download and display them on the page.
Optimizing images before uploading them to Amazon S3 helps reduce file sizes without sacrificing visual quality. Using appropriate image dimensions, compression tools, and modern formats can reduce media file sizes, improving loading speed and creating a smoother experience for website visitors.
Calling all webmasters!
Save time and boost productivity with WP Media Folder. Effortlessly organize client media
files, create custom
galleries, and provide a seamless user experience.
Upgrade your website projects now!
Conclusion
Connecting cloud storage to WordPress is an effective way to handle growing media libraries while maintaining strong website performance. By learning how to connect Amazon S3 buckets to WP Media Folder for optimized cloud storage, you can offload media files from your server, reduce hosting limitations, and deliver images or files more efficiently through scalable cloud infrastructure and CDN support.
If you manage media-heavy websites or performance-critical projects, using WP Media Folder with Amazon S3 integration can simplify media management while improving speed and reliability. Explore the WP Media Folder to start offloading your WordPress media to the cloud and optimize how your website stores and delivers media files.
When you subscribe to the blog, we will send you an e-mail when there are new updates on the site so you wouldn't miss them.


Comments