How to Add Tables in WordPress Posts and Pages (No HTML Required)

Add tables to your WordPress posts and pages easily using the built-in block editor or powerful plugins designed for beginners and professionals alike. Tables help organize information clearly, making it easier for readers to compare data, view pricing plans, or understand detailed content without confusion.
In this article, you'll learn how to add and customize WordPress tables using the default editor and table plugins. You'll also find useful tips on creating responsive, well-styled tables that enhance readability and fit seamlessly with your website's overall design.
- Tables make complex information easy to read and visually appealing, allowing visitors to quickly digest data, compare options, and grasp essential details without scrolling through long paragraphs.
- With WordPress's built-in Table block or plugins, anyone can create organized, responsive tables—no coding required—making content management simpler for businesses, bloggers, and educators.
- Using tables improves overall user experience and helps boost engagement and trust, whether you're presenting pricing, comparison, product lists, or research findings on your WordPress site.
Table of content
Why Should You Include Tables in Your WordPress Posts and Pages?
Using tables in your WordPress posts and pages is a simple yet powerful way to present information in a structured and visually clear format. They help transform long paragraphs into easy-to-scan sections, improving readability and user engagement.
- Organize information effectively: Tables allow you to present data, comparisons, or lists in a clean and systematic layout, making it easier for readers to understand.
- Enhance readability: Readers can quickly scan rows and columns to find the necessary details instead of navigating through lengthy text.
- Improve user experience: A well-designed table makes your content look neat and professional while helping users access key information faster.
- Boost engagement: By presenting complex information in a visually appealing way, tables keep readers interested and make your page look more polished.
Recommended WordPress Table Plugins for Adding Tables

While the default block editor lets you create simple tables, using a dedicated WordPress table plugin can make the process much more flexible and efficient. These plugins offer advanced customization, responsive design options, and intuitive interfaces that help you easily manage data, perfect for anyone who wants to present information professionally.
1. WP Table Manager
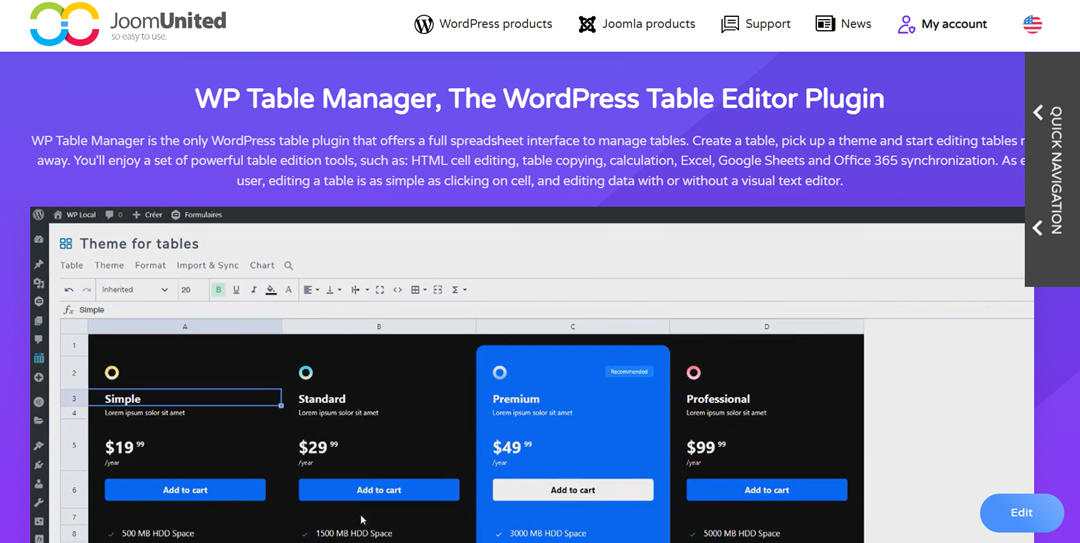
WP Table Manager is a feature-rich plugin that combines WordPress's simplicity with the functionality of a spreadsheet. It allows you to organize, edit, and style tables through a drag-and-drop interface similar to Excel. You can also apply custom themes, edit HTML cells, perform calculations, and even synchronize data with Google Sheets or Office 365.
Key Features:
- Spreadsheet-like interface for easy table editing
- Sorting, filtering, and pagination options
- Integration with popular page builders and plugins
- Import and export in multiple formats (Excel, CSV, etc.)
WP Table Manager stands out for its versatility and ease of use, making it ideal for anyone managing dynamic data tables—from pricing charts to complex product comparisons.
Looking for a robust table management solution for client websites?
From pricing tables to product comparisons, this plugin offers powerful features to present
data in a clear and
user-friendly manner.
Get the competitive edge now!
2. TablePress

TablePress is one of the most popular free plugins for adding tables in WordPress, trusted by hundreds of thousands of users. It offers a spreadsheet-style interface that feels familiar, especially for those used to working with Excel. With TablePress, you can easily import or export data, apply sorting and filtering, and even include formulas for automatic calculations.
Key Features:
- Responsive table layouts
- Import/export support for CSV, HTML, and JSON files
- Sorting, filtering, and pagination tools for large datasets
- Merge, split, and duplicate cells for flexible formatting
What makes TablePress appealing is its balance between simplicity and power, it's free, beginner-friendly, and suitable for any site that needs clean, organized data presentation.
3. WP Table Builder
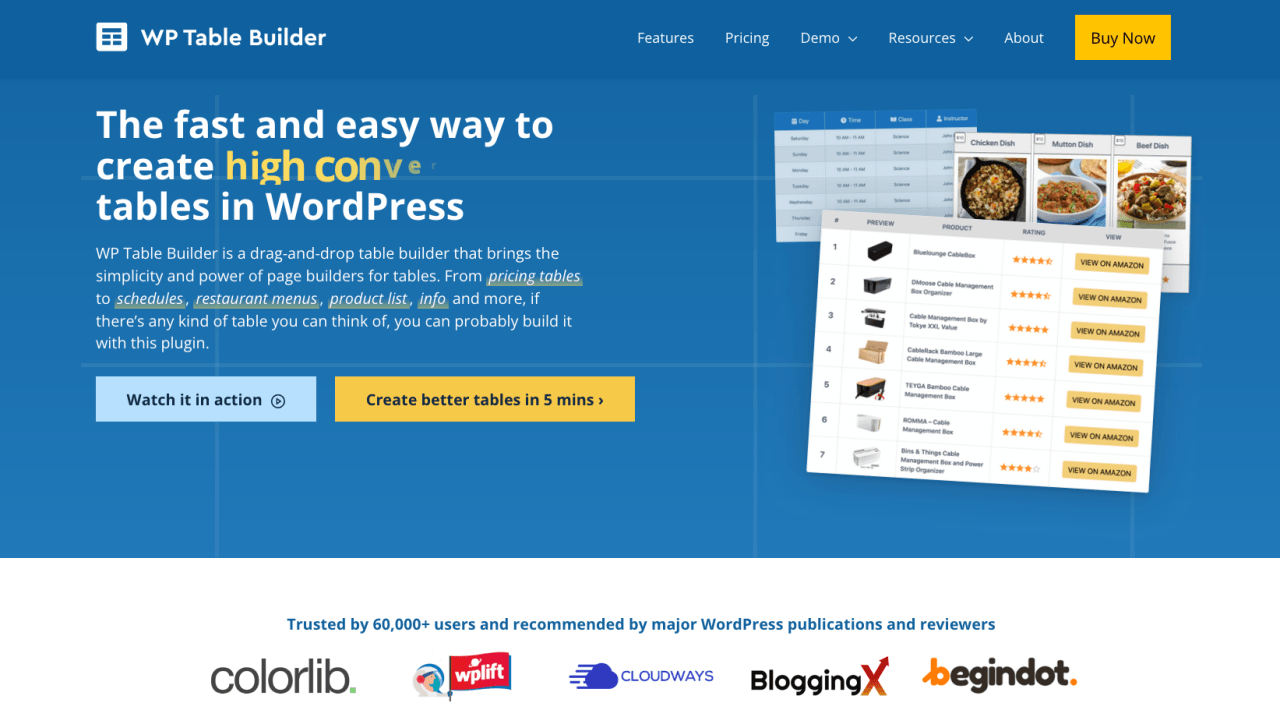
WP Table Builder is an intuitive WordPress plugin designed for users who want to create responsive and visually appealing tables without any coding skills. With its drag-and-drop interface, you can easily build and customize tables that fit perfectly into your website's design. Whether you're making pricing tables, product comparisons, schedules, or restaurant menus, this plugin offers the flexibility to do it all effortlessly.
Key Features:
- Fully responsive tables that adapt to any device
- Drag-and-drop builder for easy table creation
- Customizable colors, borders, and typography
- Compatible with major page builders like Elementor and Beaver Builder
WP Table Builder stands out for its simplicity and creative freedom. You can add various elements such as text, buttons, images, icons, and even progress bars to make your tables more engaging.
How to Add Tables in WordPress Posts and Pages

Adding tables to your WordPress posts and pages is a great way to organize and display data clearly. Here's a simple guide to help you create and customize tables directly within WordPress.
Adding Tables Using the Default Block Editor
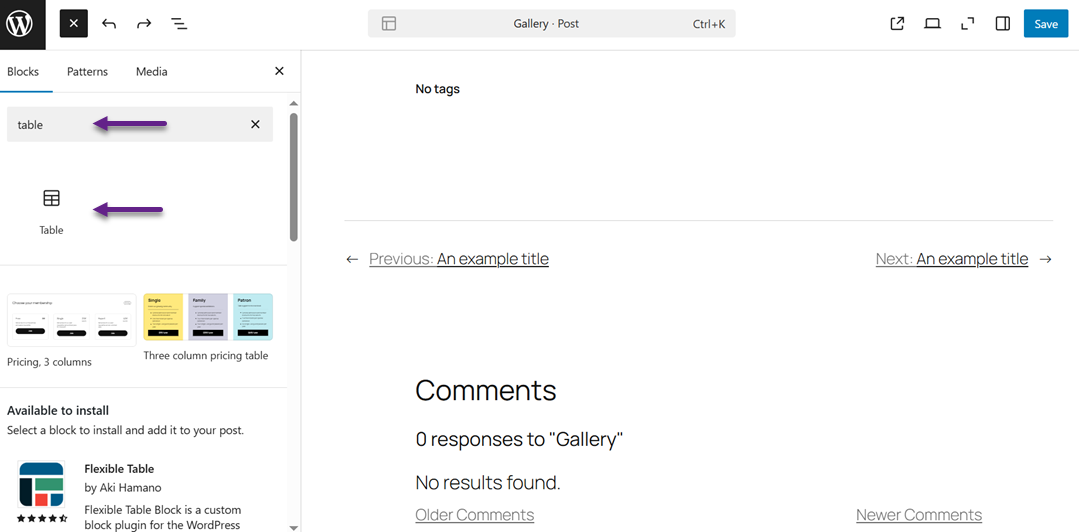
WordPress makes it incredibly simple to add tables using its built-in block editor. To get started, create a new post or page, or edit an existing one. Inside the editor, click the "+" button to insert a new block, then search for and select the Table block.
You'll then be asked to set the number of rows and columns. The default option is 2×2, but you can adjust the size later by adding or removing rows and columns.
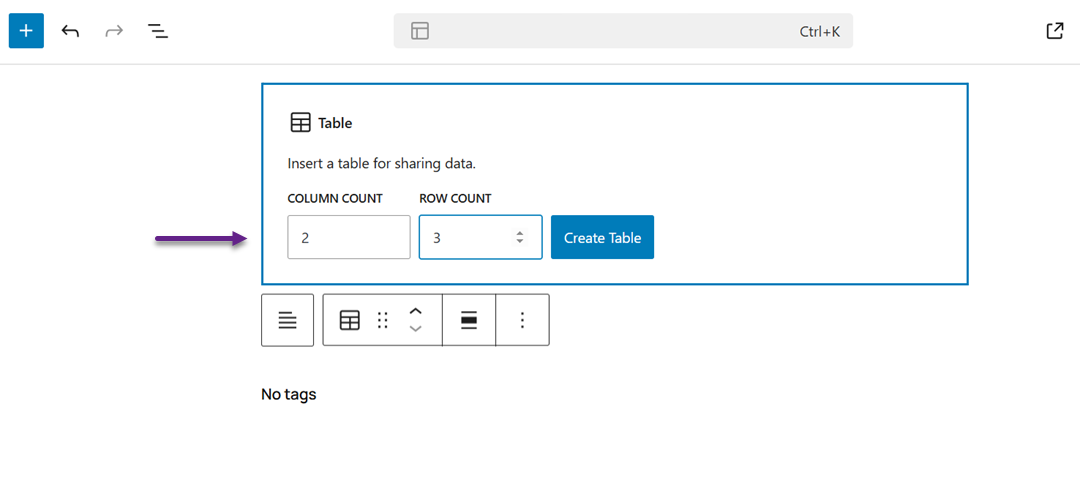
Once you click Create Table, WordPress will instantly generate a table you can edit directly in the content area.
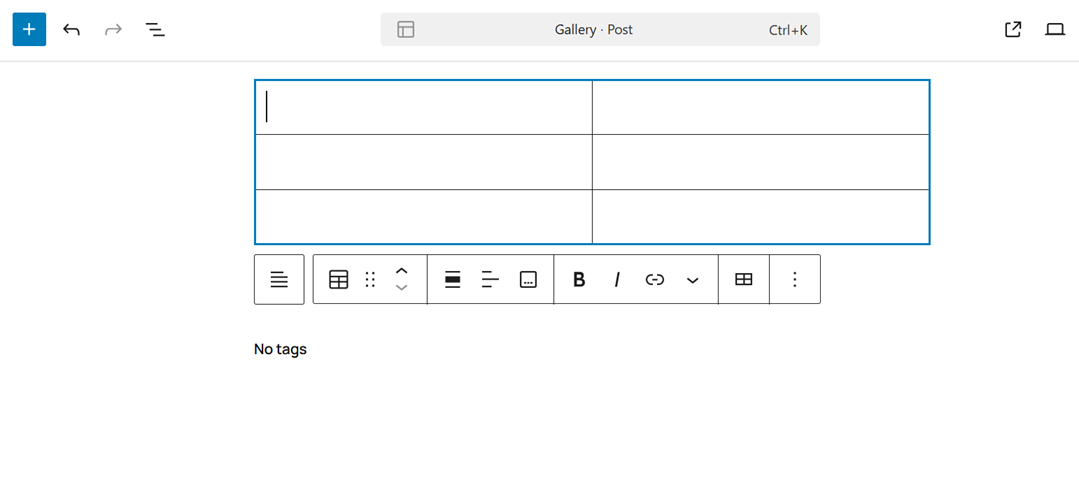
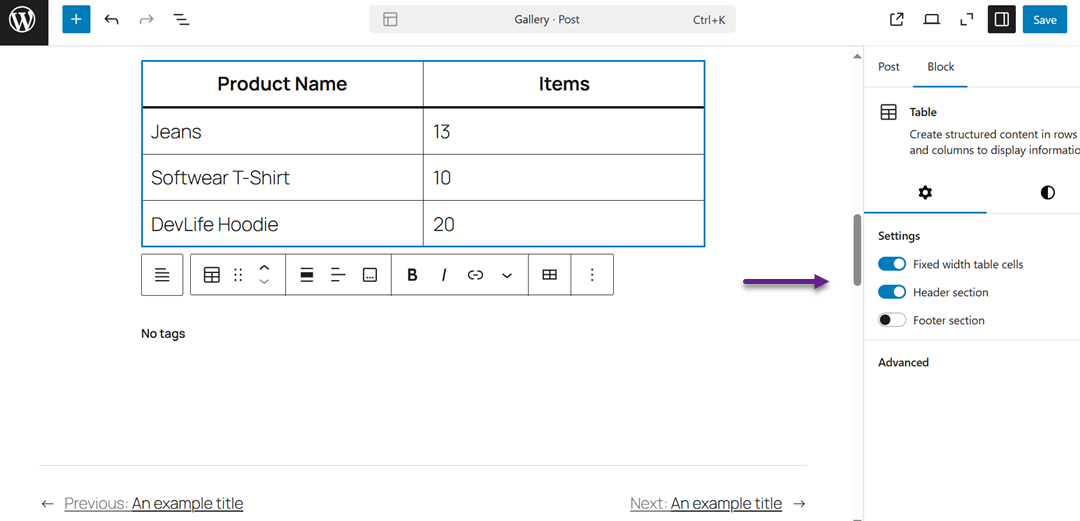
Each table cell automatically resizes based on the amount of text you enter, though you can set a fixed width in the settings panel if you prefer. Here, you can also enable table headers and footers, which are highly recommended for accessibility since they help screen readers interpret your data correctly.
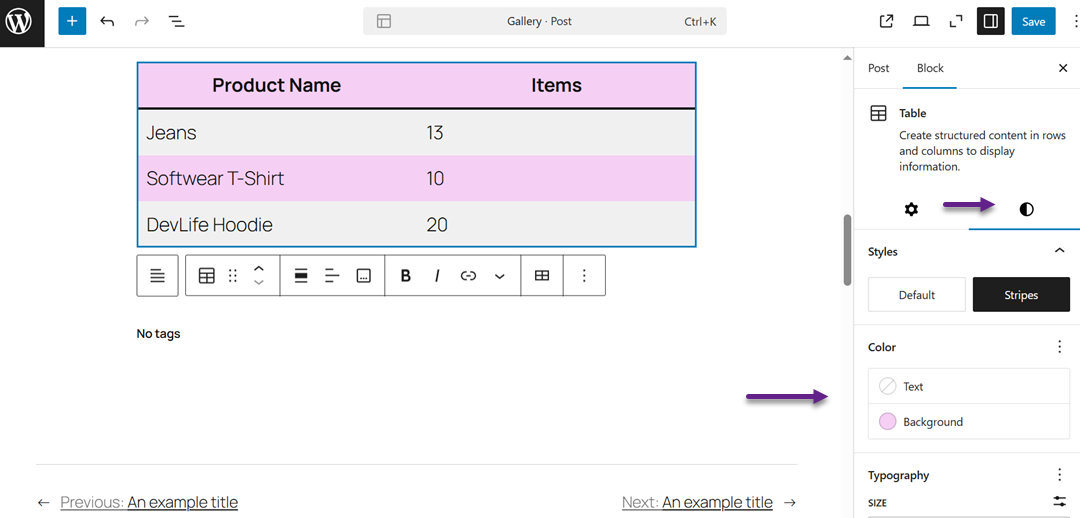
From the Style tab on the right panel, you can customize your table's design by choosing background colors, text colors, or applying preset styles offered by your WordPress theme.
If you want to add or remove a column or row, simply click on the table, choose the Edit Table option, and use the menu to modify its layout.
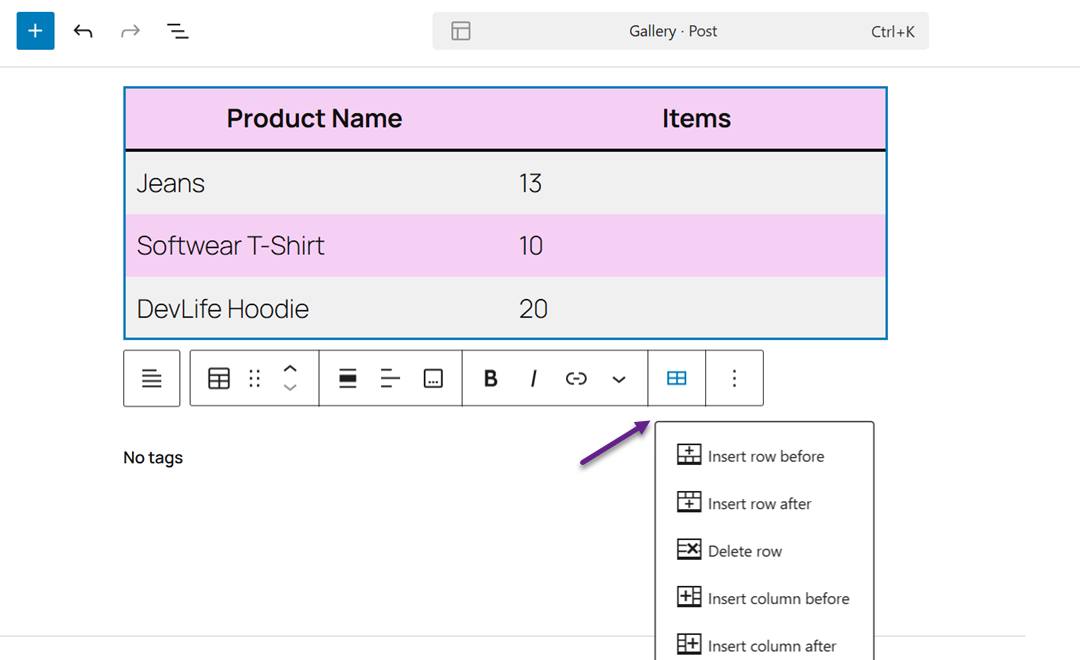
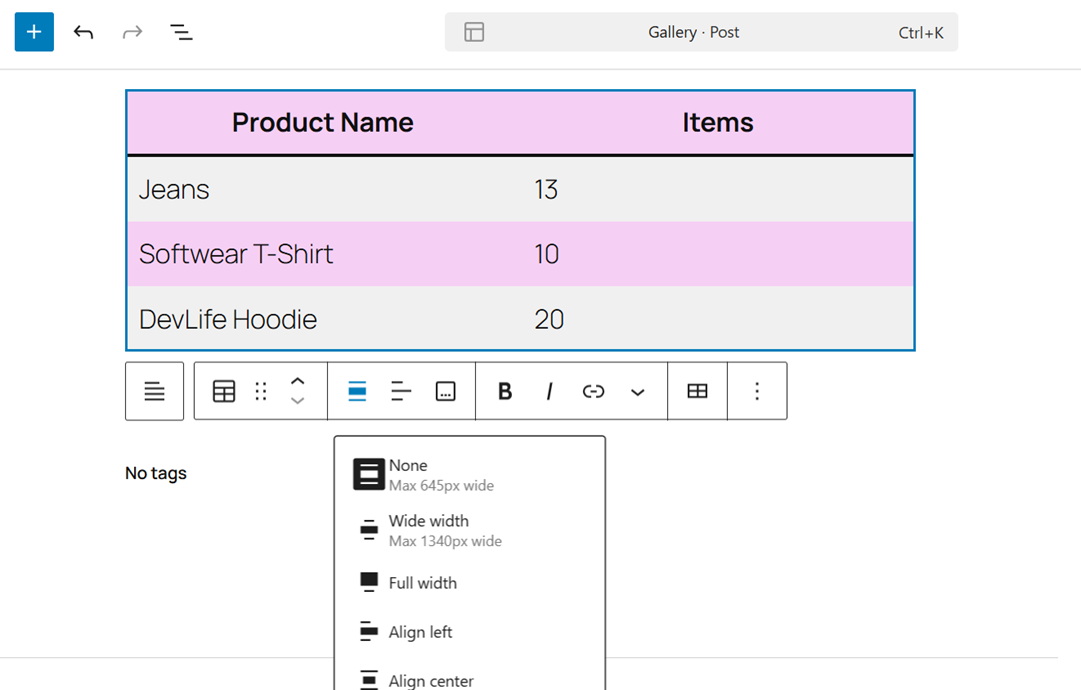
By default, your table's text aligns to the left, but you can easily change alignment within a column or the entire table using the alignment options in the toolbar.
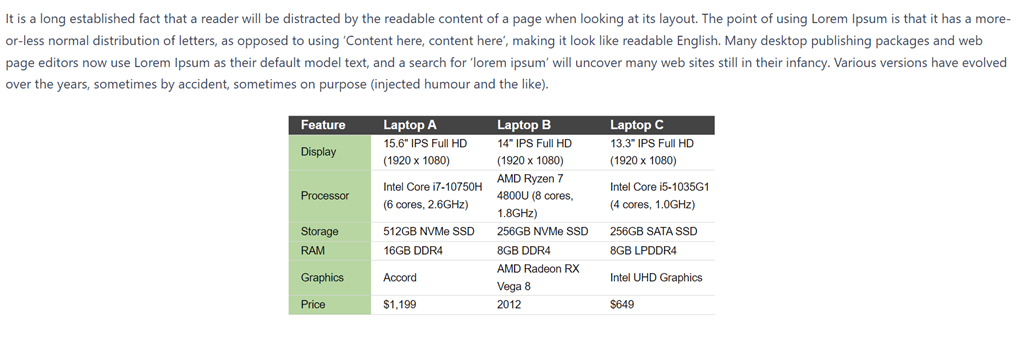
Preview your post before publishing and here is a preview of the table that has been created.
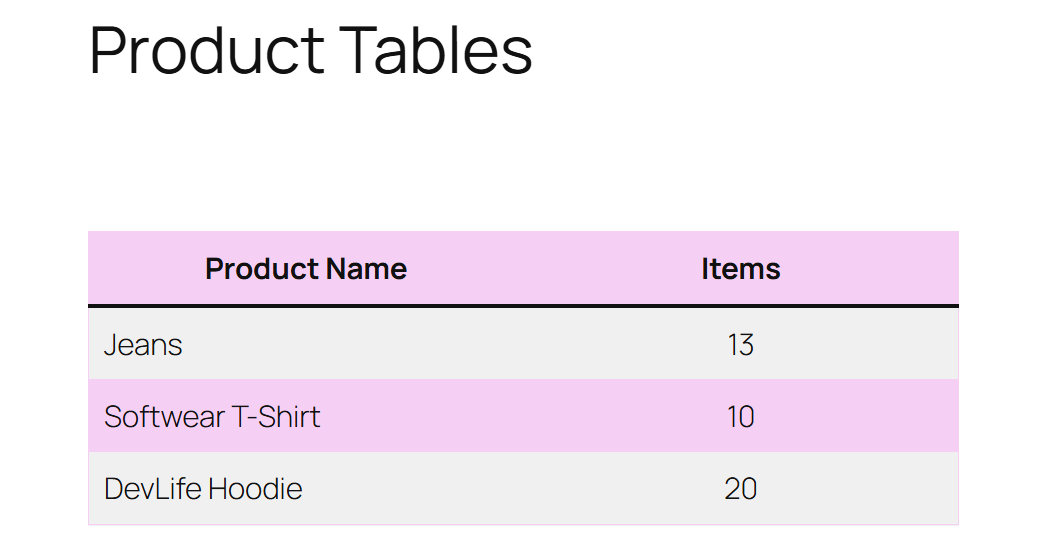
The Gutenberg table block allows you to display structured data in WordPress with flexibility and ease of use. However, it lacks advanced capabilities such as filtering, sorting, or reusing tables across multiple pages, which is where dedicated plugins like WP Table Manager can offer more powerful and time-saving options.
Adding Tables Using the WP Table Manager
WP Table Manager is a powerful and user-friendly WordPress plugin to help you easily create, edit, and manage tables directly within your website. It offers a wide range of customization features, making it suitable for beginners and advanced users with different experience levels. Thanks to its versatility and integrations, it's one of the best tools for effortlessly building professional product comparison pages.
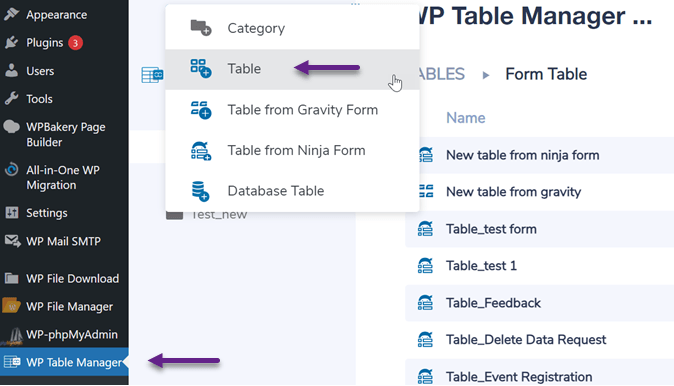
To get started, install WP Table Manager on your WordPress site. After uploading and activating the plugin, you can create a new table by navigating to WP Table Manager > Create New > Table.
Click Theme > Theme Selection.
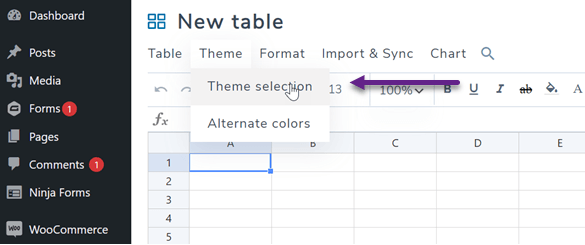
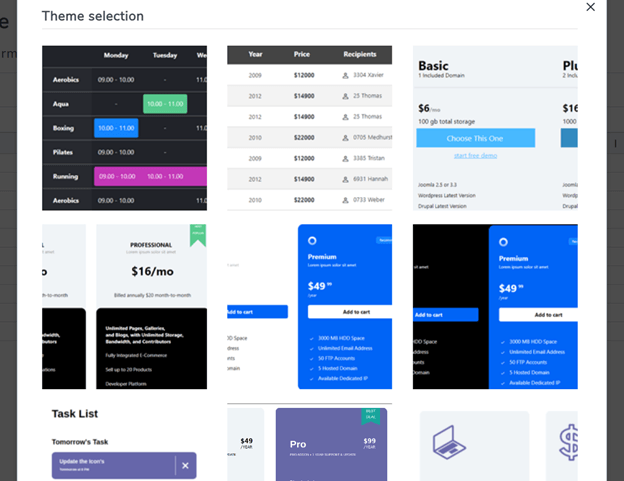
You'll then see several theme options, allowing you to match your table's design to your website's style.
Once your table is created, customize it using the built-in editor, which closely resembles Excel. You can easily add, delete, or merge rows and columns.
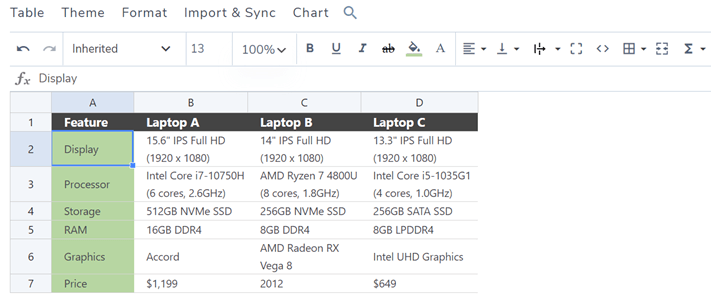
Multiple tabs in the editor offer different functions:
- Table (rename, insert shortcode, export)
- Theme (change colors and themes)
- Format (sorting, filtering, pagination, custom CSS)
- Import & Sync (connect with Google Sheets or Excel)
- Chart (generate visual graphs from your data).
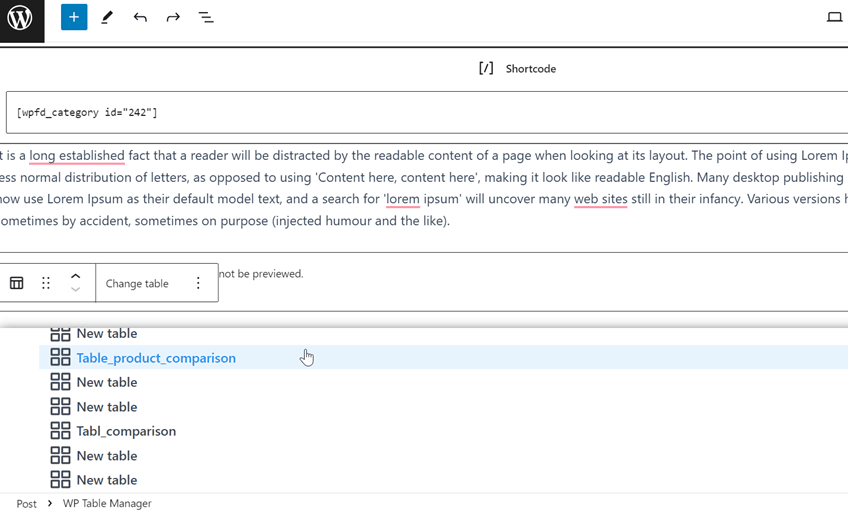
After finalizing your table, name it and save your progress. To insert it into a post or page, click the plus icon in the WordPress editor, select WP Table Manager.
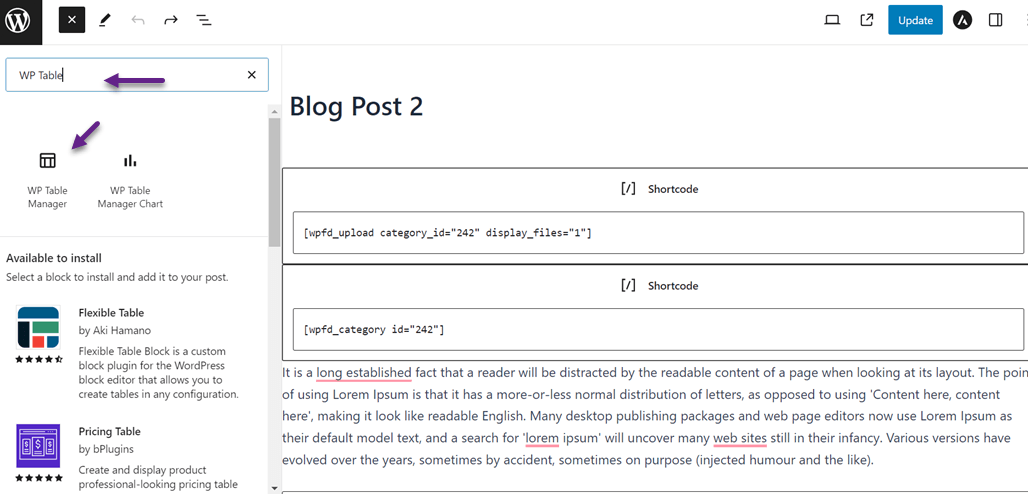
Then choose your table.
Once updated, your product comparison table will appear directly in your article.
Tips for Making Tables Responsive

Responsive tables ensure your content looks great and functions well on any device, from desktops to smartphones. A responsive design prevents users from needing to scroll horizontally or zoom in to read information, keeping your layout clean and user-friendly.
1. Use a plugin with built-in responsiveness
A WordPress plugin with built-in responsive features helps your tables adjust automatically to different screen sizes. Tools like WP Table Manager and TablePress make creating mobile-friendly layouts that collapse or stack columns easy for better readability.
This approach saves time and eliminates the need for manual CSS editing. It's ideal for websites displaying complex information, such as product comparisons or pricing lists, that must remain clear across all devices.
2. Enable scrollable tables for mobile devices
When your table has many columns, enabling horizontal scrolling ensures the layout remains organized on mobile. Users can swipe to see all data without zooming or shrinking text, keeping the design clean and functional.
This technique is perfect for large datasets where hiding columns isn't possible. It allows users to explore all content easily while maintaining a smooth mobile browsing experience.
3. Prioritize important columns
On smaller screens, not every column is equally important. Hide secondary data and focus only on key information so readers can quickly understand what matters most.
This not only improves readability but also keeps the design simple and efficient. The result is a clean, lightweight, and user-friendly table on any device.
4. Test across different devices
Always preview your tables on multiple devices before publishing. Testing helps detect layout issues or spacing problems that may not appear on desktop views.
Adjust font sizes, borders, and padding to ensure the table remains visually consistent. A quick round of testing can make a big difference in delivering a polished, professional look.
Styling Tips for Visually Appealing Tables
A well-styled table doesn't just present data, it enhances your website's overall look. Thoughtful design choices can make your tables more engaging and help readers digest information faster.
1. Apply alternating row colors
Using alternating colors for rows helps readers distinguish one line from another. This "zebra striping" effect makes scanning large tables easier and less tiring for the eyes.
Choose subtle tones that match your website's color palette. This keeps the table clean and visually engaging without drawing too much attention away from the data.
2. Use consistent fonts and alignment
Keeping fonts consistent with your site's typography ensures harmony across all elements. Align text to the left and numbers to the right to improve readability and comparison.
Consistency in font size and spacing also adds professionalism. It gives your tables a structured, organized appearance that complements the rest of your layout.
3. Add subtle borders and padding
Light borders help separate cells and define data clearly without making the table look heavy. Use soft gray lines or thin outlines for a modern feel. Proper padding prevents text from sticking to cell edges. This balance keeps your table neat, spacious, and comfortable to read.
4. Highlight key data with color or bold text
Emphasize important data points using bold text or subtle accent colors. This draws the reader's attention to the most relevant figures instantly.
Highlighting helps users grasp key information faster. It also adds visual hierarchy, making your tables look dynamic and easy to navigate.
Calling all webmasters!
Enhance your client websites with WP Table Manager. Easily manage and customize tables, charts,
and spreadsheets,
providing clients with dynamic and engaging data visualizations.
Upgrade your web design services today!
Conclusion
Add tables to your WordPress posts and pages to organize and make information readable and visually appealing. Tables help present complex data clearly, improving user experience across all devices. With the right approach, such as responsive design and proper styling, your tables can look professional while keeping readers engaged.
WP Table Manager is an excellent choice for those who want an easier and more efficient way to manage tables. Its spreadsheet-like interface, responsive features, and deep customization options make creating beautiful, functional tables effortless, perfect for any website that values design and usability.
When you subscribe to the blog, we will send you an e-mail when there are new updates on the site so you wouldn't miss them.


Comments