WP Media Folder Addon: Amazon S3 Integration
1. Login to Amazon S3 from WP Media Folder
Return to the WordPress dashboard and click on the menu Settings > WP Media Folder > Cloud > Offload Media > Amazon S3. Paste the following into the form fields:
- Access Key ID
- Secret Access Key
After that, save the settings and the connection should be a success. Please go to the next step to discover AWS S3 features.
2. How does it work? What can I do with Amazon S3?
How does it work?
Once you've connected WP Media Folder with Amazon S3, please select a bucket or create a new one where all your data will be stored.
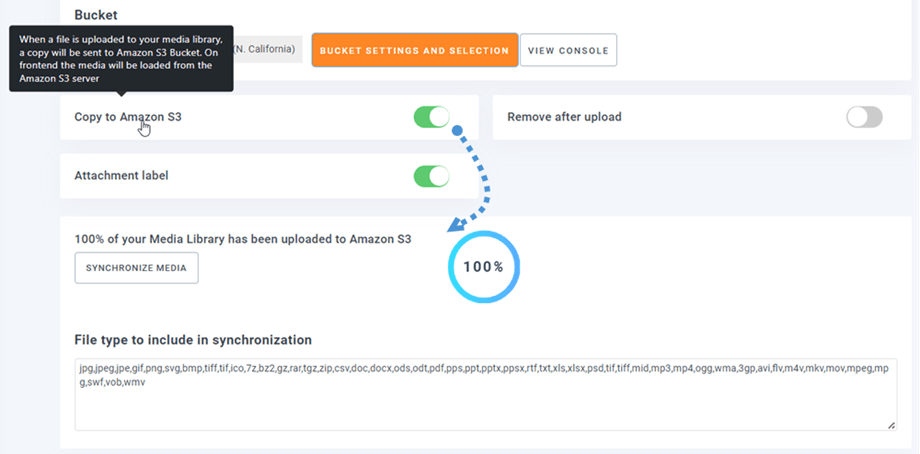
You can enable Copy to Amazon S3 option, and all your new media uploaded will be sent to Amazon S3.
If you want to sync your uploaded media before using Amazon S3 integration, click on Synchronize Media button. Then it will send all your existing media library to your S3 bucket.
Folder structure on Amazon S3: Enter custom path for where offloaded files will be stored in your S3 bucket.
In order to offload the media on your site, you should enable Remove after upload option, your media library will be completely stored on Amazon S3 instead of your server.
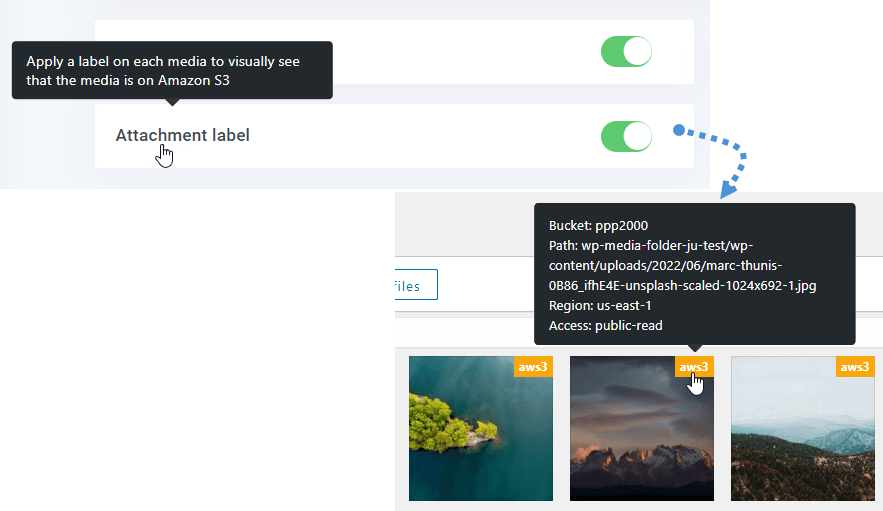
By enabling Attachment label option, the information on each media will be displayed when you hover on the aws3 label on the top right.
When you want to change your media location or remove the plugin, click on Retrieve Amazon S3 Media button, then all your media will be copied from Amazon to your media library. All former link added in your content will remain in place (no broken link).
How to connect CloudFront?
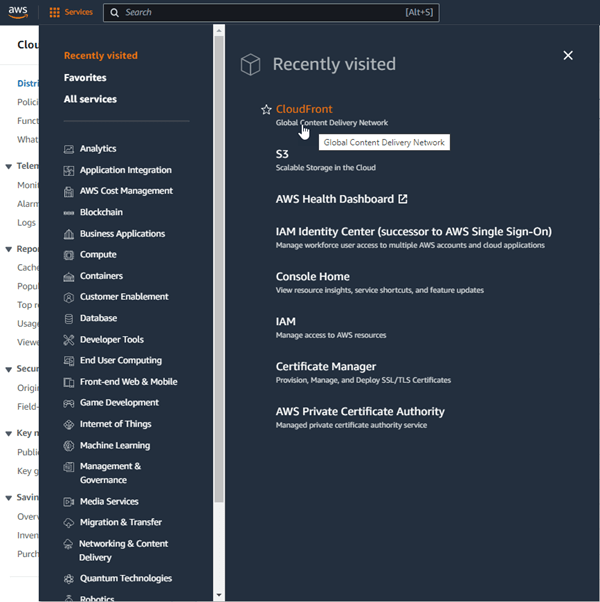
Cloudfront is integrated with our plugin. In order to create a custom domain (CNAME), firstly, at the Amazon dashboard, navigate to Services > CloudFront or go to this link.
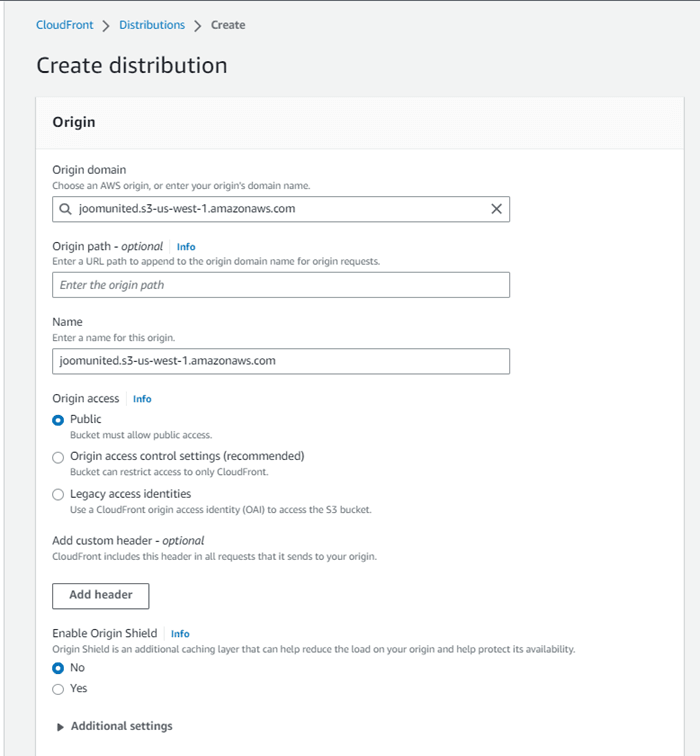
From here, click on Create Distribution button in the right corner.
Then paste your domain on the Origin domain field. If your domain is: "https://s3-us-west-1.amazonaws.com/joom-united" please switch to "https://joom-united.s3-us-west-1.amazonaws.com"
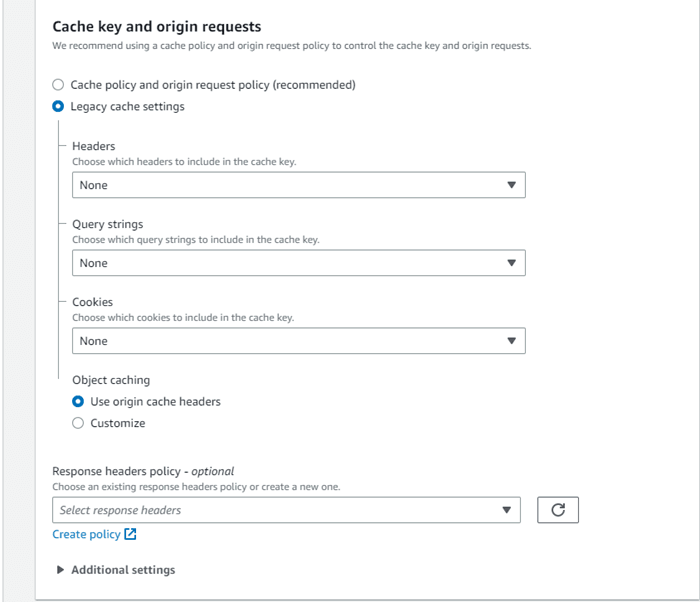
At Default cache behaviour > Cache key and origin requests section, select Legacy cache settings option. After all, scroll down to the bottom and click on Create Distribution button.
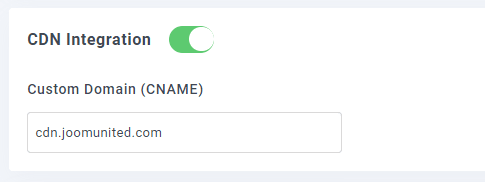
Then it turns to Distribution details, copy the distribution domain name. And go to Amazon setting in WP Media Folder, and paste it to the Custom Domain (CNAME) field.
Please wait for a few minutes for the image to load fully when the Last modified field change from "Deploying" to the current date time.
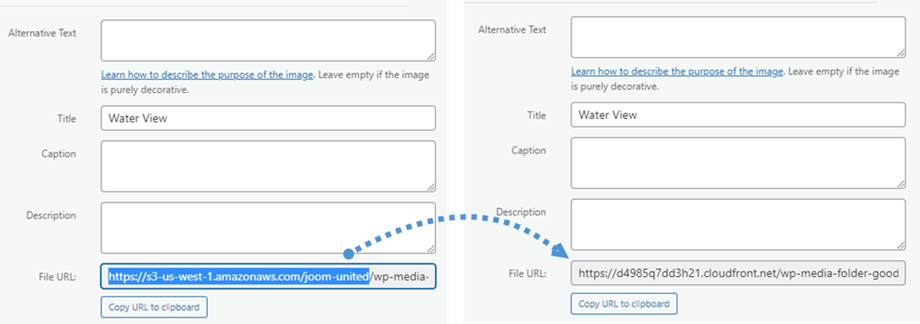
Finally, you can see the changes in File URL field in each image.
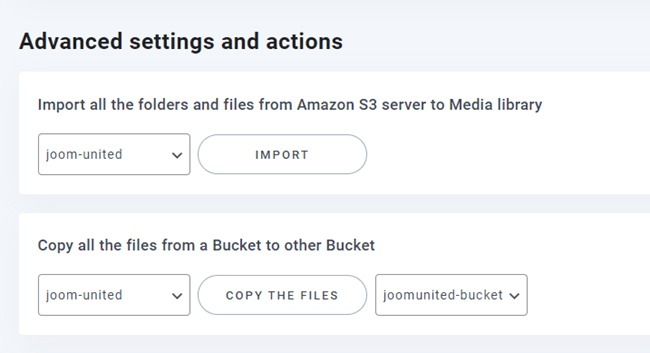
Advanced settings and actions
You can select a bucket to import folders and files from S3 server to your Media library. Or copy all files from one bucket to another one.
3. Create an IAM User
The Amazon S3 integration with WP Media Folder is included in the Add-on. You need to install this add-on (plugin) in addition to WP Media Folder. The addon includes integration for Google Drive, Google Photo, Dropbox and OneDrive too.
First, you need login to Amazon Console or sign up if you don't have a AWS S3 account.
Once you have logged into the console, you will need to create a new IAM user. Then go to the IAM Users page in the AWS Console, click the Add user button.
Step 1: enter a name for the user, then click the Next button.
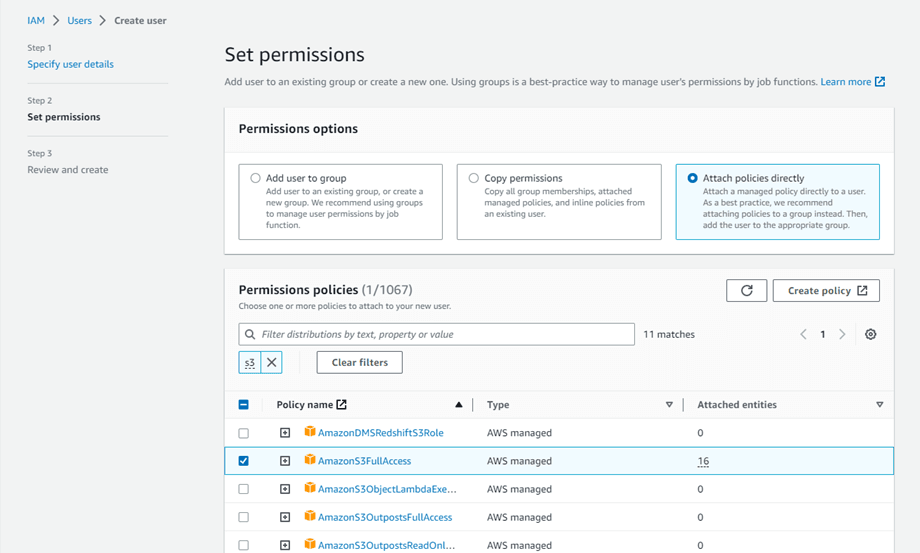
Step 2: To allow the new user to manage buckets and objects in the S3 service, you need to grant specific permissions. Click on the “Attach policies directly” button, and then enter “S3” in the filter policies input box. Select the “AmazonS3FullAccess” policy, then click the Next button.
Step 3: If everything looks good, click the Create user button.
Create an access key
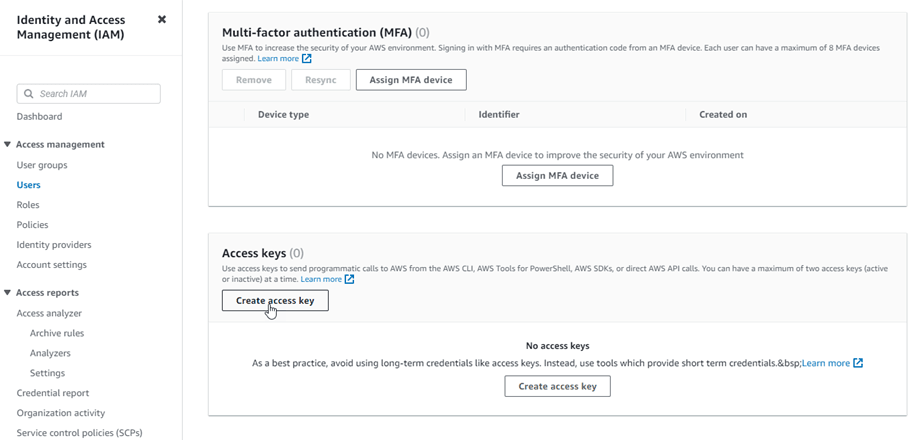
After creating successfully a new user, you should navigate to Access management > Users > {select a user} > Security credentials tab.
Then scroll down at Access keys section, and click on Create access key button.
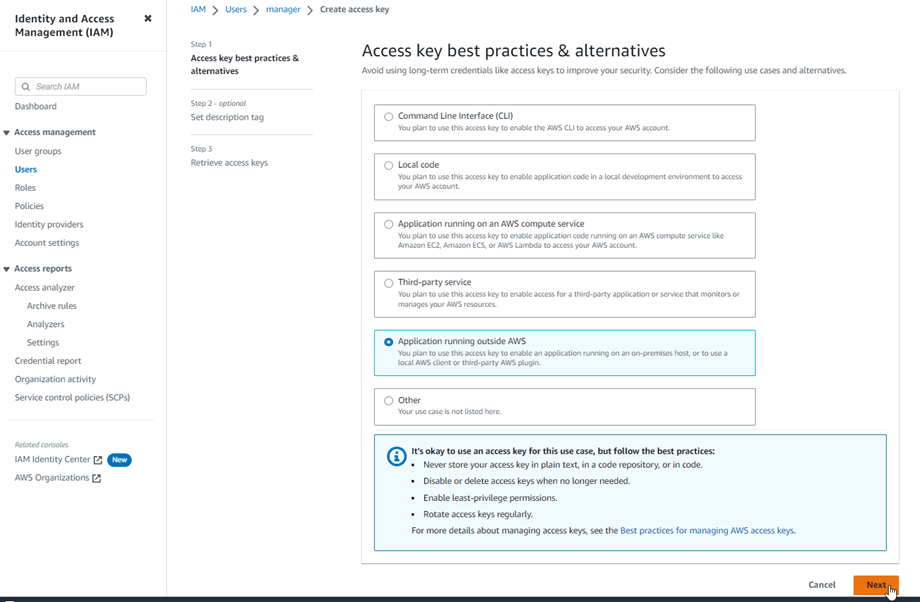
At step 1: Access key best practices & alternatives, select Application running outside AWS option. Then click on Next button.
Next on the step 2: name the description on the field. Then, click on Create access key button.
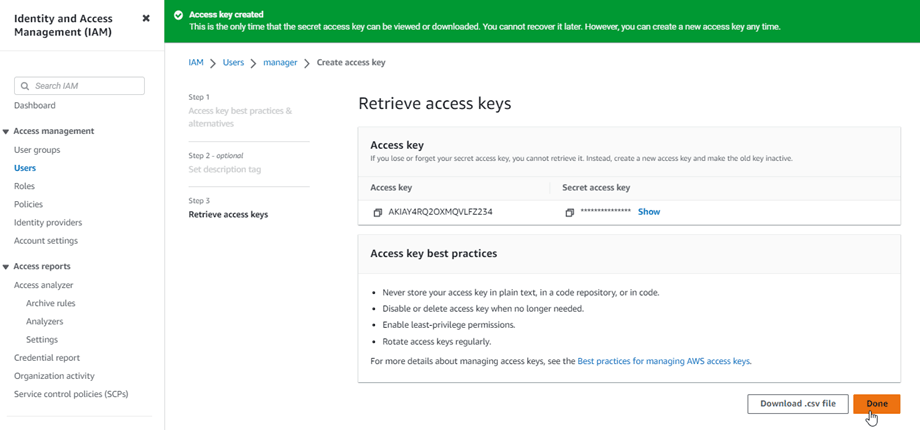
Finally, a retrieve access keys screen will be displayed with security credentials for the user, which consist of an Access Key ID and a Secret Access Key. Amazon will not show these again so please download them as a .csv and also copy them somewhere safe. If you lose them, you can always create a new set of keys from the console but you cannot retrieve the secret key again later.
Create a bucket
In order to use Amazon S3, you should create a new bucket. Please go to the bucket area: https://s3.console.aws.amazon.com/s3/buckets. Then click on Create bucket button.
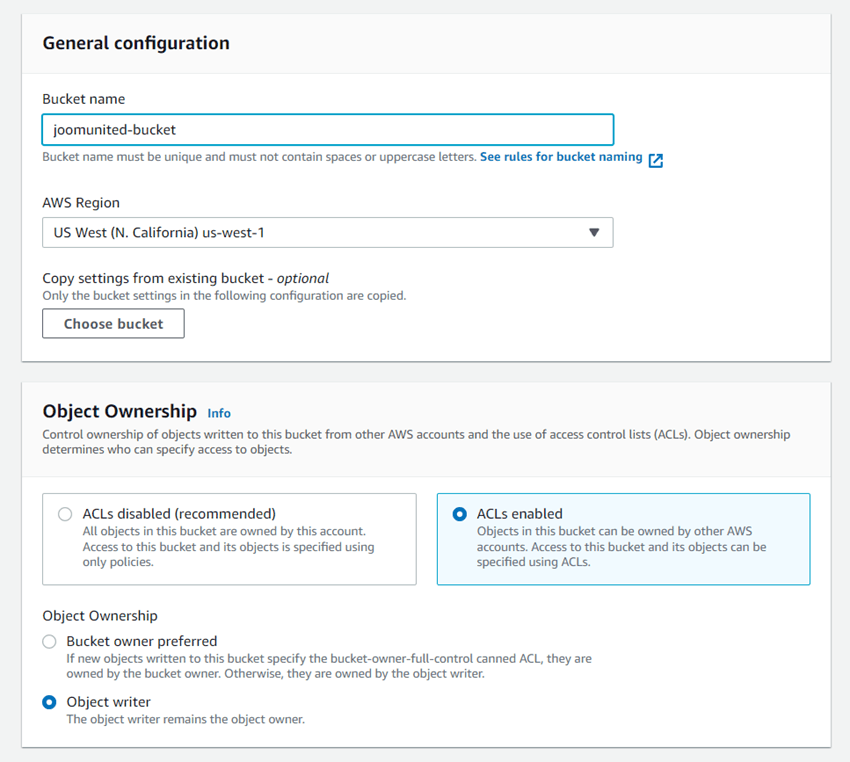
In the General configuration, input bucket name, select a AWS Region, and in Object Ownership section, select ACLs enabled > Object writer option.
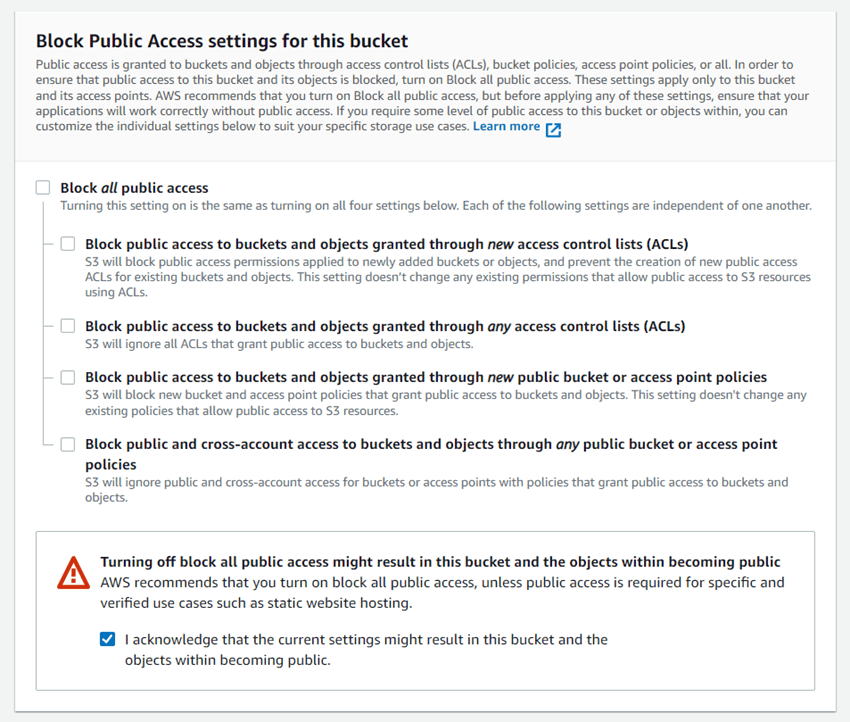
In the Block Public Access settings for this bucket section, untick the option: "Block all public access" and tick on the option: "I acknowledge that the current..." as on the image below.
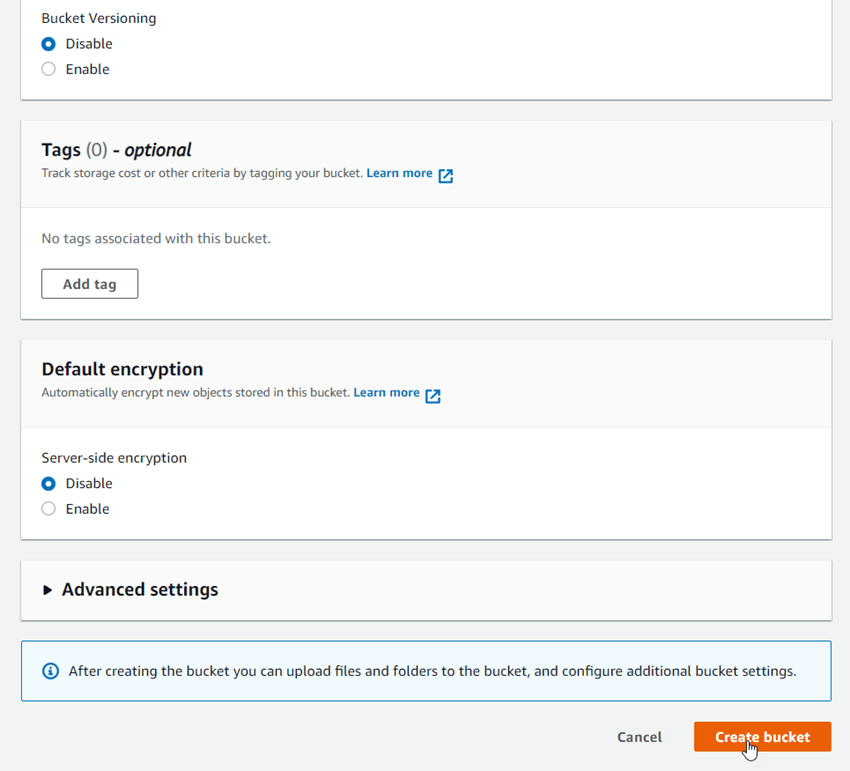
Then let all the rest options as default, and click on Create bucket button.
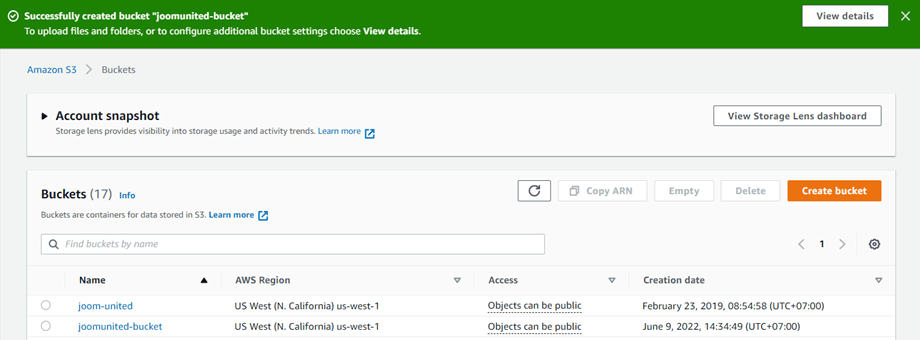
Finally, a new bucket should be created successfully with the status of Access column: "Objects can be public".
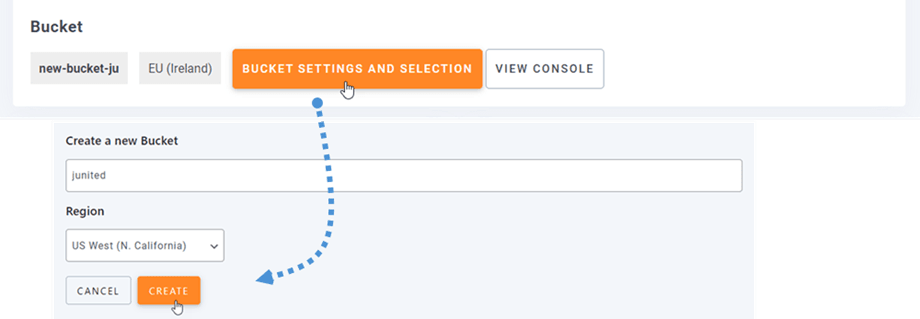
Or you can create s new bucket in WP Media Folder settings. Navigate to menu Settings > WP Media Folder > Cloud > Offload Media > Amazon S3, click on Bucket settings and selection button. At the bottom of the popup, input the bucket name and click on Create button.


