WP Media Folder Addon: Google Drive Integration
1. Login to Google Drive in WP Media Folder
To finalize the integration, go back to the WordPress dashboard and click on the menu Settings > WP Media Folder > Cloud & Media offload > Google Drive tab. First, you can set the thumbnail for images.
Generate image thumbnail: This option will generate image thumbnails and store them on your cloud account. Image thumbnails will be generated according to WordPress settings and used when you embed images (for performance purpose)
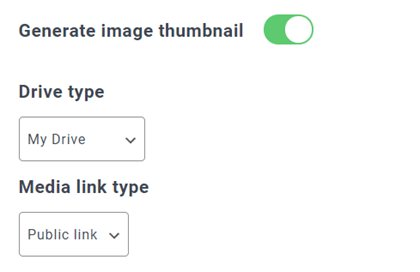
Then you can select your Drive type:
- My drive: use your personal account
- Shared drives: use your G Suite account
Then select your Media link type by default when you insert a cloud media in a page or post.
- Public link: generate a public accessible link for your files and affect the appropriate rights on the cloud files (Shared link). E.g: https://drive.google.com/uc?id=1Bq_VQt4z5Sy74Xg3IoN3KKWg4P7gymV1
- Private link: AJAX link, will hide the cloud link to keep the original access right of your file. E.g: https://yourdomain.com/wp-admin/admin-ajax.php?action=wpmf-download-file&id=1Bq_VQt4z5Sy79Xg3IoN3KKWg4P7gymV1&dl=0
Then you can connect to Google Drive account with Manual mode:
Manual mode
With the credentials in the previous step, at the Google Drive tab, paste your
- Client ID
- Client secret
Save the configuration and click on the Connect Google Drive button.

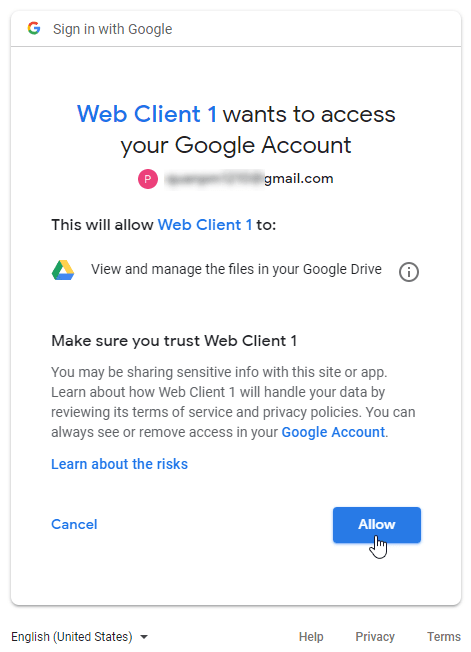
If you haven’t made any mistake you should validate the authorization in a new window as shown:
The connection should be a success ☺ If it is successful, you can create and manage Google Drive media right from WordPress' media manager.
2. What can I do with Google Drive media?
How does it work?
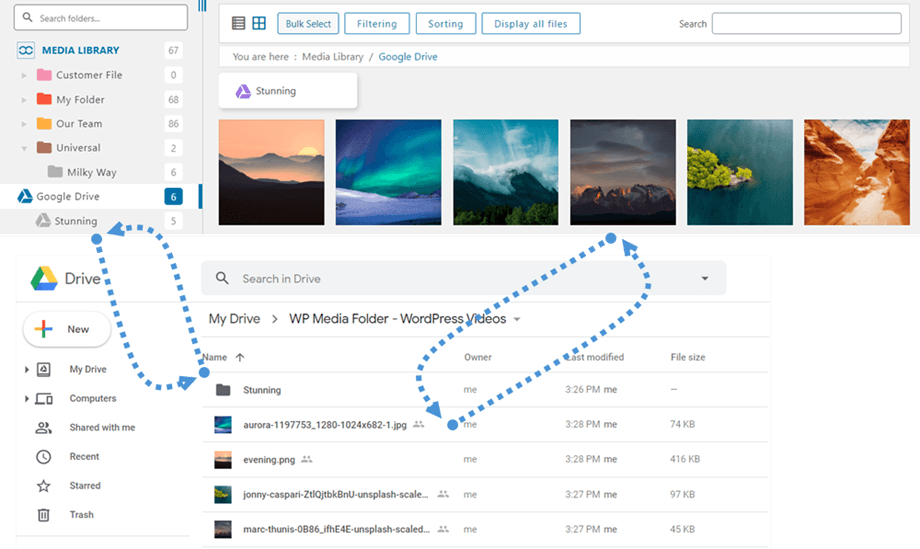
WP Media Folder will generate a root folder on your Google Drive with the site name.
All the folders and sub-folders added in WP Media Folder Google Drive will be synchronized under this folder (WP Media Folder - {sitename}). And vice versa, all your media from that root folder on Google Drive will be synchronized to your Media library on Wordpress.
What are the sync directions?
It works in both directions! You can add a file from Google Drive and see it in WP Media Folder, or add a file in WP Media Folder and see it in Google Drive. It also means you can manage WordPress files from your desktop using Google Drive sync software. That’s crazy - we know! ☺
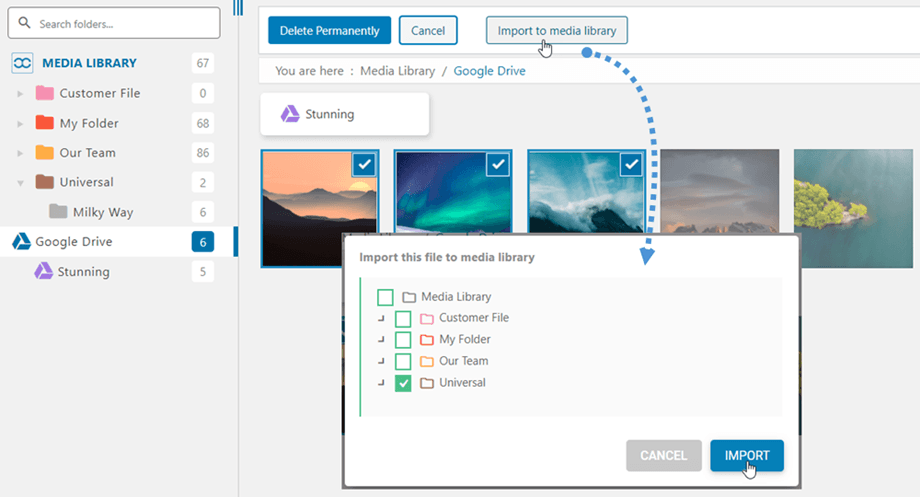
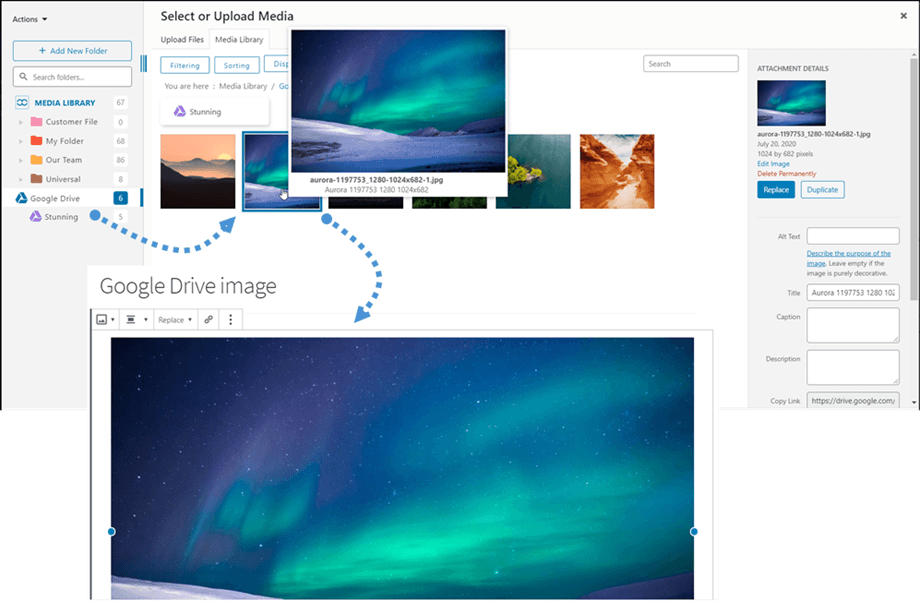
The WP Media Folder Google Drive integration allows you 2 types of actions with your media:
The first option is to import the Google Drive media in WP Media Folder (folder selection for import).
The second option is to embed the Google Drive media in your content directly. In this case, the media will be loaded from Google Drive, not from your server.
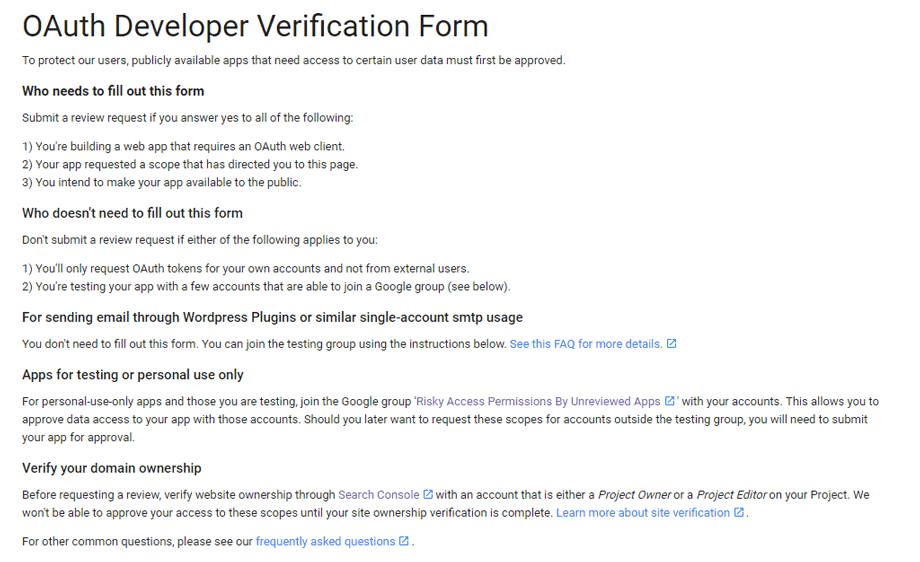
Google has recently introduced a new security layer that forces apps to be verified. If you've created the app with your Google account and then you log in from WordPress with the very same account you won't see this error.
This error will only appear if you've created an App with a Google account and trying to connect to Google from WordPress with another account.
In this case, you need your app to get approved by Google following this process: https://support.google.com/code/contact/oauth_app_verification
3. Create a Google Drive App
The Google Drive integration with WP Media Folder is included in the Add-on. You need to install this add-on (plugin) in addition to WP Media Folder. The add-on includes integration for Google Photo, Dropbox, OneDrive Personal, OneDrive Business, Amazon S3, DigitalOcean, Linode and Wasabi too.
First, to use Google Drive you need a Google dev App to connect your website. Go to https://console.cloud.google.com/ and create a new project.
Then setup a project name - you can provide any name you want, but do not include spaces or accents. Then wait few seconds for the project creation.
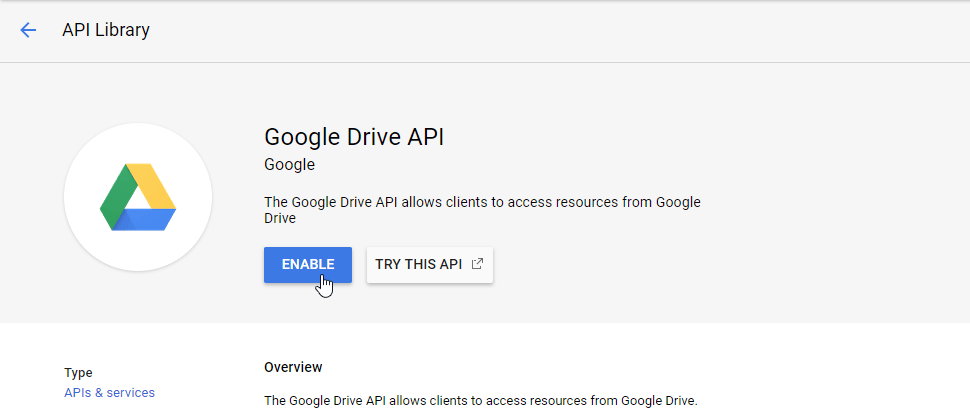
If it's the first time you're using the Google Drive API, you'll need to activate it.
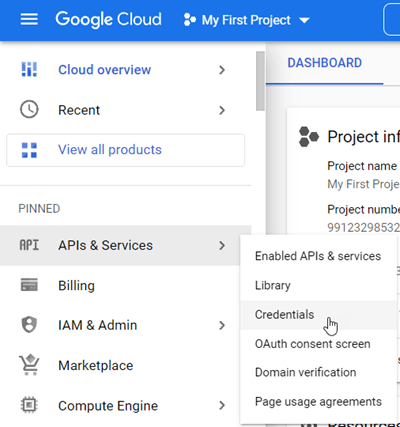
From the left menu, click on “APIs & Services”
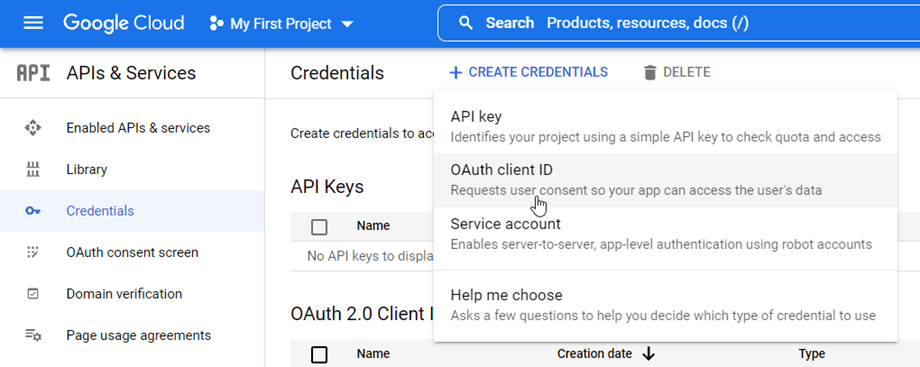
From the left menu, navigate to “Credentials”, on the main panel click “+ New Credentials” >> OAuth client ID; if asked, add a name to your OAuth consent screen.
Now, the most important step:
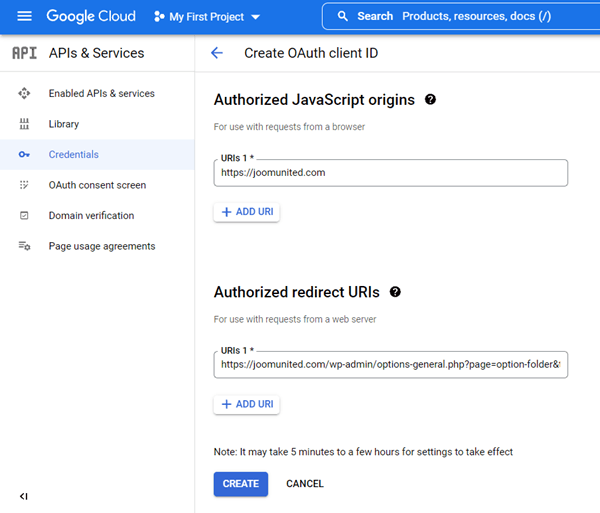
- Select “Web application” and add a name of your choice
- Authorized JavaScript origin: https://your-domain.com (replace by your domain name, with no trailing slash)
- Authorized redirect URIs: https://your-domain.com/wp-admin/options-general.php?page=option-folder&task=wpmf&function=wpmf_authenticated
(replace by your domain name)
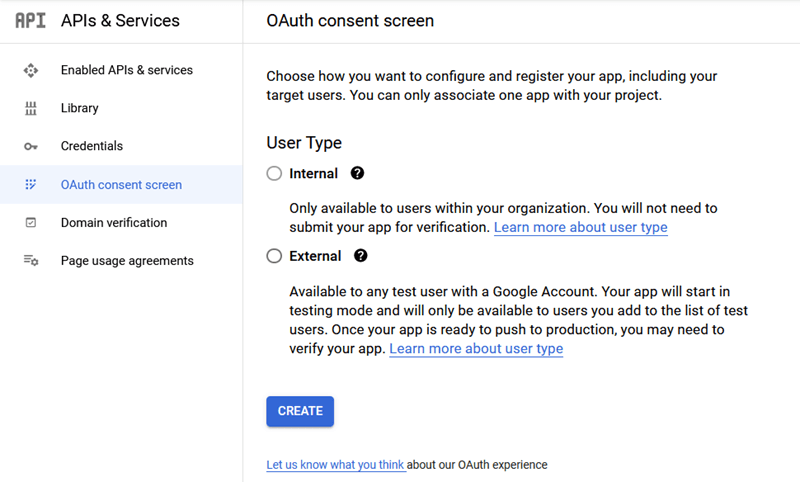
First, you need to select User Type.
- Internal: your app is limited to G Suite users within your organization.
- External: your app will available to any user with a Google account.
Then, fill your authorized domains and continue with the following steps to finish the app registration. Now you can back to the previous step: Select “Web application” to create the credentials.
The publishing status should be set to "Testing" if you prefer not to verify in "Production" mode. In Testing mode, please add Gmail addresses in the Test users section below. Click the "Add Users" button to insert users' Gmail.

Then… voilà! You got your ID and Secret to add in WP Media Folder's configuration.


